Pages

Showing posts with label Home decor. Show all posts

Mood Pillow

I often wish I had access to the yarn store 24 hours a day.  Sometimes, inspiration strikes and yarn is needed immediately, but unfortunately, my life doesn't allow for instant yarn gratification.  In fact, even when I have time set aside for such adventures, it's far from the hours of meandering that I long for.  Usually I know I have 10 minutes before the kids lose their cool and every single trip I have to scold them for unraveling the yarn in the cart.  Ah, the joys of motherhood.  
But sometimes, I pick myself up by my bootstraps and realize that my own home is practically a small version of a yarn shop and I'm able to move forward with projects as they come to me.  Recently, I noticed small amounts of several shades of gray (all Lion Brand Vanna's Choice) in one of my yarn hoarding baskets.  Ombre starting with black and fading to white seemed to be the obvious choice so off I started crocheting a simple square, not knowing exactly where it might lead me. It came out dark and moody, and I realized how it matched my own mood on that particular day.  But I wasn't exactly thrilled about my mood and imagined a sunnier, happier contrast.  So I made one.  It was a rainbow square. (All but one of the colors is Lion Brand Vanna's Choice.)

Turns out, those bad boys were destined to become something grand--a mood pillow.  One side is stormy and ominous; the other is cheerful, bright, and practically perfect in every way.


My little man is never too far out of reach. He likes to keep an eye on his weirdo mom who, while clothed in a pool towel, drags dining room chairs out to the backyard and starts snapping photos.  It must be a confusing scene for such a logical pup.  Not to mention, he says that both sides look identical to him.  Is it really true that dogs are colorblind?  For his sake, I hope not.

Puff Stitch End Table Topper


One thing's for sure--my home is a hodpodge of new things, used things, handmade things, and store-bought things.  In May, I'll celebrate 10 years of marriage and I must say that my style has morphed and evolved over this past decade--and I can only imagine that the cycle will continue.  With that understanding, I really don't put a whole lot of money into a lot of the smaller pieces of furniture that I buy.  All of our end tables are thrift store finds, and as you know, thrift store finds often come with their own... character.  (Read: flaws, nicks, dents, scratches.)  

I'm grateful to buy things that have been pre-loved, because then I don't feel the pressure of perfection.  It's a nice burden to be free of.  

The table topper I crocheted (last year) covers a cute little cast-off end table that I bought at Goodwill for $13.50.  It was a Target reject (still had the Target label attached) that has one tiny flaw in the veneer on the table top.  A vase of faux flowers has covered the flaw for a few years, but last year I made a puff stitch table topper, mostly because I just LOVE little puff stitches.   

I started with these instructions as the first rounds, and just kept going--increasing appropriately, of course.  So, yeah, pretty easy, and it was made only using yarn I had on hand.  It's all Lion Brand Vanna's Choice, in case you're curious.

I'm sure I should add some more details or some funny anecdote to end this post, but it's Spring Break and my eldest just woke from a nap--so, I'm checking out! Go forth and crochet!


Vecco DIY Rug Kit

Okay, okay, yes, I know how long it has been since I've posted.  I'm aware.  But with the invention of Pinterest and the million awesome craft blogs that are out there, can you really say you've missed us much?  Probably not.  But for sure, I've missed blogging.  So here I am.


I'll freely admit that I'm here primarily because someone lit a fire under me--in terms of a DIY with a deadline.  In other words, the fine folks at QVC offered some fun DIY rug kits in exchange for feedback-- naturally, I had to give it a try!

Specifically, the product is the Vecco Design Your Own Rug Set.  In the kit, everything is provided to make one 18"x30" rug for your home.  Here's what the kit and all the little bits look like:


I'm totally a sucker for nice packaging, so I was pretty happy with how the rug and the supplies were displayed upon opening the box.  It's nice to have a DIY project where you don't have to go and gather your supplies (because mine tend to be in a disastrous and disorganized state the majority of the time) and everything is already set up for success.

The kit I used is called "Geometric" and it came with lovely pea green and sky blue paints for the rug.  Truthfully, the hardest part of the project was designing how I'd make it my own.  In true Tristin style, I ditched the included stencils and made my own monogram template with Contact paper.


I also taped off the edges with painter's tape to create a border.  Then came the painting--and boy was I ever nervous!

Surprisingly, it went pretty well, and once I got over my painting anxiety, I was pleased with the results.  

My westie just couldn't resist photobombing--and can I blame him?  He looks especially dapper with his fancy short haircut (which for the record costs way more than my own haircuts).


All in all, I was happy with the project!  It was definitely different than anything I've done before, but it's not rocket science so almost anyone could be successful.  There were a lot of stencils included, but I really had a hard time finding anything that felt "right", which is why I took the slightly more complicated road of making my own stencil.  Is that surprising?  I try to customize everything--even rugs that come with tools for customizing, lol.

One thing I'll point out is that the paint colors can be quite deceiving--I actually made two rugs and when the spray paints dried they were both significantly lighter than the color of the initial application.  Doing a second layer of paint is not recommended in the kit (though it's not advised against either) so perhaps a second layer of paint would be beneficial.  Also, the paints tended to be drippy/runny at the beginning of application--once I'd sprayed for a few seconds it seemed to fan out as was intended (and yes, I shook the cans as the directions said to do).  I'd recommend spraying a little paint onto your drop cloth until you get the good "fanning" action that's desired for optimal spraying.

All in all, the Vecco DIY Rug Kit was super fun to try!  Wouldn't it make a cool gift for your DIY-lovin' friends and family?  You realize that Christmas is around the corner...right?!

Oh, and guess what?  I have like a million projects to share.  Seriously, in my long hiatus, I've made a LOT of things.  Come back soon... I'll have some new things to share!

-Tristin

P.S. The Vecco DIY Rug Kit will be featured on QVC on Wednesday night @ 7pm (8/28/13) on "You're Home with Jill".  Tune in if you're interested!

About You’re Home with Jill: Watch You’re Home with Jill Wednesday’s at 7:00pm ET.  Hosted by Jill Bauer, an active working mom with a keen eye for design, she’s been serving up simple solutions for a busy lifestyle on You’re Home with Jill since 2000.   Inspired by simplicity, Jill shares creative decorating ideas, entertaining inspiration, delicious dishes from the kitchen and more!

Disclaimer:  The products mentioned in the above post were received free of charge; opinions are 100% my own.


The Long-Awaited Dining Room Revamp

It was nearly a year ago that my husband and I bought an unfinished dining room table and bench that we vowed to make our own.  My husband, like always, held up his end of the bargain and had the table and bench stained and finished within a few days.  My job was to repaint chairs that we already had--and while I had good intentions (like I always do) it took me 10 months to complete my portion of the project.
Dining Room 009

Thank goodness I have a good friend like Sharon--I asked her to help me get this project officially OFF of my list and she made it happen.  And it was fun, to boot!  We spray painted the chairs and I officially marked this project off my looong to-do list.  (Thanks, Sharon!)  Spray painting the chairs took about two hours (a.k.a. one toddler nap time) with Sharon's help.  Well, two hours and 10 months altogether, but who's counting?

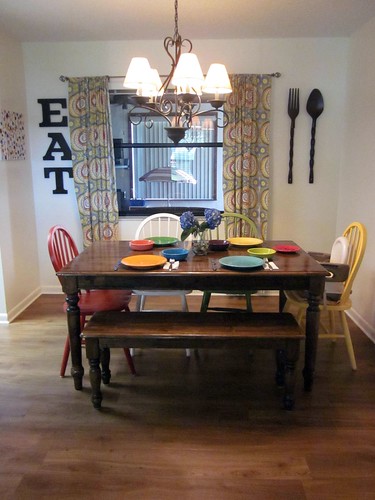
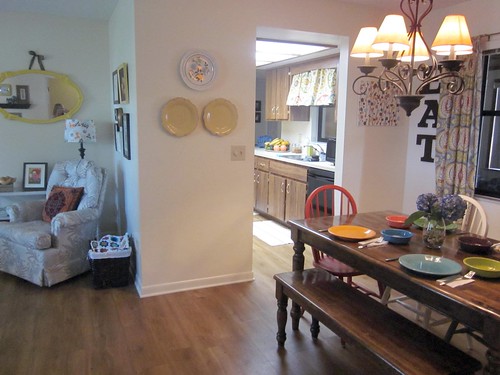
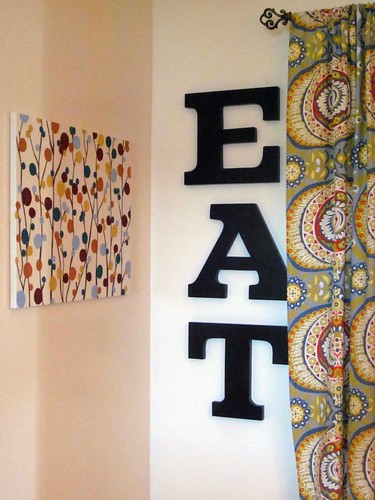
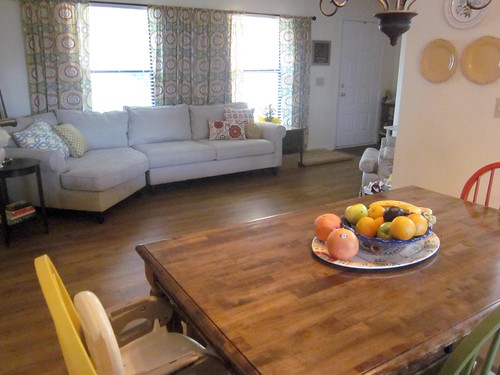
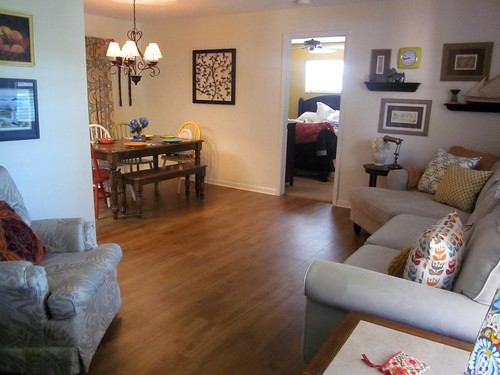
Since a picture is worth a thousand words, I'll shut up in a sec and just share the pictures of my dining room as it is today.  There are several angles so you can see it in terms of how it fits with the attached sitting room (that includes my cozy nook).  You'll also notice the DIY Art for Non-Artists is currently residing in the dining room.  Things move around a LOT in our home.  Except for the furniture... 'cause it's heavy.  The fork and spoon were a thrift shop purchase, as were the plates that adorn the wall.  The EAT letters were courtesy of a Pottery Barn clearance a few years ago.

Anyhow, without further adieu, here's my funky little dining room.

Dining Room 009

Dining Room 014

Dining Room 012

Dining Room 030


Dining Room 016

This dining room is totally not what I had in mind when I was thinking of my "dream home" years ago, but it totally suits our family right now.  I really love how it looks and it feels so COZY.  Isn't it funny how our perspective on beauty and style changes when we have kids? 

 Tristin Signature

Simple Sewing

As promised, I'm sharing what I've made with my new sewing machine thus far.  I look forward to many years of fun projects, and if you want to see some of my future projects, check out my DIY Stuff to Wear board on Pinterest along with my Sew What category.  Who knows when I'll get to all those fab projects, but inspiration is the first step, right?

Sewing Machine 009

Sew far (please forgive the sewing pun, I couldn't resist!) I've made some long overdue pillows and a cafe curtain.

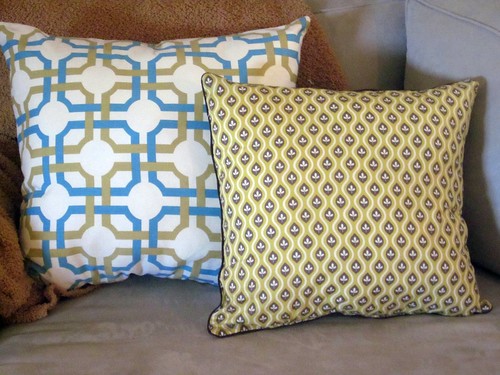
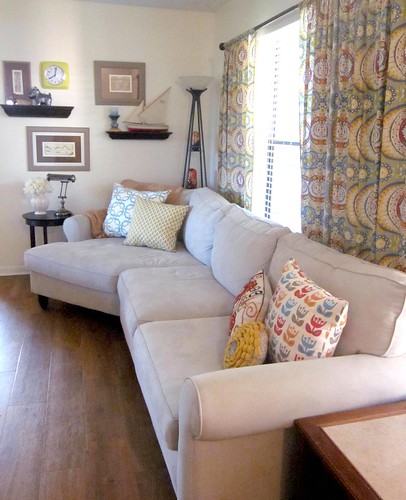
When we bought our couch a few years ago, I had the idea to recover the existing pillows that came with the couch.  The pillows were very bland; in fact, they were the same exact fabric as the couch.  I say when life hands you plain pillows, make awesome pillows--or lemonade or something like that.

Here's the couch, being graced by the presence of awesome new pillows:


Now, let's talk fabric.
Sewing Machine 009

The pillow in the background is made with Waverly's Groovy Grille in Harvest.  It's available at JoAnn fabric and lemme tell ya, no less than 4 perfect strangers complimented this fabric before I even left the store.  I was feeling pretty confident in my choice after that.

The pillow in the foreground is made with Arcadia by Sanae for Moda.  While one of the local shops here in Melbourne is still carrying this line, I have had trouble finding it online.  Isn't it awesome fabric???  Sharon and I both bought some of this fabric because we love it so.  Because it's quilting cotton, I added piping around the pillow to give better structure and a more polished appearance.  I'm glad I did--it was worth the little bit of extra effort.  Fo' sho.


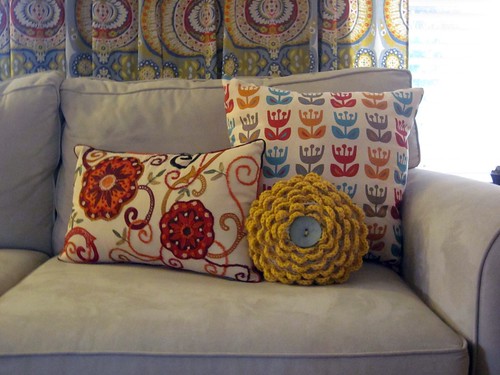
So, I know you're tired of seeing this flower embellished pillow and my crocheted rose pillow, but you'll notice a new guy in the back.  The fabric is from the Outside Oslo line from Jessica Jones.  Specifically it's the Tulip print in Dawn.  LOVE!  You can purchase this fabric and all of Jessica's amazing fabrics through the Needle Shop on Etsy.  (They're a great seller--quick service and good prices!)  I love how well the fabric complements my curtains.  Ahh, bliss.

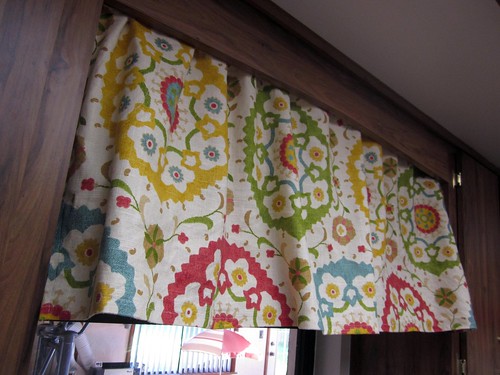
Last but not least, I made a cafe curtain for my kitchen.  A few years ago, James made me a shelf on which I store my Kitchen Aid mixer, food processor, blender, etc. because I'm morally opposed to keeping them on my counter.   (Clutter attracts clutter, folks, especially in my case.)  I made a cute little curtain to hide away all of those appliances.  The fabric is Richloom Cornwall Garden.  I found it as a remnant at Old Time Pottery for $5/yard, which is a steal! Fabric.com sells it for just under $20/yard, which is still reasonable when you consider the quality.  Pier 1 has a lot of outdoor furniture featuring this fabric right now.
After nearly 5 years of living in our home, I'm just now getting to where I really know my style.  It took years to develop it--and I have to get over my fear of color.  Once I got brave and secure in my love of funky stuff and bright colors, my house started to take shape.  It's a work in progress for sure, but I'm sure my new machine will be very helpful along the way.  It already has been.
Tristin Signature

I am going to be in trouble...

...when my husband comes home tonight.

I bought a piece of furniture without consulting him.  It wasn't expensive--but it was a furniture purchase nonetheless.  We typically consult one another before such purchases--regardless of the price.  It's only fair since we live in the same space.
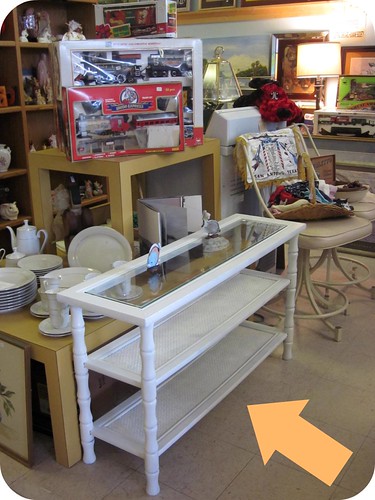
But, I needed it.  You see, yesterday Sharon and our friend Laura and I were shopping in lovely Historic Downtown Melbourne.  I saw a lovely sofa table at a thrift shop, but I wasn't ready to commit.  But after a day of not being able to get said table out of my head, I went back and picked it up for $25. 

An Even Cozier Nook 002

Isn't she a beauty?  I like the feel of it and I also like the small scale--it's hard to find a good sofa table that's made on a small scale.  You can't blame me, right?

An Even Cozier Nook 006

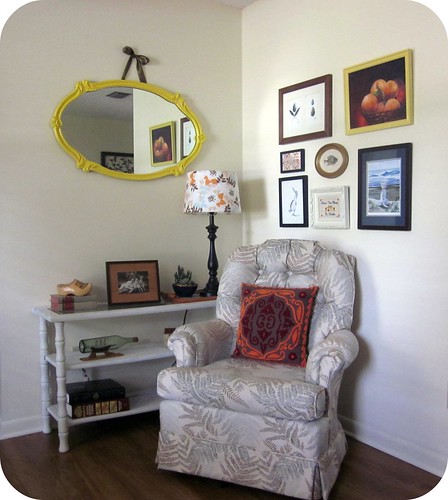
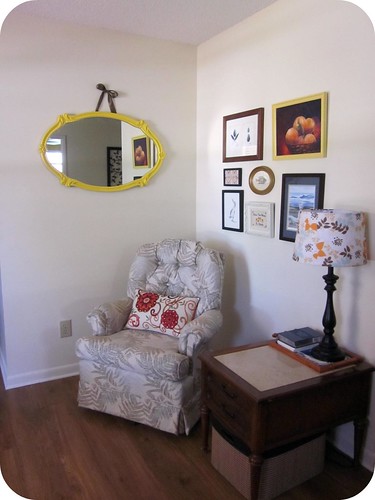
I got the table home in my somewhat trusty Volvo wagon and got busy making it "work" in the space.  I have two other places that the table would fit, but I'm going to try it in my cozy nook for a while and see how it goes.  If you don't recall my recent Cozy Nook Transformation, you may want to take a peek.  Here's a shot of the transformation as of a few weeks ago...

Cozy nook 018

I think the new sofa table made a HUGE difference in making the cozy nook even better!


Here's to hoping my husband doesn't shake his head in disapproval (yet again). He's usually a pretty good sport when I nest--as long as I don't leave a path of destruction--which I have been known to do.

And on that note, I'm off to clean up my path of destruction.
Tristin Signature

Art cluster from my cozy nook

"What is art? Are we art? Is art art?"

The above quote always comes to mind when I think about art.  I know who said it, but can anyone else tell me?  I'll think you're awesome if you know!!

Seriously... you'll make my day if you know where that quote came from. 

Moving on...

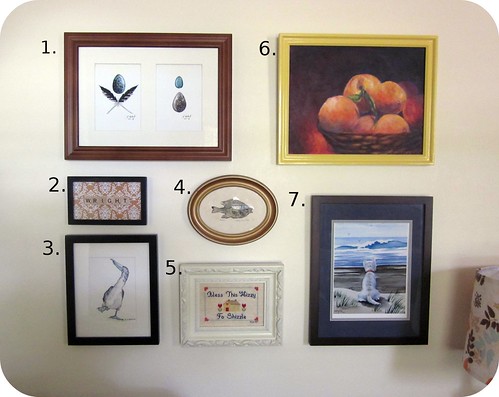
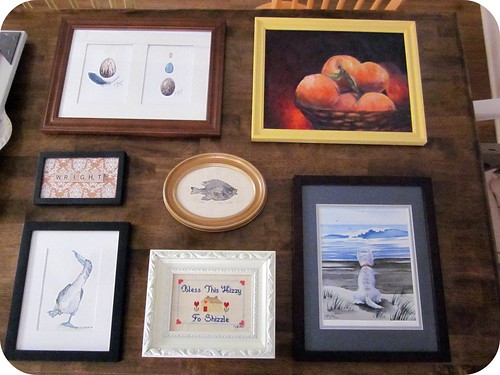
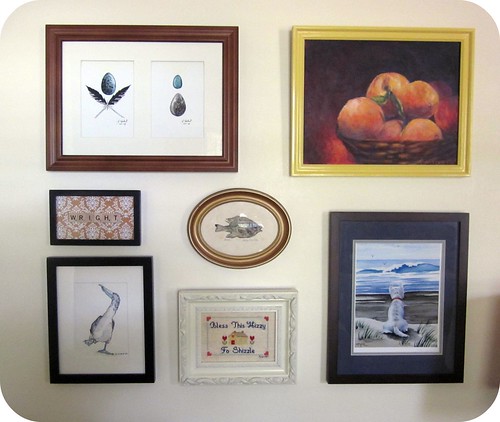
Here's a breakdown of the art that's a part of my cozy nook transformation


1. Egg and Feather prints from Blue Egg Watercolors.  (I have several other of these prints that reside in one of our bathrooms.)

2. "Scrapple Art" by me.  

3. Blue-footed Booby watercolor by Etsy seller Contours (who no longer has a shop, unfortunately.)

4. Bream fish pressing - made by a friend of my grandmother.  I inherited it.

5. "Bless This Hizzy Fo Shizzle" cross-stitch, stitched by yours truly.  I cannot claim the genius behind it though--I copied it from something I pinned on Pinterest (which is why I have not blogged about it).  Check out "Steotch" for the original idea and more subversive stitching.

6. Oranges still life acrylic painting - $2.50 at a local thrift shop!

7. Westie beach print from Etsy seller K9 Art Gallery.  (I am a proud Westie momma because Westies are the besties!)
 
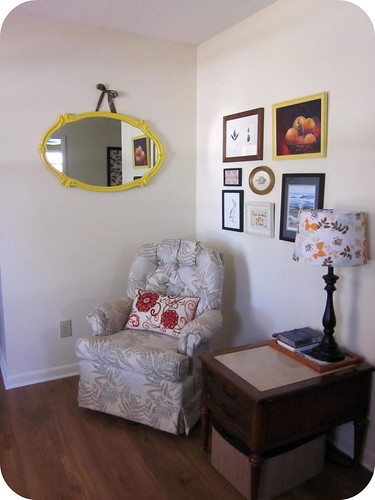
Here it is in its setting...


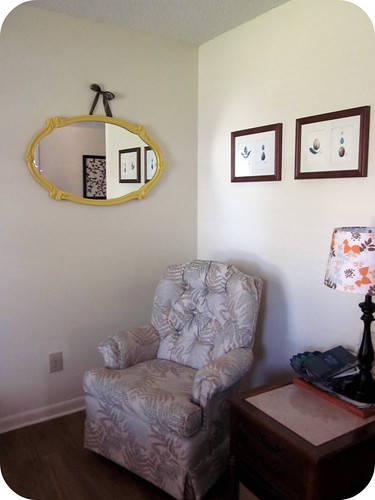
Also, the mirror was inherited from my grandmother.  It was in her living room for who know how long.  The end table was a $3 thrift store find (SCORE!) and the basket beneath it was also a thrift store find ($7, and Sharon and our friend Laura helped me carry it all around downtown Melbourne like the good pals they are).  The lamp was a $10 clearance item from Lowe's and I made the lampshade.  The pillow came from JoAnn fabric (Sharon and I both have this pillow so I'm sure you've seen it numerous times on our site.) The chair is from Hudson's furniture--and I know it's not a trendy or a "cool" chair but I LOVE it. 

So, that's that.  In case you were wondering.  Happy Monday!

Tristin Signature

Cozy Nook Transformation (And the Introduction of my Funktastic Modern Eclectic Cottage Style)


I have some good news and some bad news.  The good?  I've finally created a term to classify my home decor style.  The bad?  It's a mouthful.  Are you ready?

Here goes: Funktastic Modern Eclectic Cottage.

Aaah.  It feels so good to get it out there!  And to show you what I'm talking about, I'm going to share a recent transformation from my home.  It's my favorite cozy little nook.


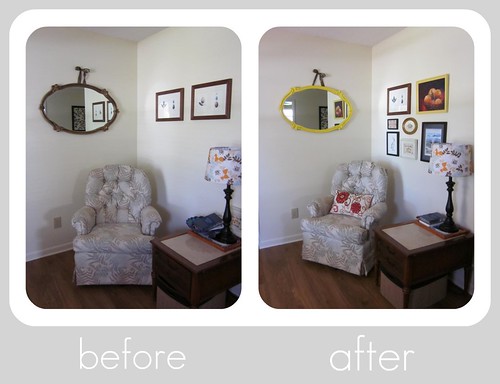
Cozy corner b&a

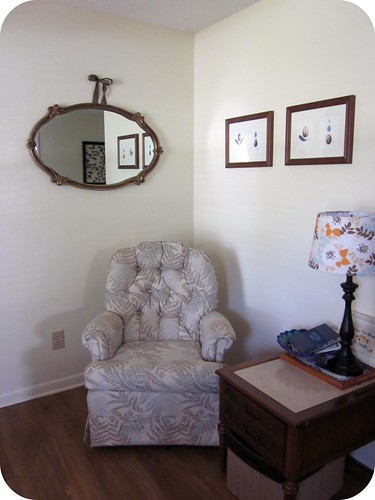
As you can see, there's nothing hideous about the nook but it lacks funk.  And funk is a necessity for a Funktastic Modern Eclectic Cottage.  Ya feel me?

Cozy nook 001

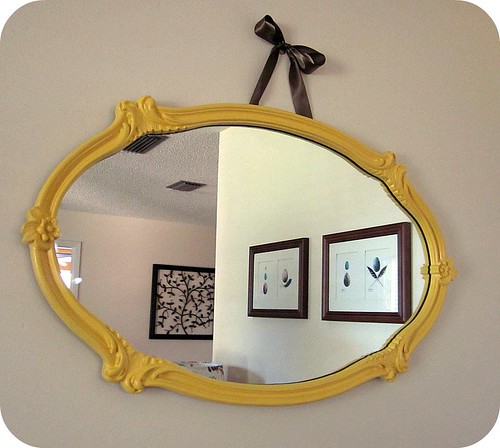
It's just a bit one-dimensional.  I thought I'd fix the problem by updating the mirror to a bright yellow.

Cozy nook 007

The yellow mirror certainly brought some funk into the nook, but it was still lacking.  (P.S. The ribbon above the mirror is there for the sole purpose of hiding a hook that the previous homeowners placed in the wall.  Pathetic, I know, when you consider the fact that we've owned the home for over 5 years.)


Yellow framed mirror

See what I mean?

Cozy nook 011

So, I shopped through my home and found some fun artwork to cluster together.  I played with the pieces I chose on my dining room table until I found an arrangement that I liked.

Cozy nook 012

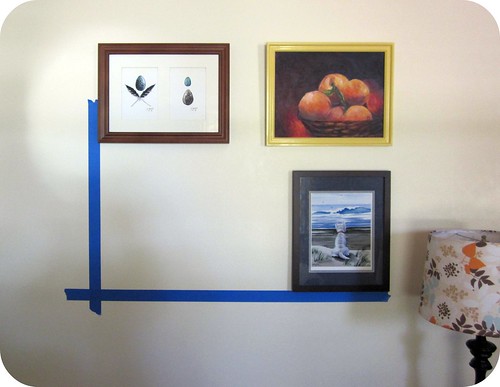
Then I moved the arrangement to the wall.  A laser leveler and painter's tape helped me accomplish the nice square-ish cluster that I desired.  I wanted there to be at least some structure to the placement of the pictures on the wall so my husband (who is my opposite when it comes to decor) wouldn't hate it and deem me an unfit homemaker.

Cozy nook 024

This cluster makes me SO happy.  You have no idea.  In a future post, I'll be sharing a bit more information about where the art pieces came from so if you have any questions, please ask away!!  I'll include an answer on my next post.

Cozy nook 018

So, here's my Funktastic Modern Eclectic Cottage cozy nook, completed.  Love!  I think a nice round area rug would do some good, but I'm not worried about that right now.  I'm just happy that this transformation was FREE other than the half-can of yellow spray paint that I used on the mirror.  Score!


Cozy corner b&a


Here it is again, in all its glory.  Thoughts?  Suggestions?  I'm all ears! 


Tristin Signature

Table And Chairs Revamped!

Refurbishing furniture is one of those hobbies that I wish I did more often. I have only tried it a couple of times, but I just love how a worthless piece of furniture can suddenly be transformed into a beautiful masterpiece that demands your full attention when you walk into the room. I also like to think that I am giving life back into a piece that is precariously toying with death. Furniture death, that is. This post is quickly getting morbid.

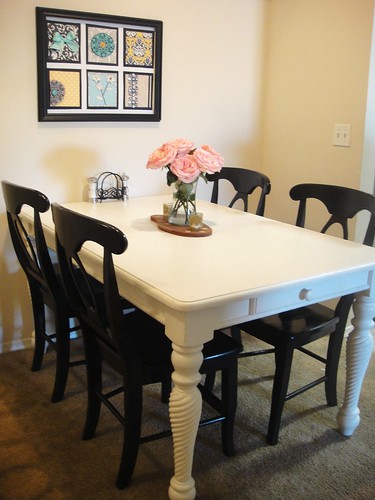
Dining table and chairs revamp

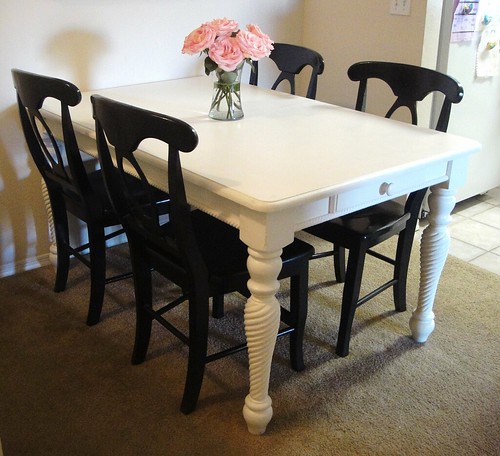
Here is a piece that I did a while back. It's a dining room set - table and chairs. I purchased the whole package for $20 on Craigslist. (Craigslist is just like thrift stores and garage sales - you have to sift through a whole lot of junk before you stumble upon real treasure.) This table is a real beauty. I am a sucker for antique-style furniture. And when I saw the curves and the detailing on the legs, I knew I had to have it. Not to mention the adorable tiny drawer! It has so much character! Even though we already had a perfectly good dining room set, I knew I had to get this table and fix it up.

Table and chairs refurbishing

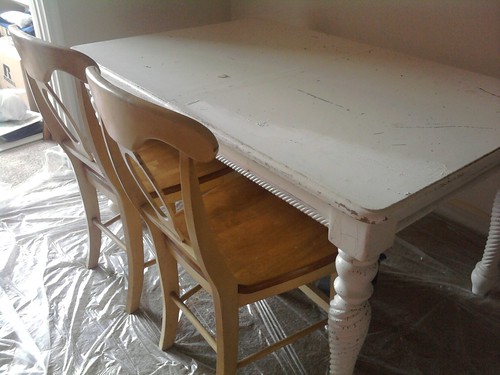
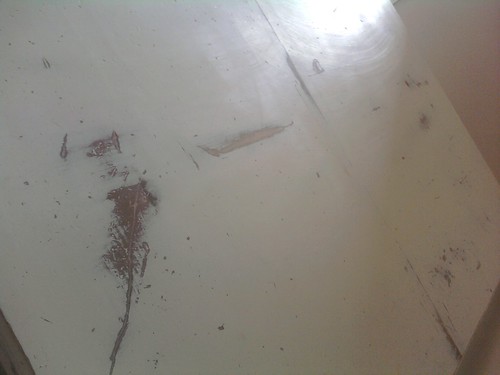
$20 is pretty amazing for all of that, but boy was it in rough shape. The pictures don't do it justice. It was depressing. Crayon scribbles everywhere. Large, deep gashes randomly throughout the surface. Even chunks missing here and there. It had definitely been through battle and nearing the end of its life. And that's when I enter. Stage right. Sander in hand.

Furniture sanded before refurbishing

Warning: Please check for lead paint before you attempt to do this step. Inhaling dusty paint chips is bad enough without adding poisonous lead. Also, wear a face mask and goggles. Place a drop cloth under your piece before continuing.

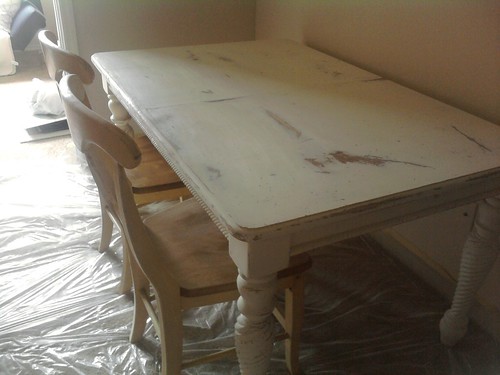
This is after I sanded the first layer off. I just tried to sand it down so that the chipped layer of paint was fairly even and smooth. This definitely took some time because I was dumb and too lazy to buy an electric sander, so I did the entire thing by hand. What a poor decision.

Refurbishing furniture-table top

This is the surface up close after the initial sanding. You can see one of the major gashes really well here. There were very deep cuts and chunks missing throughout the surface. So I had to sand the whole table top down pretty deep in order to have a smooth, even surface. This is exactly where the electric sander would have come in handy.

After it was sanded down, I took a damp cloth and wiped all of the paint dust off of the surfaces. You can also use a tack cloth to clean. You want to make sure the surface is clean so that the paint adheres well. You also want to wait for the furniture to be completely dry before applying paint. 

Dining table and chairs revamped2

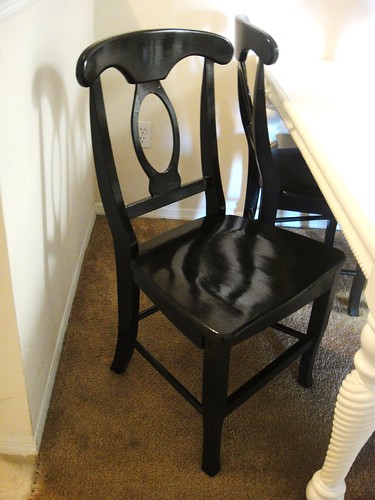
Then start painting! I applied 4 or 5 coats, letting it completely dry in between each application. This may take a few days to complete. I also painted the chairs black, applying 4 to 5 coats. (I love the contemporary look of dining chairs not matching the dining table exactly.) Make sure you don't become overzealous and glop on too much paint at one time. You will have major drip-age and the end result will look messy. Apply multiple thin coats.

Dining chair refurbished

Finally, apply a couple coats of polyurethane or any other protective sealant. Please be warned that if you are painting your furniture white you need specific types of polyurethane or another sealant made for white paint. I made the mistake of putting regular polyurethane on the table, and within a day the whole thing was tinted yellow! It was so frustrating. I had to sand the whole thing down again (and those detailed, spiral legs are NOT easy to sand) and repaint. If you are using white paint, please learn from my mistake!

Dining table and chairs refurbished

Again, the end result. The original plan was to reupholster the chairs with a chic, modern fabric that ties in the white and black. But we'll see if that actually happens any time soon. I am very happy with my $20 dining room set. It has character and charm. And I can say that I gave it new life. Now it has a happy home and many more years of use.

What do you think? 
Have you ever given new life to an old piece of furniture?

Think Thrifty


Do you ever see something in the store and just fall in love with it? I mean the must-have-right-this-second kind of love? And then you get a glimpse of the price tag and suddenly you don't really need it. This happens to me all the time. Call me cheap or fickle, but I think I'm just being thrifty.

Think Thrifty.vase 

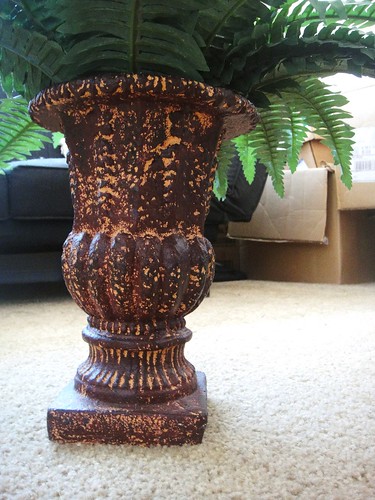
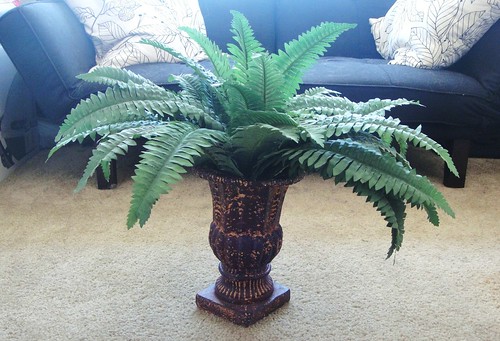
Most recent example... I saw these beautiful garden urn vases at Jo-Ann. I wanted them. I needed them. Until I peeked at the price. $39.99? Uh.. maybe they're not that beautiful. Needless to say, they did not make it home with me.

I'm so glad I didn't buy them. When I got home I remembered a thrift store piece that I had purchased months ago, and it was just sitting on our bookshelf being used as a book end. It looked just like the garden urn vases from Jo-Ann. Duh, because it was a garden urn vase. I think it even has more character than the other ones I saw. And I bought it for $3.99. That's right, $3.99.

Thrifty Ceramic Vase2

Add a couple of faux ferns from Hobby Lobby, and I think we have a winner! I love it! As a side note, I have been looking for a classy and elegant way to bring greenery into our living room, and I think I just found it. It doesn't have a permanent home yet. We are holding out on getting a gorgeous buffet style TV stand and a flat screen TV until after we move in a couple of months, but I think the urn vase will go beautifully on the stand next to the TV.

I found thrifty inspiration by looking at higher priced items and thinking of ways to mimic the look without having to spend those dollars. Luckily, I had the answer sitting on my bookshelf the whole time.
I hope you find your own thrifty inspiration!


Related Posts Plugin for WordPress, Blogger...