Pages

Showing posts with label Freezer Paper Stencils. Show all posts

Vecco DIY Rug Kit

Okay, okay, yes, I know how long it has been since I've posted.  I'm aware.  But with the invention of Pinterest and the million awesome craft blogs that are out there, can you really say you've missed us much?  Probably not.  But for sure, I've missed blogging.  So here I am.


I'll freely admit that I'm here primarily because someone lit a fire under me--in terms of a DIY with a deadline.  In other words, the fine folks at QVC offered some fun DIY rug kits in exchange for feedback-- naturally, I had to give it a try!

Specifically, the product is the Vecco Design Your Own Rug Set.  In the kit, everything is provided to make one 18"x30" rug for your home.  Here's what the kit and all the little bits look like:


I'm totally a sucker for nice packaging, so I was pretty happy with how the rug and the supplies were displayed upon opening the box.  It's nice to have a DIY project where you don't have to go and gather your supplies (because mine tend to be in a disastrous and disorganized state the majority of the time) and everything is already set up for success.

The kit I used is called "Geometric" and it came with lovely pea green and sky blue paints for the rug.  Truthfully, the hardest part of the project was designing how I'd make it my own.  In true Tristin style, I ditched the included stencils and made my own monogram template with Contact paper.


I also taped off the edges with painter's tape to create a border.  Then came the painting--and boy was I ever nervous!

Surprisingly, it went pretty well, and once I got over my painting anxiety, I was pleased with the results.  

My westie just couldn't resist photobombing--and can I blame him?  He looks especially dapper with his fancy short haircut (which for the record costs way more than my own haircuts).


All in all, I was happy with the project!  It was definitely different than anything I've done before, but it's not rocket science so almost anyone could be successful.  There were a lot of stencils included, but I really had a hard time finding anything that felt "right", which is why I took the slightly more complicated road of making my own stencil.  Is that surprising?  I try to customize everything--even rugs that come with tools for customizing, lol.

One thing I'll point out is that the paint colors can be quite deceiving--I actually made two rugs and when the spray paints dried they were both significantly lighter than the color of the initial application.  Doing a second layer of paint is not recommended in the kit (though it's not advised against either) so perhaps a second layer of paint would be beneficial.  Also, the paints tended to be drippy/runny at the beginning of application--once I'd sprayed for a few seconds it seemed to fan out as was intended (and yes, I shook the cans as the directions said to do).  I'd recommend spraying a little paint onto your drop cloth until you get the good "fanning" action that's desired for optimal spraying.

All in all, the Vecco DIY Rug Kit was super fun to try!  Wouldn't it make a cool gift for your DIY-lovin' friends and family?  You realize that Christmas is around the corner...right?!

Oh, and guess what?  I have like a million projects to share.  Seriously, in my long hiatus, I've made a LOT of things.  Come back soon... I'll have some new things to share!

-Tristin

P.S. The Vecco DIY Rug Kit will be featured on QVC on Wednesday night @ 7pm (8/28/13) on "You're Home with Jill".  Tune in if you're interested!

About You’re Home with Jill: Watch You’re Home with Jill Wednesday’s at 7:00pm ET.  Hosted by Jill Bauer, an active working mom with a keen eye for design, she’s been serving up simple solutions for a busy lifestyle on You’re Home with Jill since 2000.   Inspired by simplicity, Jill shares creative decorating ideas, entertaining inspiration, delicious dishes from the kitchen and more!

Disclaimer:  The products mentioned in the above post were received free of charge; opinions are 100% my own.


Frogs and Snails and Puppy Dog Tails... again!

A family member is about to have a baby boy so naturally I take it as an opportunity to craft.  I mean, a gift is a legitimate reason to make something, whereas the rest is just "hobby", right?  (Though I still justify my crafting by reminding myself that it's cheaper than therapy...)

Baby boy gift collage

In addition to a few store-bought necessities (like the indespensable sleep-saving swaddle blanket) I made a few small gifts for baby Myles.  Isn't Myles a great name?

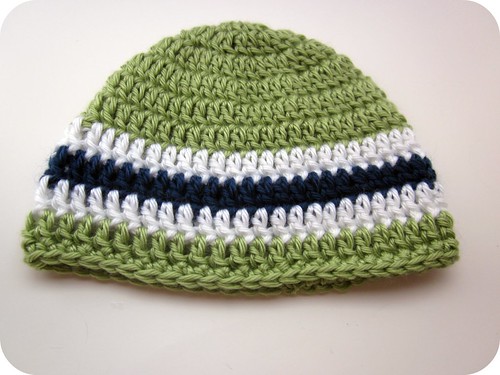
Baby boy gift Hat

This is the first hat I have not used a specific "pattern" for.  I did however look over my fav kid's hat tutorial over at Girl in Air to make sure I was starting it right.  I like the lime green and navy blue together. 

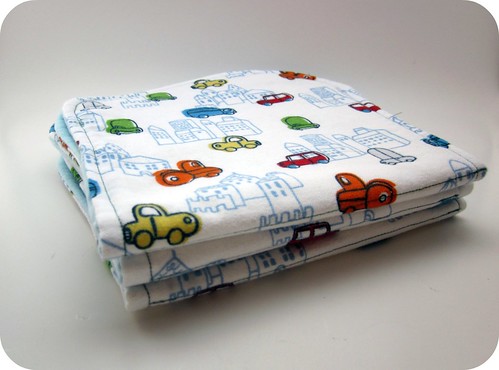
Baby boy gift burp cloths

These burp cloths are made using Homemade by Jill's burp cloth template.  Rather than fraying the edges like Jill does, I sew the pieces right-sides together with quilt batting (leaving an opening) and turn it inside out, iron and topstitch.  I just prefer them that way!

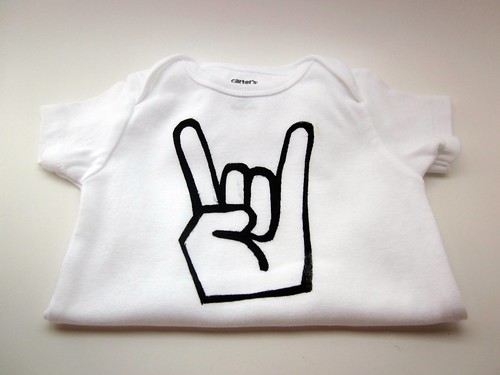
Baby boy Rocker onesie

This "Rocker" onesie was made using freezer paper stenciling.  I did a google image search for the rocker hand sign and when I found one to my liking I formatted it and went to town making a stencil with my Exacto knife.  Rock on!

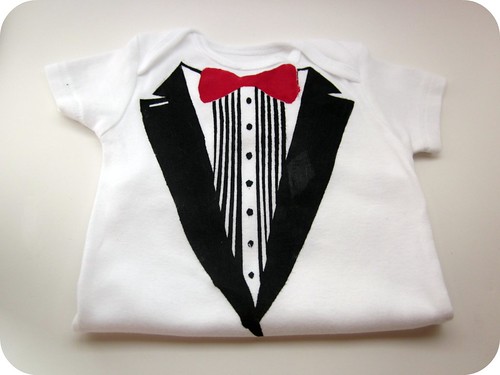
Baby boy tux shirt

This tuxedo onesie also uses a freezer paper stencil.  I used How About Orange's tuxedo printable but since I did not have fabric transfer paper, I went through the tedious process of making a stencil.  I'm (overall) happy with how it turned out!  Little Myles will really keep it classy with this onesie.

What are your go-to baby gifts (both crafty and non-crafty)?  For all of you veteran mommas, what were your favorite baby gifts to receive?

Tristin Signature

"R" is for Ridiculiously Awesome


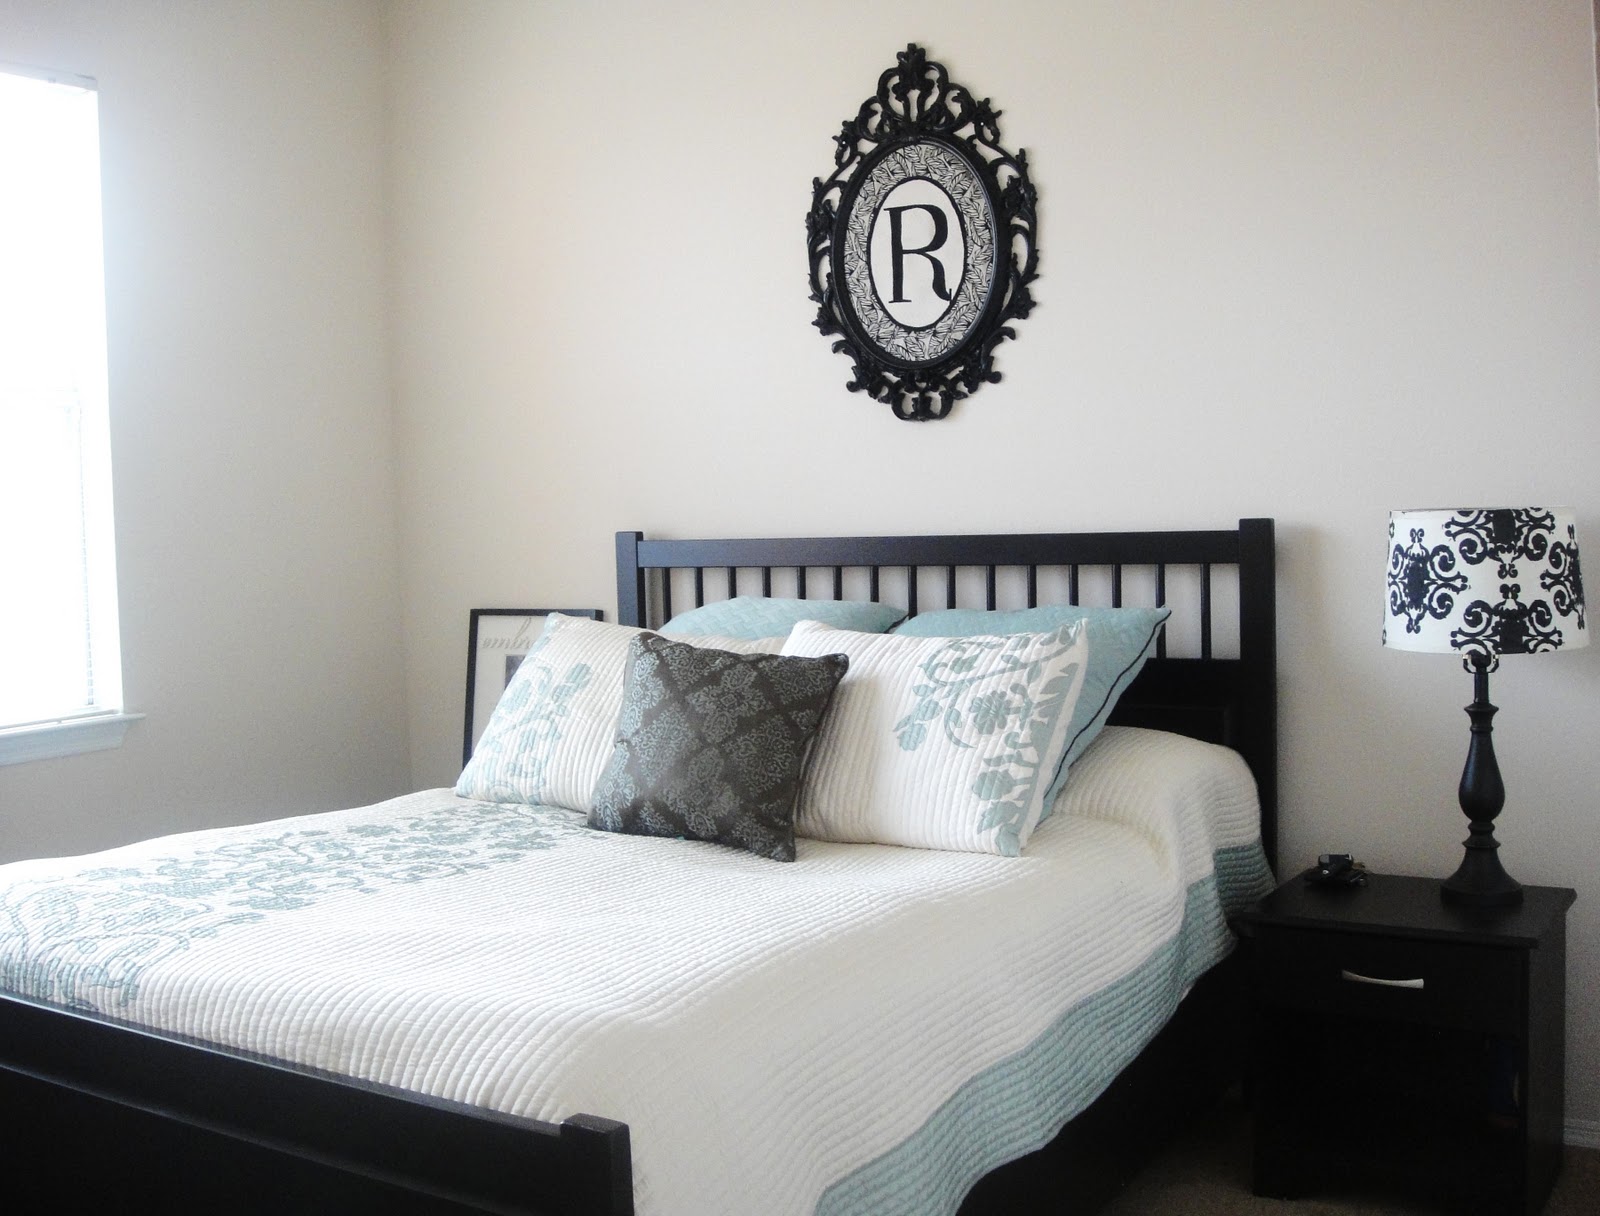
 I have another home decor solution for one of our bare walls. I sure hope you aren't tired of my home decor crafts. The way I see it is - we all have houses that need decorating. Even if you are crazy and already have every inch of your place decorated (I sure don't), you can always change it up and create something new and exciting and ridiculously awesome. This is a little personal touch I made for the wall space above our bed. Isn't it gorgeous? It has a touch of elegance but it's also fun and different and custom-made.

It all started with a frame.
 We got this beauty at Ikea for $30. We love Ikea. Sometimes we drive an hour to the closest store just to walk around and look at the showroom. Of course, we never come home empty handed. (Side note: I am not allowed in the kitchen area anymore per my husband's instructions. I find myself wanting to buy gorgeous walnut cabinets and granite counter tops for our temporary apartment.)


 Back to the frame. I knew I wanted to do something special with it. After months of it just sitting on our dresser, I decided it was time to take action! So then another month later here's what I did... I purchased some lovely fabric for the background, cut it to size, and just taped it directly onto the glass. Taping it may sound like a weird decision, but I wanted to be able to remove it in case I ever wanted to reuse the frame (I change my decor a lot). Next, I gathered a matching plain tan fabric that I already had and cut it 3 inches smaller than the original oval. You may not be able to tell in the picture, but the tan fabric has a great tweed feel and look which adds quality and texture. I used hot glue to adhere it to the background fabric.


Next, I painted an "R" on the tan oval with black acrylic paint - my new craft crush. It was my original intention to use Tristin's freezer paper stencil idea, but I did not get around to finding an "R" online, etc. I decided to take the dangerous route and draw it myself. I am such a rebel. I also drew a bold border for the smaller tan oval just to add more drama. What do ya think?


Here's how it looks in our room. Check out how great it looks with the lamp I recently stenciled! My husby is afraid it will fall on us in the middle of the night, and we'll turn into "Flat Stanleys" haha.

I personally love how it turned out, and I think it looks Ridiculously Awesome. That is, of course, what the "R" stands for.


A Shirt for a Con Man

Isn't crafting for men the hardest?  On one of my many google adventures scouring the internet for crafts to make for men, I came across a crocheted apple-sleeve. 

What's a crocheted apple sleeve, you ask?  It's a small crocheted piece with a button that you can wrap an apple in (and I mean real apples, the kind you eat--not the computers).  Really?  Is that all we have to make for men?  Apple sleeves?  Gals, we can do MUCH better!  Remember the fabulous beanie Sharon made for her hubby?  How 'bout the "I hate Mac" shirt I made for mine?  We can do better than apple sleeves, my crafty friends! 

Whoa, what a tangeant.  Anyhow, my father-in-law's birthday came around a few weeks ago and here's what I made for him:


Yeah, it says "con-man" which is a play on words in many ways that apply to my father-in-law.  The most obvious way is that he loves Converse shoes (hence the picture). 

I make a huge mess everytime I craft.  I wish I was a neater crafter!
I used freezer-paper stenciling to create the design on the t-shirt.  Seriously, it is one of the most satisfying ways to craft.  You've gotta give it a try!   How About Orange's Tutorial is simple and straightforward-I'd highly recommend checking it out.  I used a google image search to find an image of a Converse shoe, then I used the copy feature on my printer to blow it up to a larger size.


Here's the design cut out of freezer paper with an exacto knife and ironed down onto the washed and dried t-shirt.  Once you've made the template and have ironed it down, all you have to do is sponge fabric paint over the open areas.  I always use matte fabric paint that is specifically designed for t-shirts when I do this and I think it makes a much nicer result than your run-of-the-mill fabric paint.


It is SO satisfying to pull away the freezer paper and to see such crisp and professional results.  Ahhh.  Almost as satisfying as the first bite into a hot Krispy Kreme doughnut.  Almost.

So, what have you been making for the men in your life?  Lame apple sleeves or something cooler?
Tristin Signature

A Cameo on Canvas

Hey crafty folks!  I have to admit that amidst all of my busy-ness creating Christmas gifts, I selfishly made myself a little sentimental token.  

Here it is:

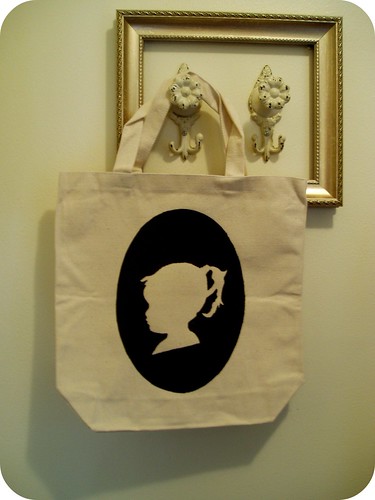
Junebug Silhouette Bag

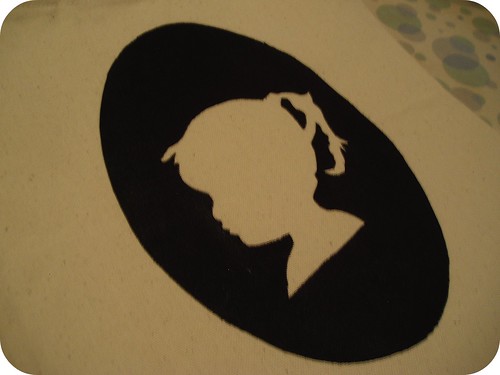
I love cameos so having one of my little Junebug to tote around proudly is pretty precious (oh, and that alliteration was completely unintentional).

It's a pretty simple project.  If you'd like to replicate it you can check out Prudent Baby's great tips on making cameos (3 methods) and visit my new favorite freezer paper stenciling tutorial.  Combine those two simple projects into one and you end up with a beautiful cameo on a canvas bag. 

Junebug Silhouette

I think this is a gift that proud grandparents would like, too, if you're still looking for last minute gift ideas!

Tristin Signature

Doggie Bag (and not the kind from restaurants!)

I'd be remiss if I didn't start by saying that I am digging this COLD Florida weather! A few nights ago it dipped down to a chilly 29 degrees--what?!  It feels like Christmas and I hope the cold snap lasts a while...let's just hope my outdoor plants survive it! 

This Christmas, my brother's wife and I committed to only make handmade gifts for one another.  One of the projects I chose to make for her is an embellished canvas bag.  I always pass by the canvas bags at Hobby Lobby and feel inspired, and keep on walking.  But when I saw the plain canvas bags on sale, I snatched 'em up and was immediately flooded with ideas on how to decorate the blank canvases...

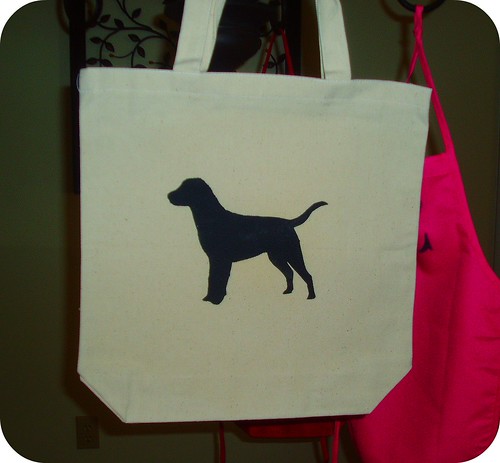
Here is my favorite completed bag:

Doggie Bag Complete

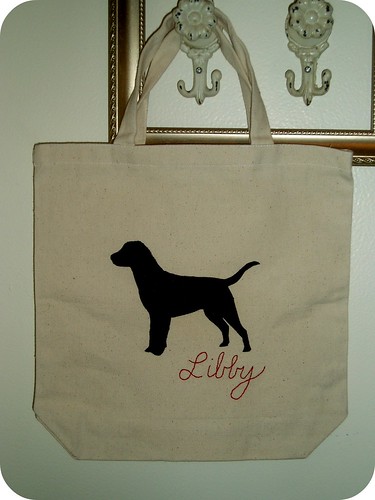
I settled on using freezer paper stencils.  There are about a million freezer paper stencil tutorials out there, so I won't bore you!   Craftster has a very straightforward tutorial here.  It's a great craft for those who are not "crafty" because it requires very little in the way of specialized tools--and very little skill, too!

To find the Labrador silhouette image, I simply did a google image search.  Pretty easy, right?  Then I followed the instructions from Craftster.  Here's what I ended up with:

Freezer Paper Doggie Bag

It looked pretty plain to me, so I pulled out my stash of embroidery floss and got to work.  If you're new to embroidery, Jessica from Sew Homegrown recently had a guest provide an embroidery primer, complete with some really great links.  

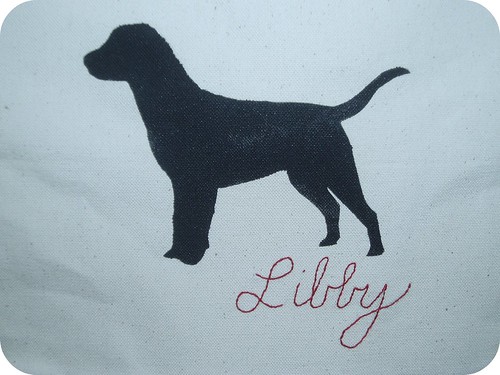
Using a backstitch, I wrote the name of my brother and sis-in-law's lab, Libby (short for Liberty). 

Don't you think it really livened up the bag?

Doggie Bag with embroidery

I think that any dog lover/owner would be thrilled to get a bag like this with their favorite breed on it.  The embroidery adds a very special "custom" touch.

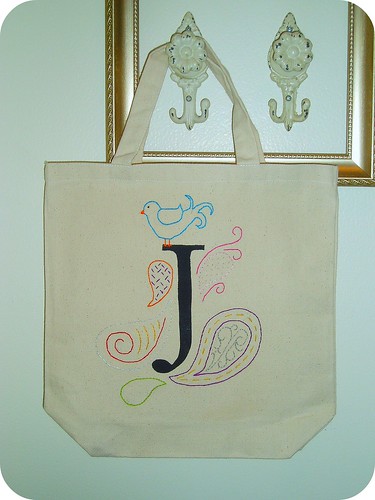
After making this bag, I realized it was a bit more dog-centered than I'd anticipated, and I thought my sis-in-law would appreciate one that was focused a bit more on her.  So, I found a great website that offers free printable alphabet templates and downloaded her initial.  I embroidered some paisley shapes with bright colors, and was quite pleased with the funky bag that resulted.

Initial bag with paisley embroidery

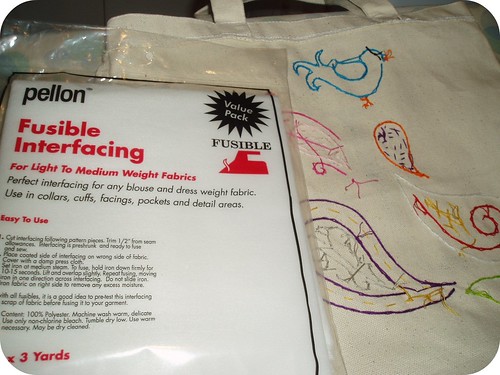
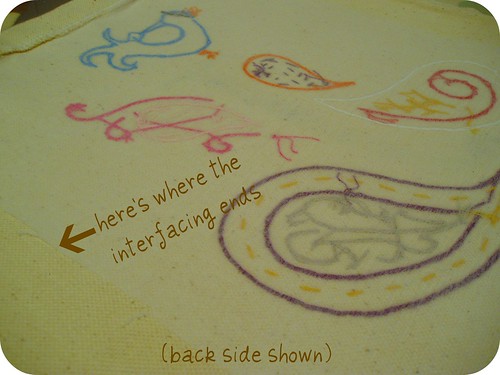
The only problem left to tackle was the ugly backside of the embroidery.  You know, the knots, the weird looking stitches, etc...  To handle that problem, I looked to my sewing notions drawer and grabbed some fusible interfacing.

Back side of bag and interfacing

The bag is turned inside out, showing the funk that was hiding inside the bag.  The strings on the back could easily snag and break once the bag has been used a few times if it's not covered.  I cut a piece of interfacing big enough to cover the area of gnarly stitching and ironed it on according to the package instructions.  Voila!  A usable AND gorgeous canvas bag (if I do say so myself!).

Interfacing over back of embroidery

If you're still struggling for last-minute gift ideas for the holidays (or any occasion) these bags are really simple, quick, and inexpensive--and thoughtful, too.

As always, questions, comments, and constructive feedback are appreciated!

Tristin Signature

Related Posts Plugin for WordPress, Blogger...