Hey crafty gals! Believe it or not, this very post was a guest post on
Prudent Baby today! (We're stoked!) Sharon and I think that if you're not regularly checking out the
Prudent Baby site, you are missing out--so go give it a whirl!
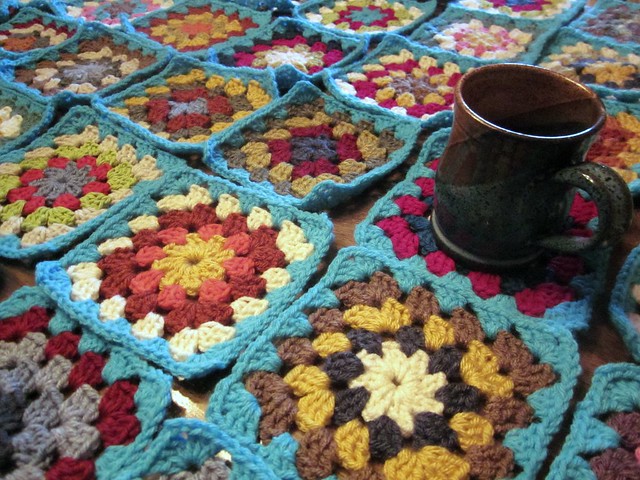
After working on the
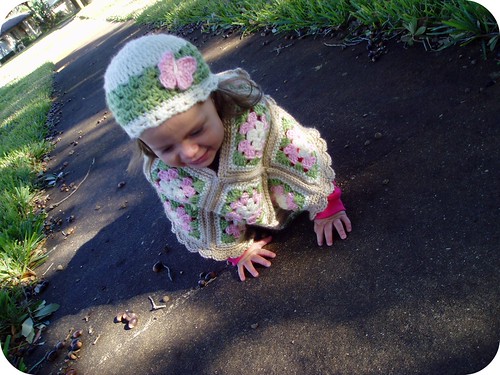
group granny square afghan, I swore off making granny squares for a while. But I couldn't stay away, and only days after our group completed the afghan I started a new granny square project--a poncho for Junebug.
Initially I wanted to crochet a poncho for Junebug to wear in cold weather because she strongly dislikes wearing long-sleeves (she's a Florida girl, through and through--if it were up to her, clothing and shoes would
always be optional). Anyhow, after looking all over the web for free toddler poncho patterns ('cause I'm cheap like that) with very depressing results, I decided I'd just have to come up with my own design.
I was inspired by running across this retro concept for an
adult granny square poncho.
Sure, it's a pretty old pattern, and I'd never wear it--but putting the concept into a more modern design suited for a kiddo worked like a charm.
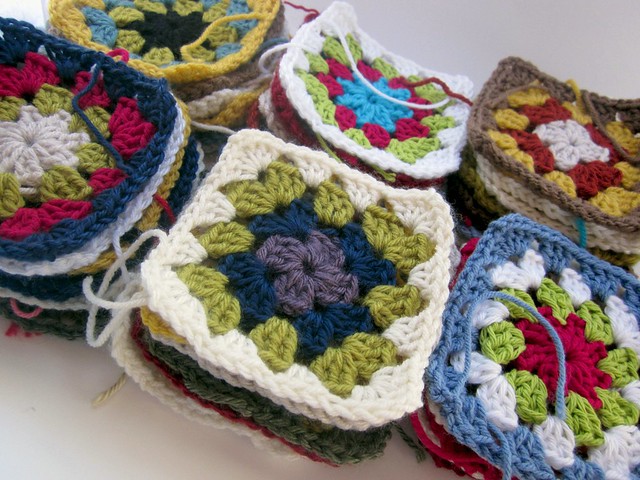
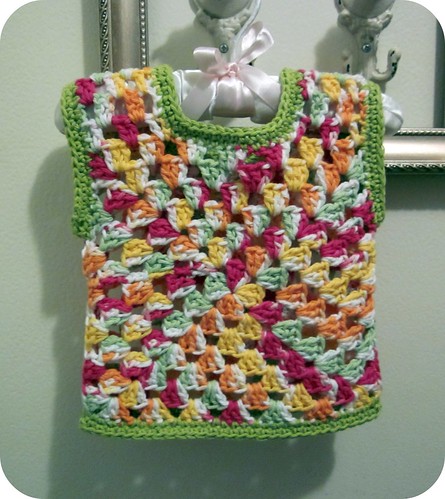
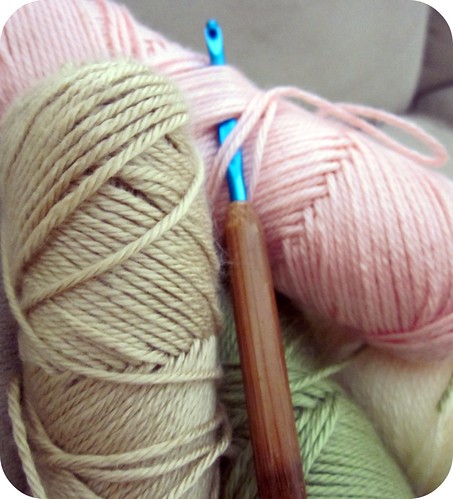
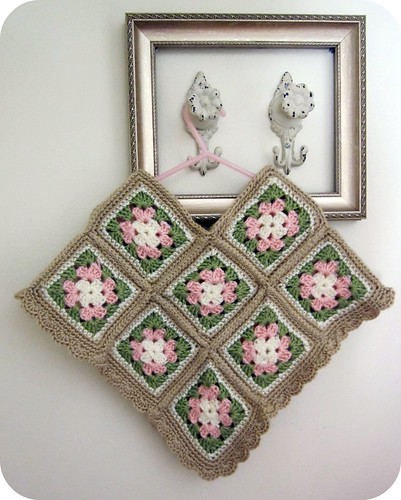
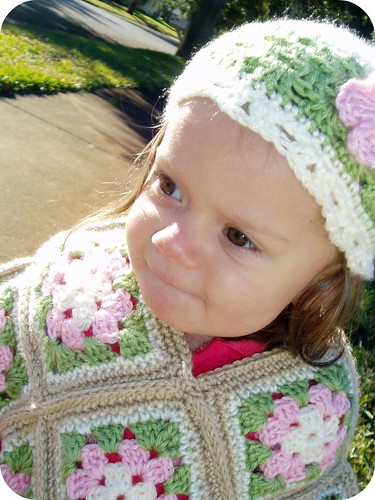
I used 4 colors of yarn for Junebug's poncho--all from the Caron Simply Soft collection.
Off White
Soft Pink
Pistachio
Camel
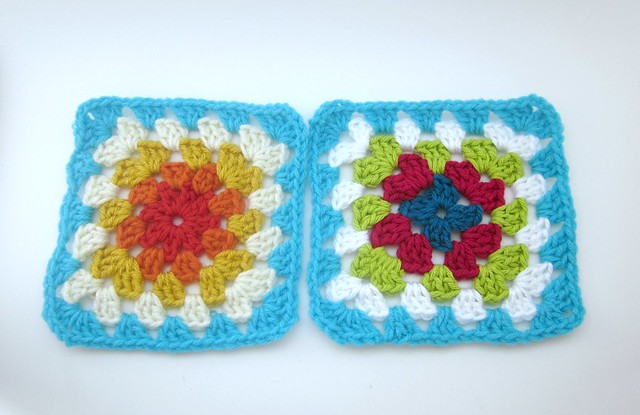
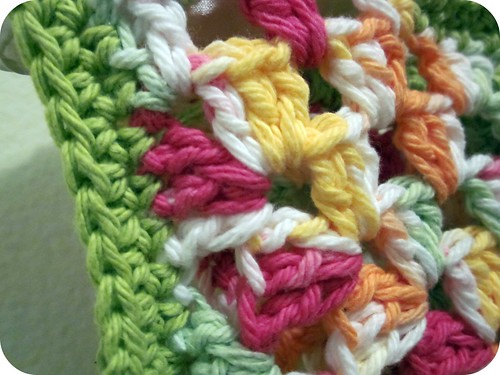
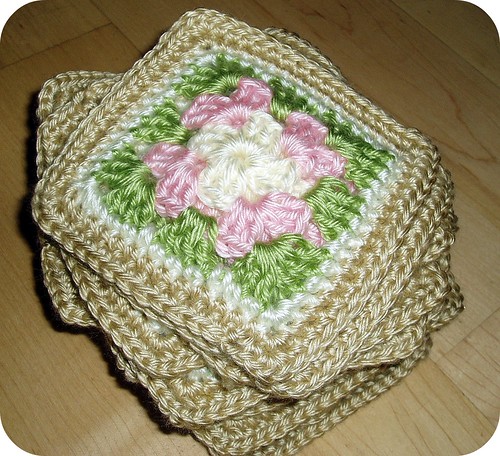
Round 1: Off White
Round 2: Soft Pink
Round 3: Pistachio
(Rows 1-3 are made using a basic granny square method. For super-awesome instructions on granny square making, check out the Purl Bee's step-by-step tutorial.)
Round 4: One round of sc in each stitch using Off White
Round 5&6: 1 sc in each st using Camel
In total, you'll need 16 squares to make a toddler-sized poncho. My squares were about 4" each when finished.
I estimate that this would fit a toddler from 12 months to a 2T size--and obviously the pattern is totally adjustable based on the size you desire. If it's for an older child, just add an extra row or two when creating your granny squares. Junebug is a teeny toddler--she's 19 months old and still wearing 12 month sized clothing. I'm sure this poncho will fit her next winter, too.
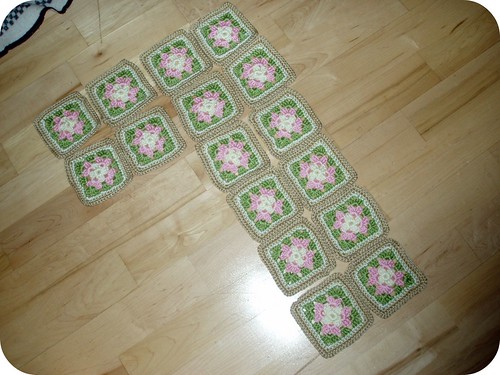
I used a version of the
slipstitch method (using Caron Simply Soft in Camel) to join the squares in this layout:
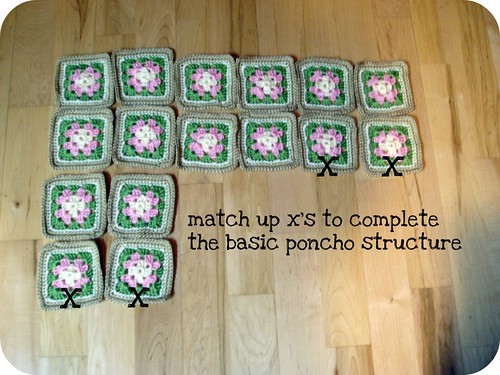
Once they're joined in the "seven" shape, use this schematic to join the poncho into its final shape.
Once the poncho has the structure in place, I crocheted one row of single crochet around the neck opening to make it stronger and more cohesive.
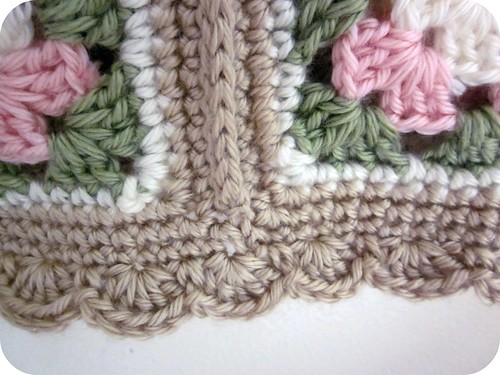
I finished the bottom of the poncho by single crocheting two rows around (again, to make it stronger and more cohesive) and then used a basic shell stitch for some girly flair.
The shell edging pattern I used goes a little something like this:
1 sc *skip 1 st, 5dc into next st, skip 1st, 1sc into next st; rep from * to end.
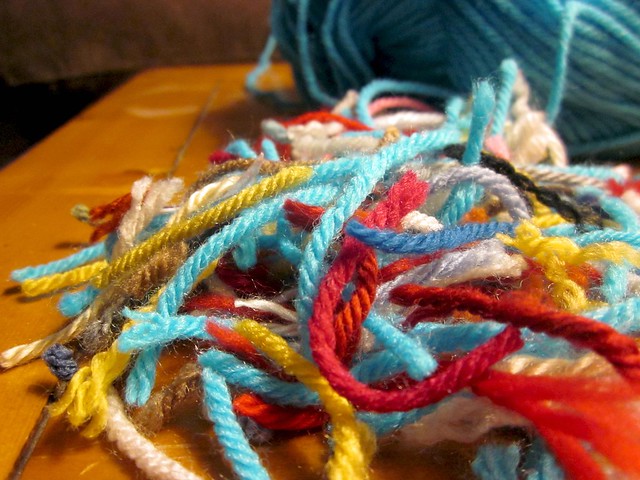
Then, of course, I tucked in all the loose strands. That's never the fun part of the project, but alas, it's necessary for true "completion".
In hindsight I wish I had used different colors. You know, something brighter and bolder, and a bit more fun. I think the poncho came out very sweet and
baby-like, and very
un-toddlerish (don't you like my technical terms?). Well, live and learn!
So, do you want to make a granny square poncho now? Any thoughts, comments or questions?
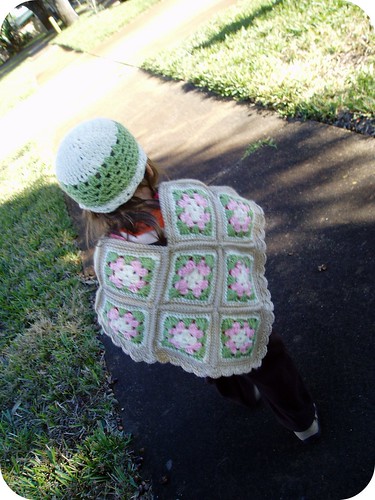
And in case you were wondering, Junebug doesn't actually like to wear the poncho I made her. In fact, she pretty much hates to wear anything I make for her. Some of you may recall the
ladybug costume I made her for Halloween and her, umm, less than grateful reaction. The first dozen reactions to the poncho were pretty similar.
Persistance paid off and on one super-cold day, I finally got Junebug to leave the poncho on. My will just had to be a little bit stonger than her will of iron.