Pages

Showing posts with label Crafting for men. Show all posts

DIY Dinosaur Air Plant Holders


There's something about going to Walmart that's inspiring.  Usually I'm inspired to never go back.

This time though, I stumbled upon plastic dinosaurs and was inspire to craft.  (And to never ever go back, though I'm sure it'll happen again.)  I've stumbled across planters made out of plastic animals and I think the idea is hilariously awesome--and dinosaurs just seemed right.  Originally I intended to make these planters for some succulent cuttings from my wildly successful succulent garden (finally, I've kept plants alive!) but my husband and I found ourselves on a kid-free trip last weekend where I found an air plant vendor at a Farmer's Market.  I've always been intrigued by air plants and I'm stoked to have some of my own.  In hollowed-out plastic dinosaurs, nonetheless.  Can life get any better?


I found these hollow plastic dinosaurs at Walmart for a dollar each while searching for a slinky as a gift for a kiddo birthday party.  (When in doubt for what to give a kid, a slinky is awesome, right?!  Inexpensive, loved by generations, and made in the good ol' USA.)


Making the dinosaur transition from toy to planter is as simple as cutting a hole with an Exacto knife.  A box cutter would probably work, too.  Maybe even a steak knife.  I'm pretty sure there aren't rules on what you can and can't use to cut into dinosaur toys when you're a grown-up.


Since I'd intended to use this with dirt and succulents, I made a drainage hole.  And yes, I laughed at the placement...but it just seemed like an obvious place for a drainage hole. 

Then I spray painted those bad boys for good measure.  Ever wondered what caused dinosaurs to go extinct?  My current theory is spray paint fumes.


Since I went with the air plants, all I had to do was stick the plants into the holes I'd created.  Bam.  Pretty awesome, right?


A Shirt for a Con Man

Isn't crafting for men the hardest?  On one of my many google adventures scouring the internet for crafts to make for men, I came across a crocheted apple-sleeve. 

What's a crocheted apple sleeve, you ask?  It's a small crocheted piece with a button that you can wrap an apple in (and I mean real apples, the kind you eat--not the computers).  Really?  Is that all we have to make for men?  Apple sleeves?  Gals, we can do MUCH better!  Remember the fabulous beanie Sharon made for her hubby?  How 'bout the "I hate Mac" shirt I made for mine?  We can do better than apple sleeves, my crafty friends! 

Whoa, what a tangeant.  Anyhow, my father-in-law's birthday came around a few weeks ago and here's what I made for him:


Yeah, it says "con-man" which is a play on words in many ways that apply to my father-in-law.  The most obvious way is that he loves Converse shoes (hence the picture). 

I make a huge mess everytime I craft.  I wish I was a neater crafter!
I used freezer-paper stenciling to create the design on the t-shirt.  Seriously, it is one of the most satisfying ways to craft.  You've gotta give it a try!   How About Orange's Tutorial is simple and straightforward-I'd highly recommend checking it out.  I used a google image search to find an image of a Converse shoe, then I used the copy feature on my printer to blow it up to a larger size.


Here's the design cut out of freezer paper with an exacto knife and ironed down onto the washed and dried t-shirt.  Once you've made the template and have ironed it down, all you have to do is sponge fabric paint over the open areas.  I always use matte fabric paint that is specifically designed for t-shirts when I do this and I think it makes a much nicer result than your run-of-the-mill fabric paint.


It is SO satisfying to pull away the freezer paper and to see such crisp and professional results.  Ahhh.  Almost as satisfying as the first bite into a hot Krispy Kreme doughnut.  Almost.

So, what have you been making for the men in your life?  Lame apple sleeves or something cooler?
Tristin Signature

Crafty gifts for the man I love

If you're the man I love, please, stop reading right now.  You know who you are.  ; )

I'm leaving spaces so he won't see any images on his browser.  If you're not him then just scroll down a bit.  Thanks!

{Don't Peek!}

{Don't Peek!}

{Don't Peek!}

{Don't Peek!}

{Don't Peek!}

{Don't Peek!}

{Don't Peek!}

Ok, I think he's gone.  Now ladies, how many of you out there have problems coming up with something to "make" for the special man in your life?  Yeah, me too.

My husband is not a beanie wearer, so making him a fabulous hat like Sharon did for her husband is a lost cause.  Scarves?  Nah, he'd never wear 'em. 

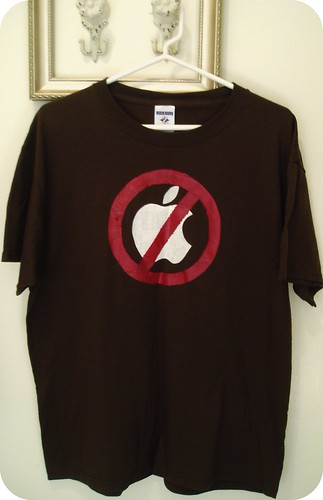
So, what to do?  I thought I'd make a T-Shirt for him.  But of what?  Well, he hates strongly dislikes Mac.  I mean, he's an I.T. guy so he's entitled to this opinion.  Maybe you're offended.  Well, don't be.  I couldn't care less about the computer you use--but he does because he's the one who helps people with computer problems.  I came up with a great T-Shirt for my Mac-hatin' husband.

I Hate MAc Shirt Complete

It's the I Hate Mac T-Shirt.  Think he'll like it? 

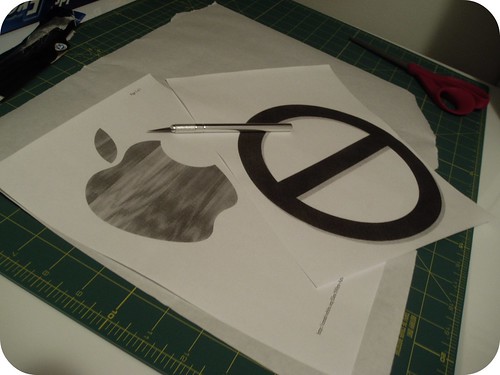
I used the freezer-paper stencil technique I've been preaching about.  Seriously, it's so simple and so satisfying!  I did a google image search for the Mac logo, and another search for the famous "NO" circle. 

I Hate Mac Shirt Supplies

If you're a Mac fan, well, simply leave off the "NO" circle.  It's that easy. 

That T-Shirt cost about $3 to create.  What?!  He'll appreciate that, too!

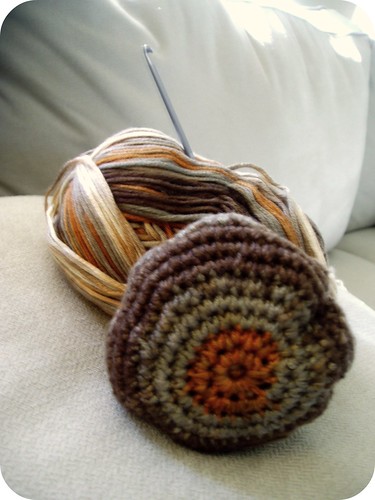
I also made him a hacky-sack for his stocking using this pattern.  It was really simple, even for a new crochet-er like me.
Crocheted Hacky Sack

I used Deborah Norville's Serenity Garden Yarn in Earth, and used a size D crochet hook borrowed from my momma.  Altogether, I'd say it took about 2 hours to figure out and create.  I filled it with dried black-eyed peas 'cause that's what I had.

I know he'll appreciate the nostalgic nature of the hacky sack. 

So, what have you made for the men on your list?  (And if you've only bought things, don't feel guilty.  I did some of that, too!)
Tristin Signature

Cause baby, it's cold outside

DSC03299


I have recently learned how to crochet. And I am loving it! Some ladies at our church had a brilliant idea to make a granny square afghan for one of our young ladies getting married. A few of the ladies already knew how to crochet, and they taught the rest of us.

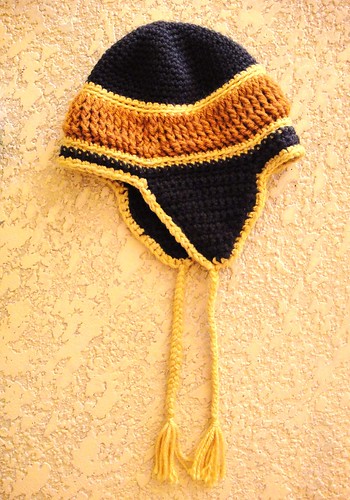
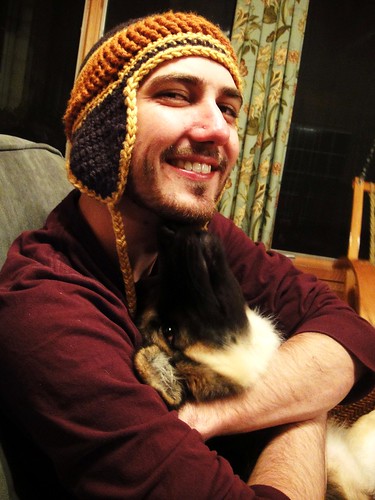
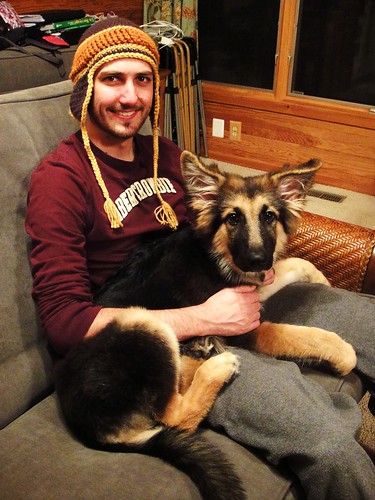
Crocheting is amazing. With a simple skein of yarn, you can create a piece of clothing, an accessory, a blanket, a present for someone, or anything else your creative mind can think of! If you have no crocheting experience, I suggest you give it a try. You might discover a new obsession… I mean hobby. After I learned how to crochet a traditional granny square, I wanted to see what else I could make with my new-found skill. Since then I have completed many fun projects. Today I will share one of my crochet creations with you. It’s a crocheted beanie hat with ear flaps that I made for Mr. JR. He absolutely loves it.


DSC03220


I love these beanies because you can make them for anyone. They would look pretty adorable on a baby or child (and then you can add a fun pom pom on the top or at the end of the braids). Make one for yourself or as a gift to someone else. I already have 4 friends requesting me make them one. That’s a lot of beanie.

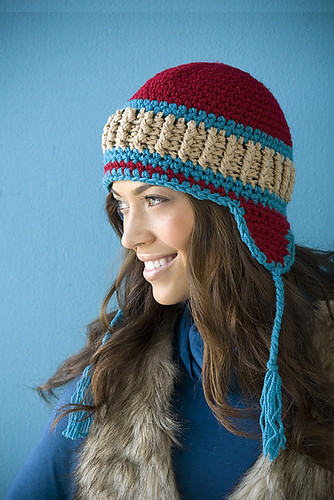
Here is where my inspiration came from...


Earflap_Hat_medium2


It’s the Snowy Day Hat by Lauren Osborne that can be found on the Ravelry website or in their magazine. Isn’t it wonderful!? You have to subscribe to the magazine in order to get this pattern, so I decided to try to figure it out on my own. It was quite the adventure.

I used an I9/5.50mm hook.
I wish I had written down the names of the colors I used, but you can use any colors you like. Duh, as if you needed permission.

For the top portion of the beanie, I used another pattern I found. Then, I did two rows of back post single crochet in my second color (yellow), three rows of front post double crochet in my third color (orange), and two more rows of the back post single crochet stitch in yellow. I then single crocheted two more rows in brown, did the ear flaps on the sides, and finished it off with a yellow border and braids down the side. The tricky part was the ear flaps. I didn’t have a pattern for this either, but I taught myself how to “decrease” in stitches. I started with 15 crochet stitches and decreased 1 at each end of every row and eventually 2 at each end of every row. Don't forget to tie in the loose ends when you're finished.


Now just relax by the fire and enjoy wearing your hat indoors.
Cause baby, it's cold outside!

DSC03217


signature
Related Posts Plugin for WordPress, Blogger...