Pages

Showing posts with label Scrapbook Paper. Show all posts

Day 8: Woven Star Tree Toppers with Heidi of Mom's Crafty Space

Hi everyone! I'm Heidi from Mom's Crafty Space, and I'm super excited to be here today to share this tutorial for an inexpensive Christmas decoration that packs a lot of style! Woven stars made from straw or paper have been a holiday tradition for hundreds of years, and I'm going to show you how we can use modern materials to supersize our woven star into a shimmering tree topper.

All you'll need to make this gorgeous star is a sheet of 12" x 12" glittered cardstock, scissors and glue (hot glue works best). If you have single sided glitter paper you will need to glue two sheets back-to-back to create a double sided sheet.


First, take your paper and cut it into (20) 1/2" wide strips.


Fold two strips in half and crease to mark the center. Line up the center marks and glue the two strips to form 90 degree angles.


Add four more vertical strips (two on either side of your original + shape), weaving the horizontal piece through the vertical strips. Glue at all places where the paper intersects.


Continue weaving until you have a grid of 5x5 woven strips (the tails should be around 4" long).


This step is the trickiest to explain, so hopefully the photos will help! In each corner, take the two inner corner strips and join the tips, making a twist in each strip before gluing them together. Do this with the next interior set of corner strips as well, so that you end up with two twisted points on each corner.


When all your corners are twisted and joined, it should look like this.


Now make another!


Turn one of your pieces upside down and rotate it so that the tips form an 8-pointed star when placed on top of the first piece.


Weave the remaining tails into the points, glue down and trim the ends.


 Voila, an easy peasy and super cheap way to add a lot of sparkle and shine to your holiday season! These also look incredible when hung in small groups from the ceiling - use white or silver paper to create a flurry of shimmery snowflakes that's sure to impress!


Now go find a tree (preferably one where all the lights will light up for you!) and add your shiny new topper! Happy Holidays!

Be sure to stop by Mom's Crafty Space for our other fun tutorials, recipes and holiday ideas!


simple spooky spiderwebs


Sometimes the best crafts are the simplest.  Sometimes the simplest crafts are the best.  I love crafts that anyone can do--limited budget, limited time, limited craft supplies... if you fit into any of those categories, this one's for you.

All you need to make some simple spooky spiderwebs is black cardstock or any thick black paper, a white crayon and an exacto knife.  

I'll let the pictures do the explaining...


spiderweb 4 step

Sure does beat buying those fake cobwebs to hang up in your house, right?  (Ok, ok, so I bought some of those, too.)  I feel satisfied when I can add holiday flair to my home and a.) spend little to no money and b.) not have to store stuff 11 months out of the year.  Seriously, I'll just toss these and make a few more next year.  If you're one of those super-organized types that I envy, I'll bet you have a file folder you can tuck these away in for safe keeping until next year.  Good for you. 

Paper spiderwebs

These webs required no effort other than to stick them in the thin space between the frames and glass of various pictures I have around the house.  No tape required, which is great since I can never seem to find my tape.

10-13 uploads 030


Tristin Signature

The Raven Wreath

Let's start with a quick excerpt from Edgar Allan Poe's well-known poem, The Raven:

"Take thy beak from out my heart, and take thy form from off my door!'
Quoth the raven, `Nevermore.'"

raven wreath

In direct opposition to Poe's request to take the raven off of the door, I'm going to share with you the Raven-inspired wreath I made this year (which is proudly displayed on my front door--sorry Edgar!)

I used plain black cardstock for this wreath, but also threw in a sheet of starry scrapbook paper just for fun.  My goal was to create the look of feathers or scales (depending on your imagination).  I snagged this raven at my favorite thrift shop for a buck--but they're available at most craft stores for about the same price.

Fall Crafts 030

To make the scales/feathers, I used a heart-shaped punch and then cut each heart in half.  Obviously you don't have to use a punch--you can use scissors and this would be the perfect time to do free-hand cuts.  No need for perfection on what is meant to be a creepy wreath!

Fall Crafts 033

Hot glue is the perfect medium for affixing the paper to the wreath, and if you stagger the paper just right you'll cover the wreath without showing the ragged straw form below.

Fall Crafts 035

I left the hot glue strands because they kind of look like spider webs.  It had nothing to do with laziness and the fact that didn't want to spend an extra 5 minutes picking them off.  Yeah, right.

Stick your bird on the wreath, and there you have it!

poe quote raven wreath

P.S. A few days after I completed this wreath, Dana from made pinned this wreath on Pinterest


Very similar, huh?  Made with felt cut into oval shapes.  I almost decided not to share the project I had created after seeing this similar wreath, but then I got over it!  With so many blogs out there, it's tough to be original even when you think you're being original.  In the end, great minds think alike.

Tristin Signature

Fancy-Schmancy Heart-Shaped Stool

I know that some of you will read the title and think I'm talking about a heart-shaped bowel movement.  I'm not.  I'm definitely not.  That's not crafty.  That's gross.

Mod Podge Stool 006

Anyhow, I recently noticed a need for a stool in Junebug's bathroom.  She's washing her own hands now but I have to assist with helping her up and down to the sink.  Being a terribly independent little gal, she's not always so keen on having mommy help.  So, I thought a stool would make my little big girl happy.

I found this beauty at my favorite local thrift shop.  It's just one of those generic bare wood pieces that you can find at most craft shops--I noticed from the tag on the bottom that it originally retailed for $9, but my thrift shop listed it for $3.  SOLD!

August crafts 037

I spray painted the stool bright yellow (left over from my mirror) and once it dried, I mod podged a lovely piece of scrapbook paper over the top.  (Since Mod Podge is both a sealer and an adhesive I coated the top of the stool with a thin coat before and after the paper was applied.)

August crafts 040

You won't see the strokes once the Mod Podge dries.

August crafts 042

Once the Mod Podge is dry, spray with a clear sealer since feet and who knows what else will be stepping on the stool.

Badda bing, badda boom.  A darling one-of-a-kind stool.

Here's where it gets really real.

I thought I'd take a pic of the stool in action.   You know, I thought you'd like to see it.

Terrible idea.

You see, Junebug, just like her momma, is short.  Like majorly short.

I told her she could use the stool to wash her hands but... it still doesn't get her to the faucet.  Which is terribly frustrating if you're two years old.  Apparently lots of things are frustrating when you're two.

August crafts 062

See?  I keep it real.  Really real.  I'll share with you my ugly 1985 builder-grade grey bathroom with blue tile (seriously, who picks blue tile?!) AND my fit-throwing toddler--all in the same post!  You're welcome.

August crafts 066

I think I may need to get one of these awesome inventions to complete the bathroom:

2011-aqueduck
Found via Pinterest

And here's the stool again, in all its finished glory--sans screaming toddler:

Mod Podge Stool 006


Cute, huh?


Tristin Signature


DIY Glass Magnets (The alternative to gift cards!)


Nothing says "I have absolutely no idea what to get you" like the gift of magnets.  You know?  But if they're homemade it's somehow legit.  I love to use the word legit.  I'm just too legit to quit.  I crack myself up.

Magnets 007


This whole craft came about when I found some lovely large-ish sized flat-bottomed glass gems at the Dollar Tree.  They're meant to be used as a vase filler, but there's so rules so let's make some magnets!  I thought I was brilliant as my mind raced with the possibilities of a new craft--only to come home see a similar project while perusing How About Orange.  It burst my crafty bubble, y'all.  Whatevs.  Great minds think alike.

On with the show...

To do this lovely craft, you'll need:
Flat-bottomed glass gems (the kind for filling vases with; I found mine at the Dollar Tree)
Scrapbook paper you love
Mod Podge
Paintbrush
Magnets (strong ones since the glass gems are heavy)
Gorilla Glue
Clamps

First of all, you'll want to roll a gem over your scrapbook paper in order to find a design that's suitable for a magnet.  Patterns are fun, but I have been holding on to this paper for months in hopes of the perfect project 'cause I love the cute kitchen objects.  This is the perfect use of this paper.  (I purchased it at Jo-Ann Fabric and it's still available there if you want it, too!)

DIY Glass Magnets

Then cut out your design to fit the bottom of the glass gem.  Trace if you need to.  (I needed to.)

Apply a thin layer of Mod Podge to the flat side of the glass gem and affix your paper.  Let it dry.  (Duh.)


DIY Glass Magnets

Apply Gorilla Glue to back of gem and add your magnet.  Then clamp it per Gorilla Glue instructions. (Initially I tried to do this part with hot glue.  Fail!  The hot glue is not strong enough and it will just detach from the magnet at the first sign of stress.)


DIY Glass Magnets

If you don't have clamps, you can use a clothespin, though I'll admit, it takes a lot more finesse.  Plus it feels better to use manly tools like clamps when crafting.  Don't you agree?

Clamping glass magnet with gorilla glue


So, keep some of these simple little magnet sets on hand for those "I have no idea what to give you!" occasions that are sure to pop up.

Magnets 007


Isn't the theme of these magnets perfect for a kitchen??


A friend from church shared a yummy recipe with me that I can't wait to try.  It's on the fridge with one of my new magnets.


Keep your eyes peeled this week for a few more magnet crafts. I'm kind of on a kick.

Tristin Signature

Spring Scrapbook Paper Tree

Hello fellow crafters!

Tristin and I were invited to be today's featured guest blogger over at Everyday Mom Ideas! We were thrilled with this wonderful opportunity, and wanted to share with the readers over there one of our trees from the collection we're currently doing.

This second tree is very similar to the first one. I'm sorry! I promise, the next ones will be more diverse. But the materials used in this tree are very different and it is a lot easier to overall construct. So what are you waiting for? Go check it out!

(Since this is a guest post on a different blog, and the concept is similar to the first tree.. I may have repeated myself a little. Do forgive.) Ok, now go check it out!


Thanks, Julia, for having us on your blog!

Scrap Candy Designs makes a Patterned Paper Wreath

Are you sick of our Patterned Paper Wreaths yet?  I hope not!  One of our readers, Crystal from Scrap Candy Designs made Sharon's version of the Patterned Paper Wreath with a slight change and had fabulous results that we can't help but want to share.


Crystal cut her paper into 1"x6" strips (Sharon used 2"x4") and came up with super-fluffy and full results.  Didn't she do a great job?


If you want to see scrapbook paper used in its intended form, check out Scrap Candy Designs for some inspiration.  Sharon and I will continue to use it in every form possible besides scrapbooking 'cause we're rebels like that!
Tristin Signature


P.S. If you're a reader and you make one of our crafts, please let us know.  We'd love to see what you've made and perhaps share it with our readers!

The Ramseys Finally Have Coasters


We finally have coasters! Whoo hoo! As I mentioned in the Linky Love post last Saturday, we have been needing some drinking coasters for a while now. I have been perusing the internet for a DIY coaster tutorial that was easy with a beautiful result. Well, I found out that there are a lot. But I really wanted to take a stab at the ceramic tile coasters. Ooh, violent. I know this ceramic tile coaster tutorial has been done many times, but c'mon people! We needed coasters really badly. I'll share with you what I did as well as the link to the tutorial I followed by Prudent Baby.


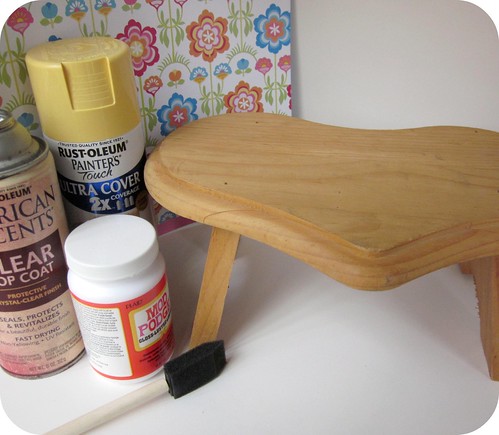
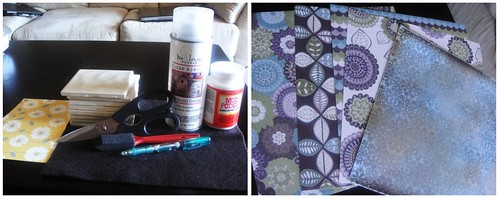
Fortunately enough, I already had almost all of the supplies on hand! How's that for easy?

 Le Supplies (No, I don't speak French.):
  • Scrapbook paper, wrapping paper, pretty napkins, any paper product of that nature. Prudent Baby says not to use anything printed off because the ink will smear.
  • Scissors
  • Pencil
  • Felt or cork board (felt is a whole lot cheaper)
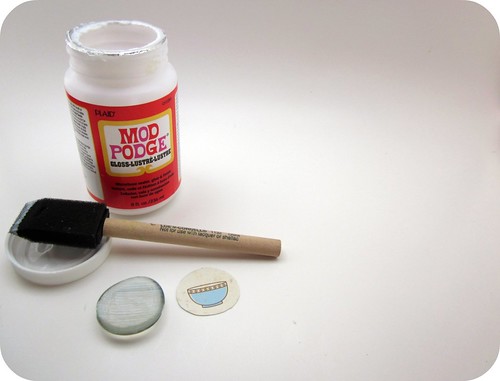
  • Mod Podge (I've had this for a while now, so I don't remember how much a container of it is... maybe around $5? But it lasts!)
  • Water-resistant, Clear Acrylic spray or Polyurethane spray (this costs around $5, but yet again - it lasts). 
  • Foam/sponge brush
  • Ceramic Tiles (these are super cheap! I got mine for free from a friend, but they are around 16 cents a piece, depending on what kind of tile you get. 
Cut out paper for tile coasters

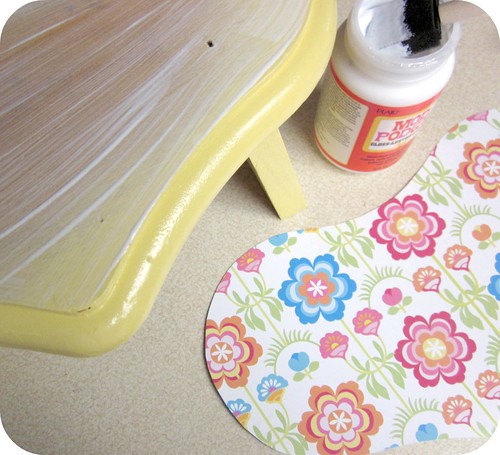
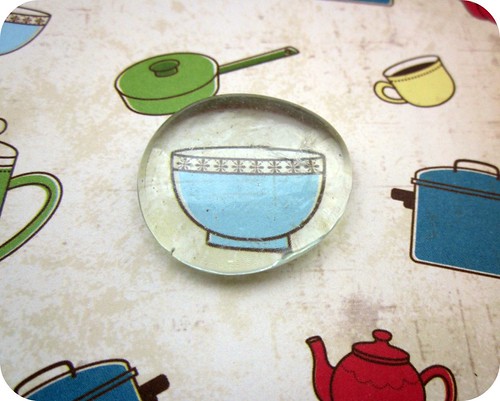
First, trace the tile onto your paper and cut it out. You can choose to leave room on the sides for a border, but I like the paper to cover the entire surface. I did, however, have a border on my yellow coasters because I used small cards for the paper, and I didn't want to have a crease in the middle of my coaster. Yes, you can also use cards for this project! There are so many fabulous cards out there with gorgeous designs. You can also get creative and cut out patterns and paste them onto your coasters to create your own picture (like the bottom cut out in the picture above).

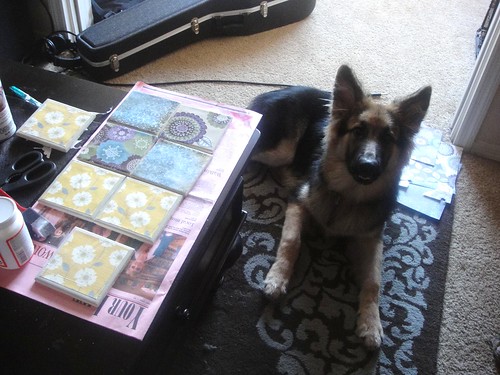
It was my intention to pick one theme or the other (yellow or the blues and purples), but I loved them both so I chose to do four in the yellow and four in the blue/purple/flower theme.

Using Mod Podge on tile coasters

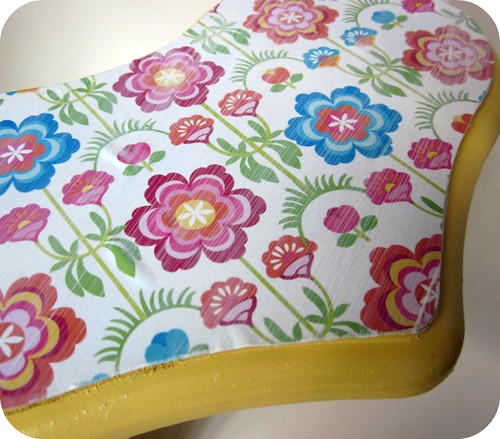
Next, take your Mod Podge and podge up that tile. I used glossy, but you can certainly choose to do matte if you like. Carefully place your paper onto the podged (what a fun word) tile. You have a couple of precious seconds to play around with your paper to get it straightened out on the tile, but once those seconds are up, don't move it! Or you'll end up with a goopy, podgey mess. Wait a couple of minutes for the paper to stick to the tile and then podge the top of the paper. "Podge" may be my new favorite verb.

ceramic tile coasters drying

Let the tiles dry for 15-20 minutes, then apply another coat on top. Repeat this process a few more times.

Isn't our baby beautiful? I have to brag on her. She's a 50 pound puppy who is crazy and always wants to play (as all puppies are), but she just sat there like a well-behaved lady while I sat on the floor and crafted at her eye and tail level. I am such a proud mommy. :) I usually do projects on my craft table a.k.a. our dining room table, but the coffee table was closer to the big windows and provided more ventilation. I was so afraid our puppy would try to lick the mod podge, but she didn't even bother me at all. She just sat there watching me. Maybe she was watching my methods so that she could go and make her own doggie coasters. Or maybe I've gone insane.

Felt circles for ceramic tile coasters

The next step is to make felt circles for the bottom of your coasters. You can do this in between coats of mod podge while you're waiting for them to dry. Another option is to cut the felt into squares to cover the entire bottoms of the tiles. You can also choose to use cork board which looks fancier and more professional. I went with felt circles. Cause that's how I roll. And because I had limited felt in my supply of craft scraps.

felt circles for tile coasters

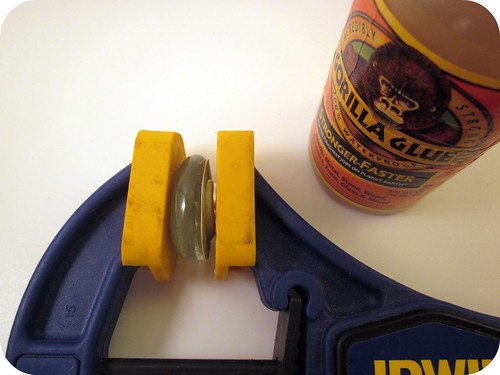
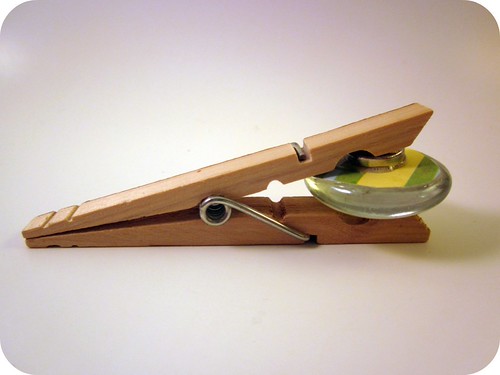
Glue them on! Be sure to use a waterproof glue like the amazing E-6000 or any other glue of that nature. The husby was helping me take pictures (another one of his ways to "craft" with me. Ha! He's adorable.) I was trying to get him to take pictures of me gluing the felt on, but I ended up with two or three pictures of the coaster and a million ugly pictures of me! Maybe next time I'll let him glue and I'll take the pictures.

The final step is to spray your coasters with the clear acrylic (or polyurethane) spray. I chose the glossy coating, but the matte look would work well too. Apply according to the directions given on the can. I did a couple of coats for extra waterproofiness. 

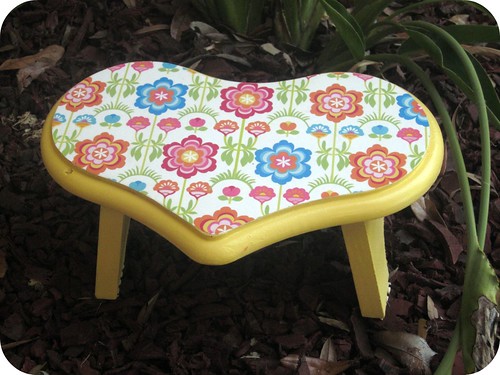
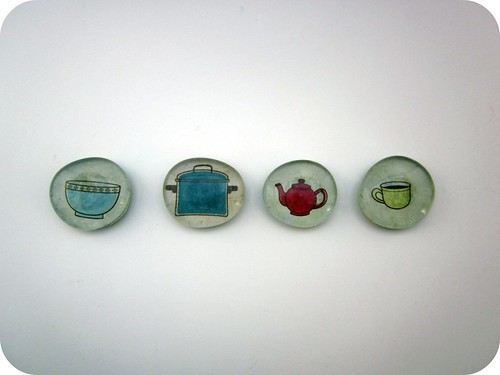
 Here is the yellow set.


And here is the other set. I'm not sure if I'm going to keep both sets (because we definitely could use all 8) or give one set to someone for a present (another great reason to make these).


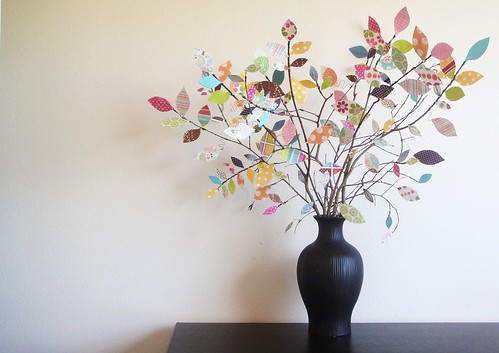
And that's all! They're so beautiful! They add so much to the space even though that's not their main purpose. I love them.They are so bright and cheery and have such a cool texture from the mod podge and the brush strokes. Also, they were less than $5! Well, not counting the mod podge (which I already had) and the clear acrylic spray, but those will be used for many more projects in the future, so I only count a percentage of their cost. Only $5?? Whaat? Subliminal message: Must make coasters now.

So long, nasty water rings! Good riddance. 

Related Posts Plugin for WordPress, Blogger...