Pages

Showing posts with label Spray paint. Show all posts

DIY Dinosaur Air Plant Holders


There's something about going to Walmart that's inspiring.  Usually I'm inspired to never go back.

This time though, I stumbled upon plastic dinosaurs and was inspire to craft.  (And to never ever go back, though I'm sure it'll happen again.)  I've stumbled across planters made out of plastic animals and I think the idea is hilariously awesome--and dinosaurs just seemed right.  Originally I intended to make these planters for some succulent cuttings from my wildly successful succulent garden (finally, I've kept plants alive!) but my husband and I found ourselves on a kid-free trip last weekend where I found an air plant vendor at a Farmer's Market.  I've always been intrigued by air plants and I'm stoked to have some of my own.  In hollowed-out plastic dinosaurs, nonetheless.  Can life get any better?


I found these hollow plastic dinosaurs at Walmart for a dollar each while searching for a slinky as a gift for a kiddo birthday party.  (When in doubt for what to give a kid, a slinky is awesome, right?!  Inexpensive, loved by generations, and made in the good ol' USA.)


Making the dinosaur transition from toy to planter is as simple as cutting a hole with an Exacto knife.  A box cutter would probably work, too.  Maybe even a steak knife.  I'm pretty sure there aren't rules on what you can and can't use to cut into dinosaur toys when you're a grown-up.


Since I'd intended to use this with dirt and succulents, I made a drainage hole.  And yes, I laughed at the placement...but it just seemed like an obvious place for a drainage hole. 

Then I spray painted those bad boys for good measure.  Ever wondered what caused dinosaurs to go extinct?  My current theory is spray paint fumes.


Since I went with the air plants, all I had to do was stick the plants into the holes I'd created.  Bam.  Pretty awesome, right?


The Long-Awaited Dining Room Revamp

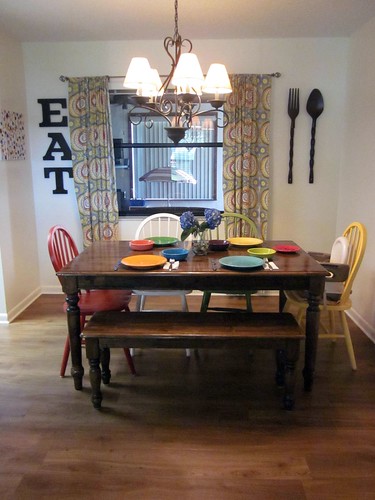
It was nearly a year ago that my husband and I bought an unfinished dining room table and bench that we vowed to make our own.  My husband, like always, held up his end of the bargain and had the table and bench stained and finished within a few days.  My job was to repaint chairs that we already had--and while I had good intentions (like I always do) it took me 10 months to complete my portion of the project.

Dining Room 009

Thank goodness I have a good friend like Sharon--I asked her to help me get this project officially OFF of my list and she made it happen.  And it was fun, to boot!  We spray painted the chairs and I officially marked this project off my looong to-do list.  (Thanks, Sharon!)  Spray painting the chairs took about two hours (a.k.a. one toddler nap time) with Sharon's help.  Well, two hours and 10 months altogether, but who's counting?

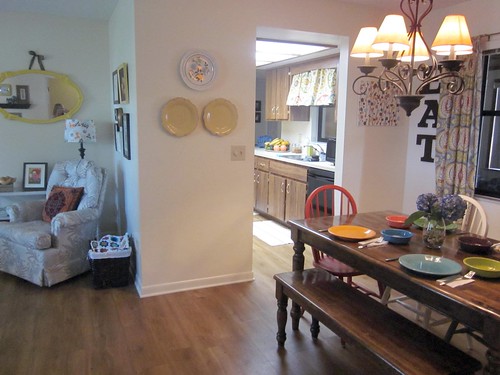
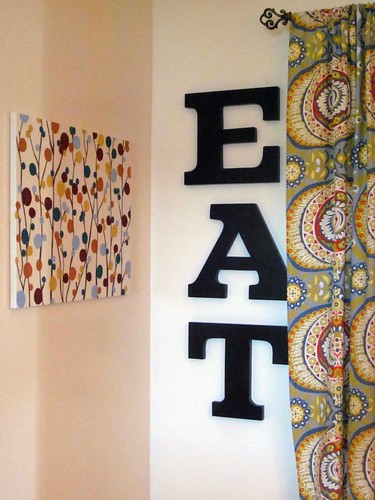
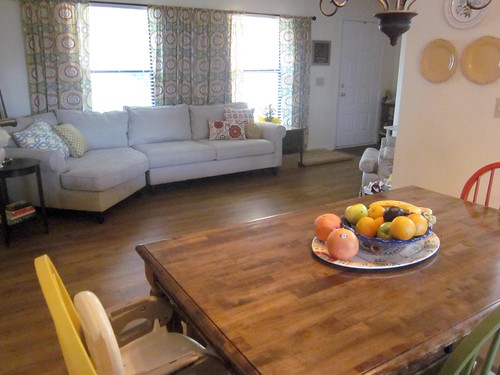
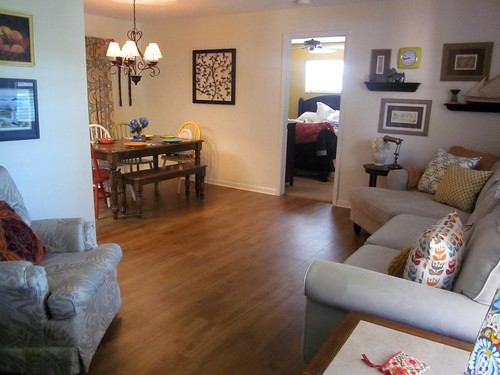
Since a picture is worth a thousand words, I'll shut up in a sec and just share the pictures of my dining room as it is today.  There are several angles so you can see it in terms of how it fits with the attached sitting room (that includes my cozy nook).  You'll also notice the DIY Art for Non-Artists is currently residing in the dining room.  Things move around a LOT in our home.  Except for the furniture... 'cause it's heavy.  The fork and spoon were a thrift shop purchase, as were the plates that adorn the wall.  The EAT letters were courtesy of a Pottery Barn clearance a few years ago.

Anyhow, without further adieu, here's my funky little dining room.

Dining Room 009

Dining Room 014

Dining Room 012

Dining Room 030


Dining Room 016

This dining room is totally not what I had in mind when I was thinking of my "dream home" years ago, but it totally suits our family right now.  I really love how it looks and it feels so COZY.  Isn't it funny how our perspective on beauty and style changes when we have kids? 

 Tristin Signature

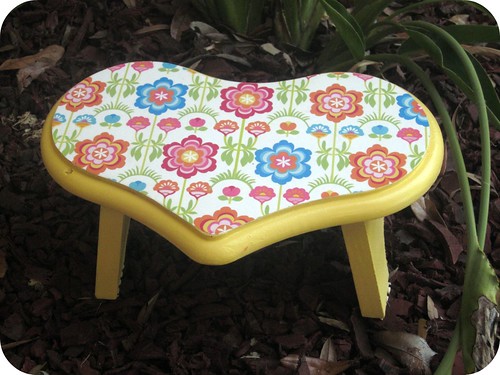
Fancy-Schmancy Heart-Shaped Stool

I know that some of you will read the title and think I'm talking about a heart-shaped bowel movement.  I'm not.  I'm definitely not.  That's not crafty.  That's gross.

Mod Podge Stool 006

Anyhow, I recently noticed a need for a stool in Junebug's bathroom.  She's washing her own hands now but I have to assist with helping her up and down to the sink.  Being a terribly independent little gal, she's not always so keen on having mommy help.  So, I thought a stool would make my little big girl happy.

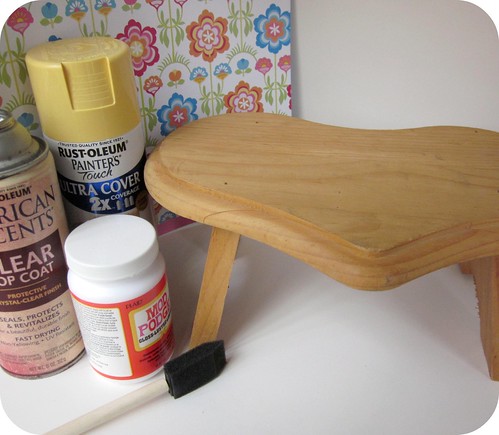
I found this beauty at my favorite local thrift shop.  It's just one of those generic bare wood pieces that you can find at most craft shops--I noticed from the tag on the bottom that it originally retailed for $9, but my thrift shop listed it for $3.  SOLD!

August crafts 037

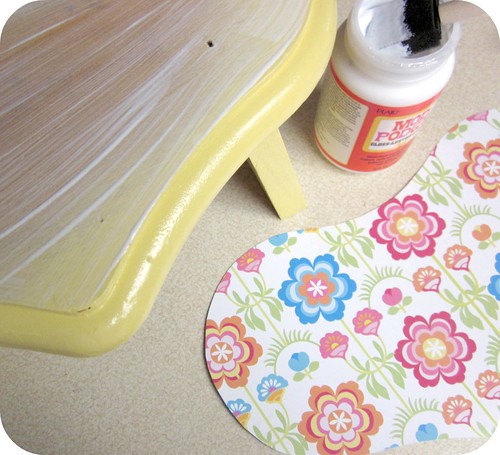
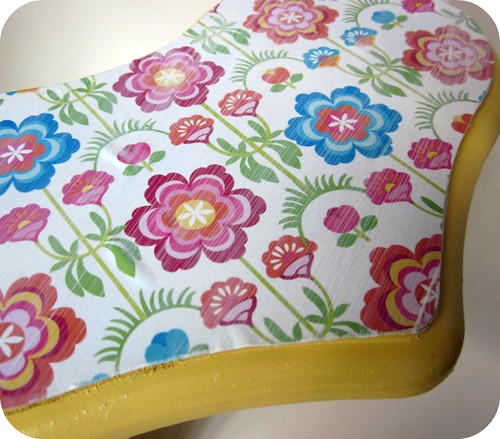
I spray painted the stool bright yellow (left over from my mirror) and once it dried, I mod podged a lovely piece of scrapbook paper over the top.  (Since Mod Podge is both a sealer and an adhesive I coated the top of the stool with a thin coat before and after the paper was applied.)

August crafts 040

You won't see the strokes once the Mod Podge dries.

August crafts 042

Once the Mod Podge is dry, spray with a clear sealer since feet and who knows what else will be stepping on the stool.

Badda bing, badda boom.  A darling one-of-a-kind stool.

Here's where it gets really real.

I thought I'd take a pic of the stool in action.   You know, I thought you'd like to see it.

Terrible idea.

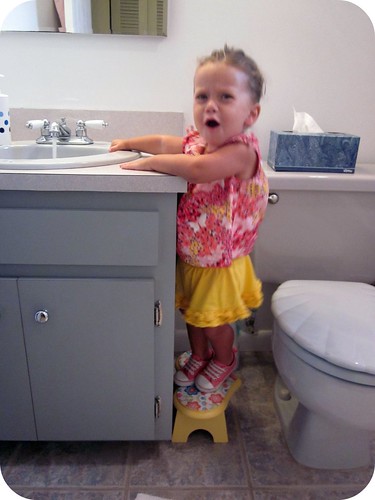
You see, Junebug, just like her momma, is short.  Like majorly short.

I told her she could use the stool to wash her hands but... it still doesn't get her to the faucet.  Which is terribly frustrating if you're two years old.  Apparently lots of things are frustrating when you're two.

August crafts 062

See?  I keep it real.  Really real.  I'll share with you my ugly 1985 builder-grade grey bathroom with blue tile (seriously, who picks blue tile?!) AND my fit-throwing toddler--all in the same post!  You're welcome.

August crafts 066

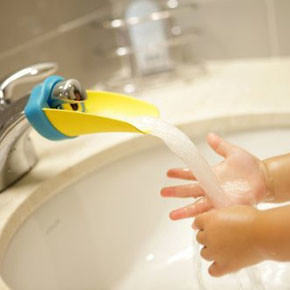
I think I may need to get one of these awesome inventions to complete the bathroom:

2011-aqueduck
Found via Pinterest. 

And here's the stool again, in all its finished glory--sans screaming toddler:

Mod Podge Stool 006


Cute, huh?


Tristin Signature


Cozy Nook Transformation (And the Introduction of my Funktastic Modern Eclectic Cottage Style)


I have some good news and some bad news.  The good?  I've finally created a term to classify my home decor style.  The bad?  It's a mouthful.  Are you ready?

Here goes: Funktastic Modern Eclectic Cottage.

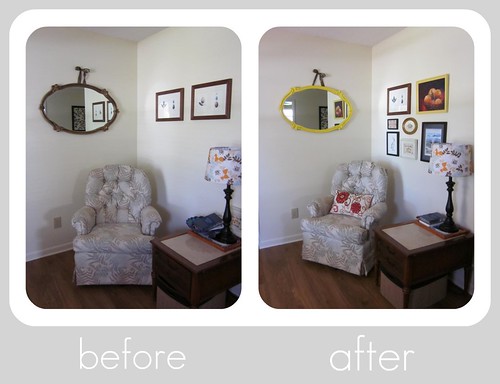
Aaah.  It feels so good to get it out there!  And to show you what I'm talking about, I'm going to share a recent transformation from my home.  It's my favorite cozy little nook.


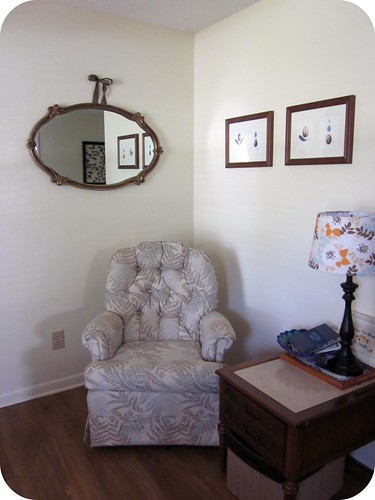
Cozy corner b&a

As you can see, there's nothing hideous about the nook but it lacks funk.  And funk is a necessity for a Funktastic Modern Eclectic Cottage.  Ya feel me?

Cozy nook 001

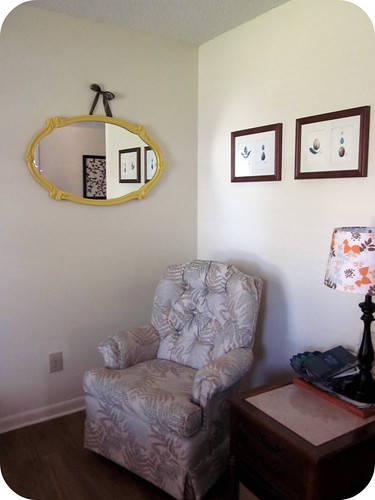
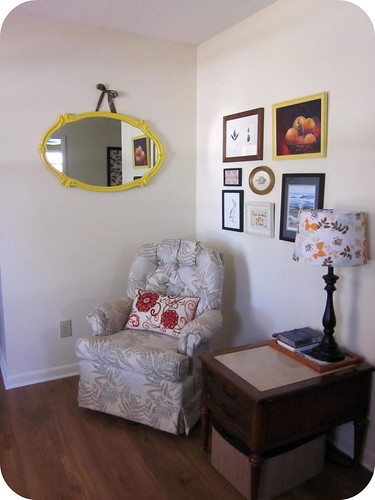
It's just a bit one-dimensional.  I thought I'd fix the problem by updating the mirror to a bright yellow.

Cozy nook 007

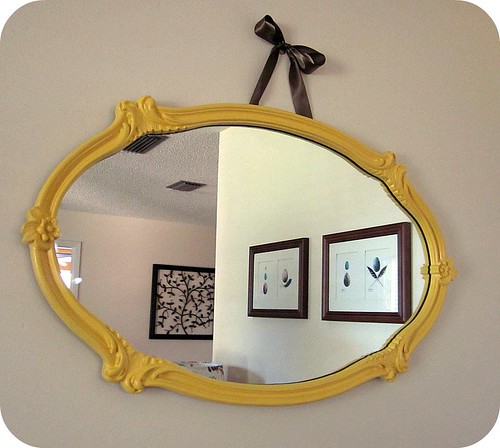
The yellow mirror certainly brought some funk into the nook, but it was still lacking.  (P.S. The ribbon above the mirror is there for the sole purpose of hiding a hook that the previous homeowners placed in the wall.  Pathetic, I know, when you consider the fact that we've owned the home for over 5 years.)


Yellow framed mirror

See what I mean?

Cozy nook 011

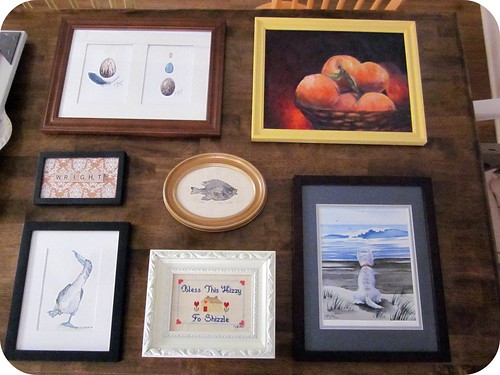
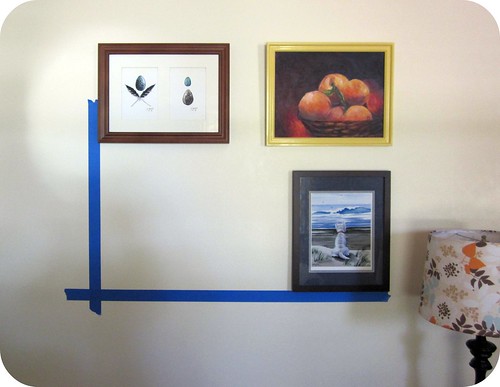
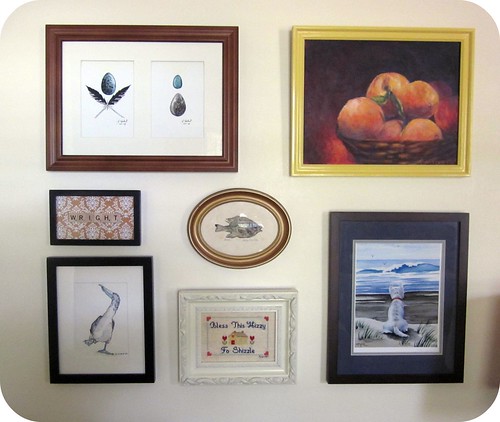
So, I shopped through my home and found some fun artwork to cluster together.  I played with the pieces I chose on my dining room table until I found an arrangement that I liked.

Cozy nook 012

Then I moved the arrangement to the wall.  A laser leveler and painter's tape helped me accomplish the nice square-ish cluster that I desired.  I wanted there to be at least some structure to the placement of the pictures on the wall so my husband (who is my opposite when it comes to decor) wouldn't hate it and deem me an unfit homemaker.

Cozy nook 024

This cluster makes me SO happy.  You have no idea.  In a future post, I'll be sharing a bit more information about where the art pieces came from so if you have any questions, please ask away!!  I'll include an answer on my next post.

Cozy nook 018

So, here's my Funktastic Modern Eclectic Cottage cozy nook, completed.  Love!  I think a nice round area rug would do some good, but I'm not worried about that right now.  I'm just happy that this transformation was FREE other than the half-can of yellow spray paint that I used on the mirror.  Score!


Cozy corner b&a


Here it is again, in all its glory.  Thoughts?  Suggestions?  I'm all ears! 


Tristin Signature

{Thrift Store Makeover} Bird Branch Jewelry Stand


Don't you love a good thrift store find?  I sure do.  Like really.   I really love a good thrift store find.  I brag about them for months--just ask my friends.

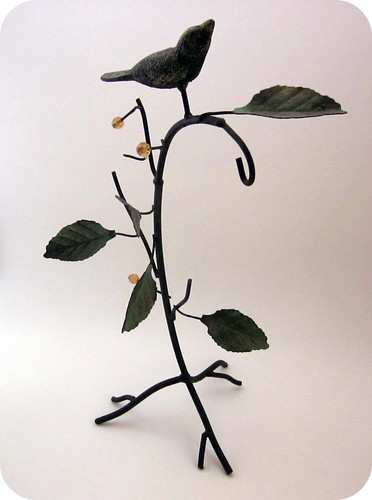
I recently had the pleasure of walking into my favorite thrift shop and finding this little diamond-in-the-rough.  Nice shape, huh?  I paid 2 bucks for it--boo yah!

Thrifty Branch Redo 005

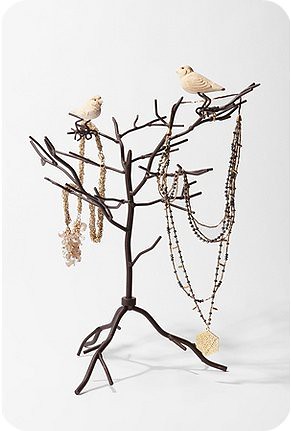
It reminded me a lot of the Anthropologie/Urban Outfitters jewelry stands that are popular right now.  Urban Outfitters currently has this Love Birds Jewelry Stand online for $39.   

UO Jewelry stand

I liked the shape of the one I picked up at the thrift shop, but I wasn't loving the wrought iron look.  So I washed it down (it was SO dusty) and spray painted it with a couple of coats of ivory spray paint.

Thrifty Branch Redo 010

Pretty awesome for $2 and a little elbow grease, huh?  What have been your latest and greatest thrift store finds?

Tristin Signature

Kid's Table and Chair Overhaul

Throw your hands in the air if you love hand-me-downs!  (That's my way of keepin' things gangsta!)

Table and Chairs Redo - Chalkboard Paint

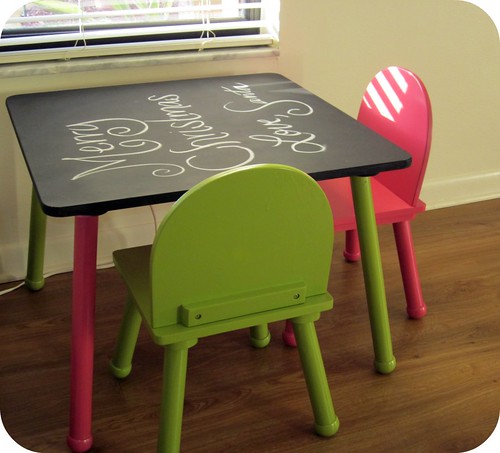
In December, my sister-in-law passed down a well-loved Dora the Explorer table that her gals had outgrown.  That very table ended up being Junebug's Christmas gift from Santa--that is, after Santa's elves did an overhaul!  (And it has taken me 3 months to actually post the transformation!)

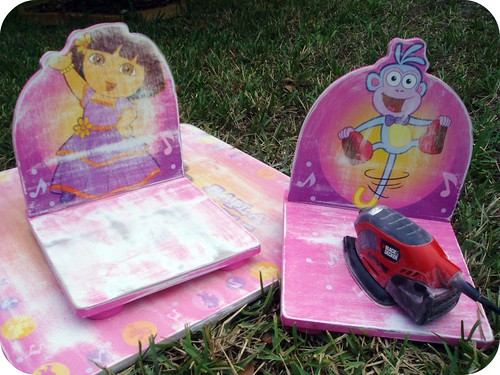
Here's what we started with...

Chair redo

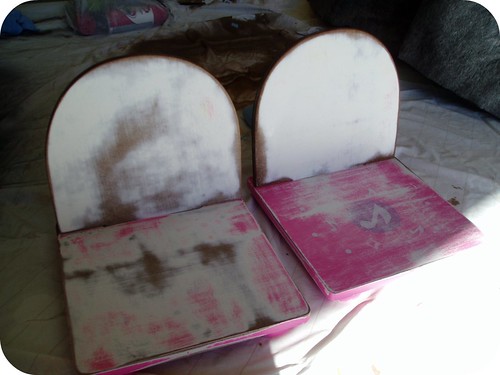
I forgot to take a photo before I started sanding the paint down.  I wanted nice plain chairs, and as you can see the chairs are formed in the same shape as the characters that are painted on them.  The "elves" didn't want to have funky shaped chairs, so we called in the assistance of our dear friend (and one of Junebug's favorite people because he always plays "3-2-1 BLAST-OFF" with her), Mr. Tim.  Tim does some fabulous woodworking so he had the tools and the skills to round off the chairs to make them a bit more uniform. 

December 22 2010 002

It's great to have other creative folks in your circle who are willing to help! 

Table and Chairs Redo - Chalkboard Paint

So, a few coats of spraypaint later, we had a table!  The top is chalkboard paint, which in hindsight is a bad choice for a toddler since now is the time to teach that it's inappropriate to write on furniture.  Live and learn, I guess.
Junebug with new table

Here's the moment Junebug discovered that Santa brought a new table and chairs.  Isn't that little Reindeer on her bottom to-die-for??

If you love chalkboard paint like I love chalkboard paint, keep your eyes peeled for Sharon's next post! 

Tristin Signature

Frame wall

Do you like my super creative title for this post?

Empty frame wall 3

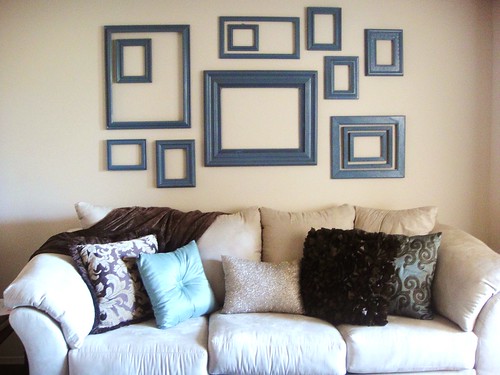
Today I'm going to share with you my wall of empty frames. I stole this idea from The Nester who made a similar one on the wall to the side of their stairs. Craftiness meets home decor!

Our living room wall was very bare. Like just-color-a-dang-picture-and-put-it-up-here bare. Since we are renting, we don't want to spend the extra time and money painting and then soon after, repainting. I also didn't want to buy a humongous piece of art and just slap it up there. Don't get me wrong - I love wall art, but I wanted to incorporate something a little more unique and interesting. (Even though frame walls are definitely not a new concept.)

Empty wall before frames

Here is our unbelievably bare wall [before]

Empty frame wall

And here is our awesome frame wall [after]
Ah! Much better.

The concept is simple -
1. Collect interesting frames of all sizes
2. Remove the art and/or glass panel from inside the frames
3. Play around until you find a beautifully well-balanced arrangement that you love
4. Spray paint your frames
5. And finally, hang them up

Some notable tips - 
  • You can also incorporate oval frames to give your wall a different dimension and look. 
  • Be careful when removing glass paneling or artwork from inside the frames! I had to use my husband's tools for some of the demolition (removing staples, etc.) and I even had to carefully smash one of the glass panels in order to remove it. If you do not want to go through this much trouble, then when you are buying the frames, keep in mind that you will have to remove whatever is inside of them. 
  • Find free frames on craigslist or buy them cheap from thrift stores.
  •  If you want the spray paint to adhere better, sand the frames down beforehand. Always spray paint in a well ventilated area, preferably outside.
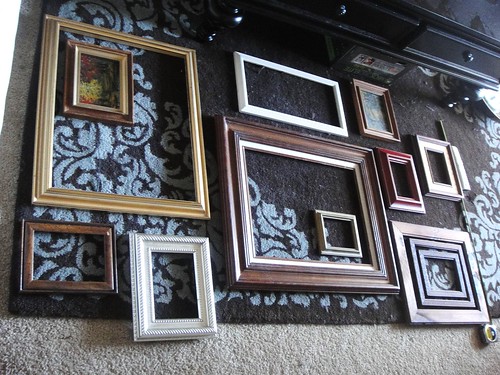
  • Some people who have also done frame walls say to lay the frames down on a large piece of butcher paper and trace the frames where they are positioned. Then adhere the paper to the wall the frames are to go on, and nail the frames on top of the paper and onto the wall. Carefully remove the paper. I decided to fore go that method. I just had my frames in the arrangement I wanted and then eyeballed their position on the wall. Below is a picture of my frame arrangement before the spray paint.
Empty frames
    If you have a sad, bare wall, then vamp it up with this fun and interesting display of 
    empty frames!


    Related Posts Plugin for WordPress, Blogger...