Pages

Showing posts with label Crochet. Show all posts

Mood Pillow

I often wish I had access to the yarn store 24 hours a day.  Sometimes, inspiration strikes and yarn is needed immediately, but unfortunately, my life doesn't allow for instant yarn gratification.  In fact, even when I have time set aside for such adventures, it's far from the hours of meandering that I long for.  Usually I know I have 10 minutes before the kids lose their cool and every single trip I have to scold them for unraveling the yarn in the cart.  Ah, the joys of motherhood.  
But sometimes, I pick myself up by my bootstraps and realize that my own home is practically a small version of a yarn shop and I'm able to move forward with projects as they come to me.  Recently, I noticed small amounts of several shades of gray (all Lion Brand Vanna's Choice) in one of my yarn hoarding baskets.  Ombre starting with black and fading to white seemed to be the obvious choice so off I started crocheting a simple square, not knowing exactly where it might lead me. It came out dark and moody, and I realized how it matched my own mood on that particular day.  But I wasn't exactly thrilled about my mood and imagined a sunnier, happier contrast.  So I made one.  It was a rainbow square. (All but one of the colors is Lion Brand Vanna's Choice.)

Turns out, those bad boys were destined to become something grand--a mood pillow.  One side is stormy and ominous; the other is cheerful, bright, and practically perfect in every way.


My little man is never too far out of reach. He likes to keep an eye on his weirdo mom who, while clothed in a pool towel, drags dining room chairs out to the backyard and starts snapping photos.  It must be a confusing scene for such a logical pup.  Not to mention, he says that both sides look identical to him.  Is it really true that dogs are colorblind?  For his sake, I hope not.

Puff Stitch End Table Topper


One thing's for sure--my home is a hodpodge of new things, used things, handmade things, and store-bought things.  In May, I'll celebrate 10 years of marriage and I must say that my style has morphed and evolved over this past decade--and I can only imagine that the cycle will continue.  With that understanding, I really don't put a whole lot of money into a lot of the smaller pieces of furniture that I buy.  All of our end tables are thrift store finds, and as you know, thrift store finds often come with their own... character.  (Read: flaws, nicks, dents, scratches.)  

I'm grateful to buy things that have been pre-loved, because then I don't feel the pressure of perfection.  It's a nice burden to be free of.  

The table topper I crocheted (last year) covers a cute little cast-off end table that I bought at Goodwill for $13.50.  It was a Target reject (still had the Target label attached) that has one tiny flaw in the veneer on the table top.  A vase of faux flowers has covered the flaw for a few years, but last year I made a puff stitch table topper, mostly because I just LOVE little puff stitches.   

I started with these instructions as the first rounds, and just kept going--increasing appropriately, of course.  So, yeah, pretty easy, and it was made only using yarn I had on hand.  It's all Lion Brand Vanna's Choice, in case you're curious.

I'm sure I should add some more details or some funny anecdote to end this post, but it's Spring Break and my eldest just woke from a nap--so, I'm checking out! Go forth and crochet!


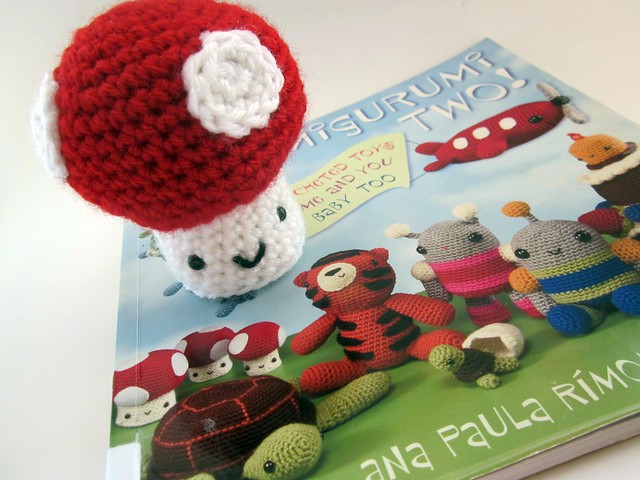
Amigurumi Two!: Crocheted Toys for Me and You and Baby Too

Amigurumi Book

A while back, as in before Bennett was born, I borrowed Amigurumi Two!: Crocheted Toys for Me and You and Baby Too from the library and actually made some projects!  (Don't worry, I returned the book.  I took these photos about two years ago and never shared!). It has seriously been so long since I've completed an amigurumi project, I now wonder how I ever spent my time on cute little things like these. Maybe one day when I'm eighty I can finally do it again. And maybe even get more than five hours of sleep, too.

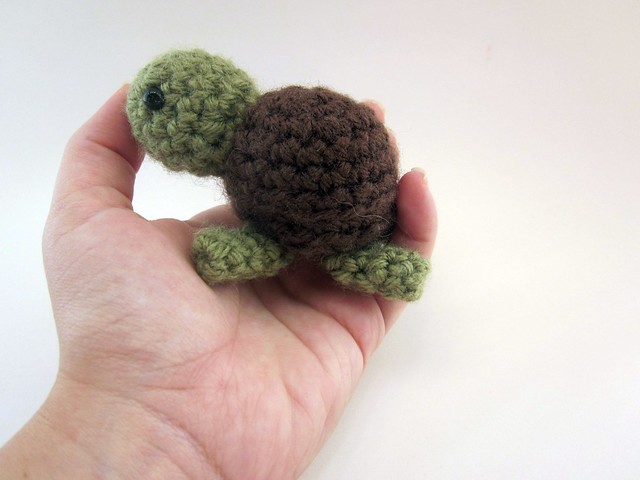
Tiny Turtle

He's so so so super-cute.  The author actually includes a pattern for a large momma turtle that these little babies (and some egg shells) can nest into.  Cool, right?  Yeah, I never made the momma.  My attention span just didn't allow for it.

Turtle in palm

It was a cute book and the author created very clear and concise patterns.  I just love amigurumi.  The counting is soothing and it's nice to be challenged occasionally by actually having to pay attention to a pattern.

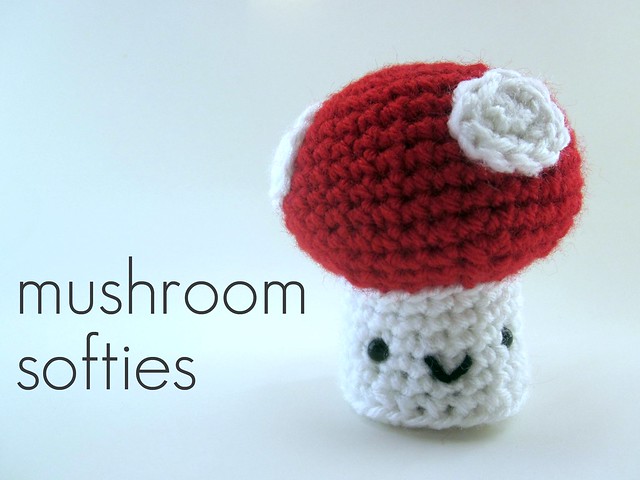
Mushroom softies

I'm thinking about using this little toadstool in some yarnbombing.  Like this:

{Source}

That'd be awesome to see on a park bench, right?!

Much love! 
Tristin

 (And if you want some yarnbombing inspiration, check out my Yarnbombing Pinterest Board.)


{Gray & Rainbow} Granny Poncho


With as much creating as I do (seriously, my hands always stay busy with something) you'd think I'd be better about sharing what I've done.  I don't always think my projects are worthy of being shared or perhaps the effort of documenting is more than I'm willing to put forth at the time.  This granny poncho, however, is one worth sharing.  Almost anywhere it goes, it receives attention and granny-love.  There's something about muted grays and vibrant rainbow stripes that is just oh-so-appealing!

The method of making this poncho came entirely from Le Monde de Sucrette. Don't let the name intimidate you; it's a blog that's written in plain English.  Does anyone else ever feel like the majority of the awesome free patterns you find on Pinterest are written in another language?  Oh, the huge problems we face.  ; )  With the "pattern" you can make a poncho of any size to suit any age.  Pretty dern awesome.

I used yarn entirely from my stash.  The colors are all Lion Brand Vanna's Choice (it's my go-to budget  friendly yarn) and the gray is almost an entire skein of Red Heart Super Saver (one of my least favorite yarns, purchased a few years ago when I was just a wee grasshopper, learning the ancient ways of crochet).  Unlike the first poncho I made for Elliott several years ago, she LOVES this one.

And now I kinda want one, too.

-Tristin

5 1/2 Hour Throw

If you follow me on Pinterest, you know that I love to pin crochet ideas.  The problem with all of the lovely crochet inspiration I pin  is that often each afghan you're looking at takes like 8 months of stolen moments, and though I'd love to make it happen, I tend to gravitate toward projects that are achievable in a weekend or two at most.  There's just something about having kids and their need to eat and have attention and such...


Enter the 5 1/2 hour throw from Lion Brand.  Yeah, it takes a lot of yarn.  A lot of expensive (yet super-awesome chunky-textured) yarn...but it's totally doable in a weekend.  Have you worked with Wool-Ease Thick and Quick yarn yet?  I'm telling you, it's so satisfying and smooth and buttery... Luxurious might be a good word.  And they don't even pay me to say that!


This 5 1/2  hour throw took me like 4 months to make.  Funny right?  Granted, I started it right after I had Bennett--so--you know, the whole newborn thing can be a real crochet-killer (and sleep-killer--but pretty awesome in every other aspect, right?).  I made it as a Christmas gift for my mother-in-law last Christmas (and I'm just now getting around to sharing it with you) and I'll be honest, I'd love to make one for myself one day--so yeah, it's awesome. 

If you're looking for some doable DIYs for Christmas gifting, this may be a fun one to try!  Maybe I'll make another this year!

Oh, and in the time it took me to make this throw and post it... my kiddos have.grown.so.much.  Elliott is in preschool now and Bennett (who we pretty much only call Benji) is walking around like a pro.

Doesn't time just fly?

Rosette Embellishments

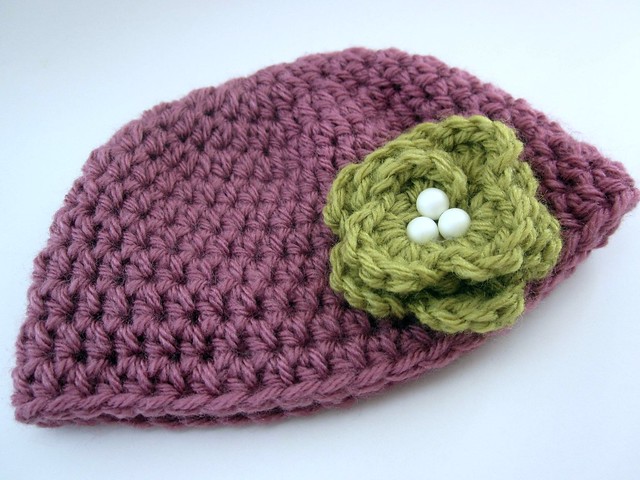
Sometimes it's all about the details, isn't it?  Especially if like me, you take the easy way out and make a simple hat for new baby gift-giving.

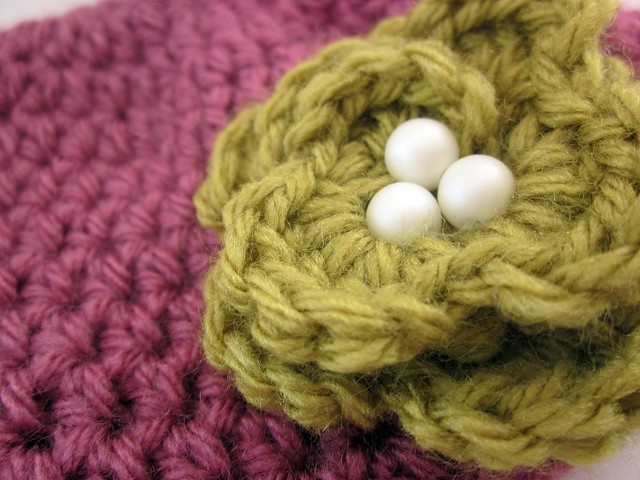
Pearl Bead Detail

It's no secret that I love to crochet hats, but a plain beanie for a baby is just too boring.  So embellishing is FUN!

Baby Beanie

I used this pattern to create the rosette that I attached to a simple baby beanie that I made.  Then I made a million more rosettes, just for fun.  I have hot glued them to alligator clips to make simple hair embellishments for Elliott.  They'd also make some cute headbands.

Rosettes 

And just in case you're wondering, none of these rosettes are being worn by the new baby gal because she's still hanging out in the uterus (we're 5 days "over" so far).  I joke to my husband that it must be like a 5 star resort in there, because neither of my gals has been in a hurry to come out.  Whatever.  All I know this time around is that I don't mind an "overdue" baby--they're a lot easier to manage while they're still nestled inside than they are when they come out. Right?!  Let's just hope she's not growing too much...  

Tristin


Angel Wings Pinafore

Angel Wings Pinafore

My little Bennett Mae is due in July, so naturally I'm nesting.  Not so much in the cleaning my house like a madwoman kind of way (though it's highly needed) but more in the crafting until all hours of the night kind of way.  I wish I had more time to blog but there are SO many projects that I want to do that I don't even post about the majority them (obviously, since I so rarely post these days).  It may take only an hour to complete a project, but by the time you document with photos, edit your crappy photos (in my case) and blog and edit for spelling and grammar (occasionally) you've wasted TONS of valuable crafting time.

All the while, you should have been cleaning your messy house.  (Or is that just me?)

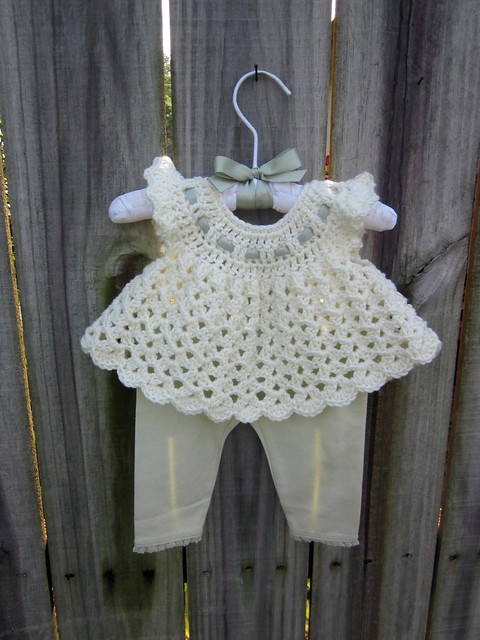
Messy house aside, I found a sweet pattern via Pinterest called the Angel Wings Pinafore.  I repinned it immediately.  And then I grabbed some yarn and about 2.5 hours later, I had a newborn-sized pinafore completed.

Ribbon Detail

I used Martha Stewart Crafts Lion Brand Yarn Collection- specifically the Extra Soft Wool Blend in Buttermilk.  What a gorgeous name for the color I used--Buttermilk.  Oh Martha, you never cease to amaze me.  I love this particular yarn.  Another great option for this pinafore would be Lion Brand Cotton Ease.  I have become a Lion Brand devotee, can you tell?  Cotton Ease is a nice cotton to work with, washes up well, and it's affordable.  Win, win, win.  The Martha yarns are a bit more expensive than the other craft store yarns, but so far they've proven themselves to be worth the extra cost in my opinion.

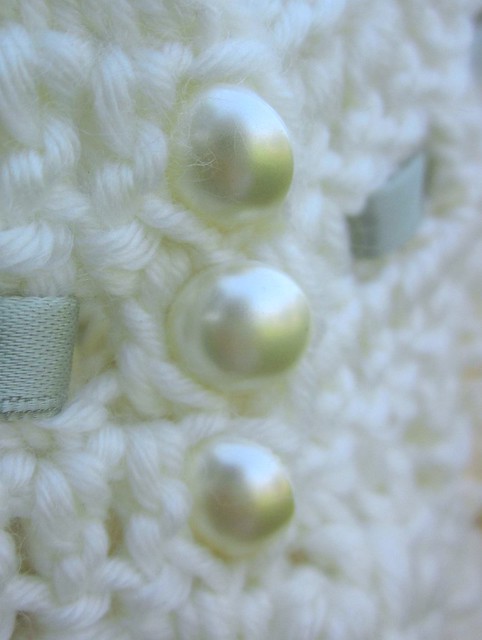
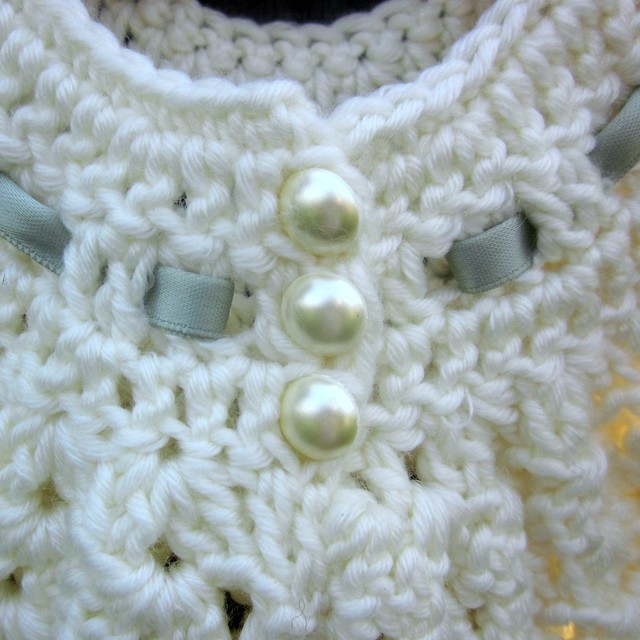
Button Detail

I used pearly buttons for the back.  So precious, and a great adornment considering babies are often thrown over the shoulder--why shouldn't the back have beautiful details?

Angel Wings Pinafore Button Detail

To add just a bit of color. I wove ribbon into the yoke and stitched it in on the back to keep it in place.  I think Martha Stewart would have liked my ribbon color choice--a calm celery green.

Pinafore with Leggings

I bought leggings at Gap Kids before purchasing the coordinating ribbon.  Gap Kids really has great style and awesome colors.  I looked in a few cheaper places for newborn leggings and was pretty disappointed with the offerings (primarily hot pink and black)--but Gap had so many fantastic babyish colors that it was hard to decide.  One particular store tried their best to sell me on their infant "Jeggings" (jean-looking leggings, for those of you who don't know) and I don't think I held back my look of horror at the suggestion.  Let's just say this sweet little pinafore was not intended to be worn with Jeggings. 

Jeggings.  Ha.  What a funny word. 

Oh, and wish me luck.  I'm going to my first kitting class tonight.  My goal for the night is not necessarily to learn to knit, it's more along the lines of not poking anyone's eyes out with my knitting needles when I inevitably get frustrated and lose my temper.

The Birth of a Granny Square Afghan

I finished a major project folks--you have no idea how huge that is for a distracted crafter like me!  The project only took a little over a year to finish. 

Granny Square 002

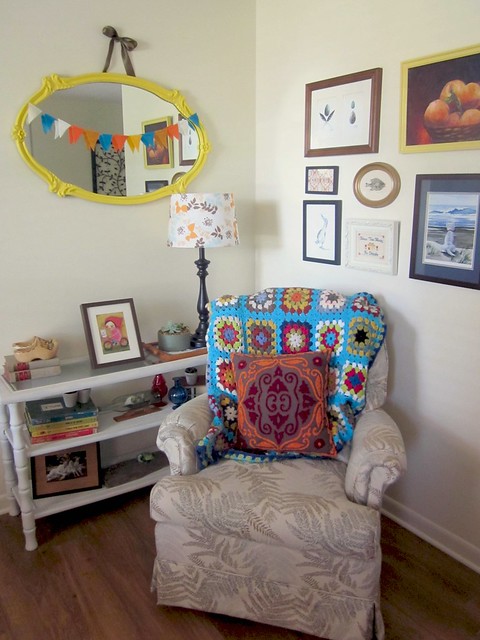
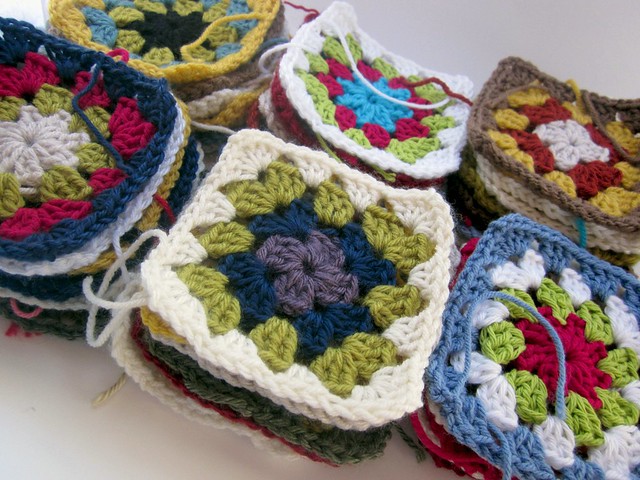
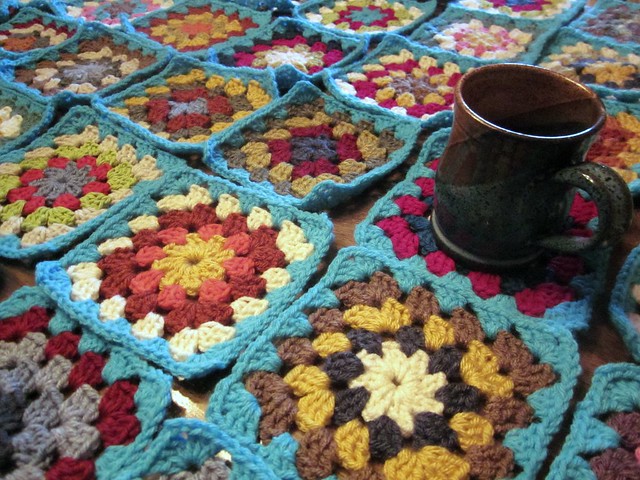
It's my very first granny square afghan!  This afghan is a true representation of what the granny square is meant to be--a scrap buster.  Not one skein of yarn (other than the binding color) was purchased with this project in mind.  It's made strictly from pieces of yarn left over from other various projects and some yarn that I inherited from others.

It all started like this...

Granny Squares 013

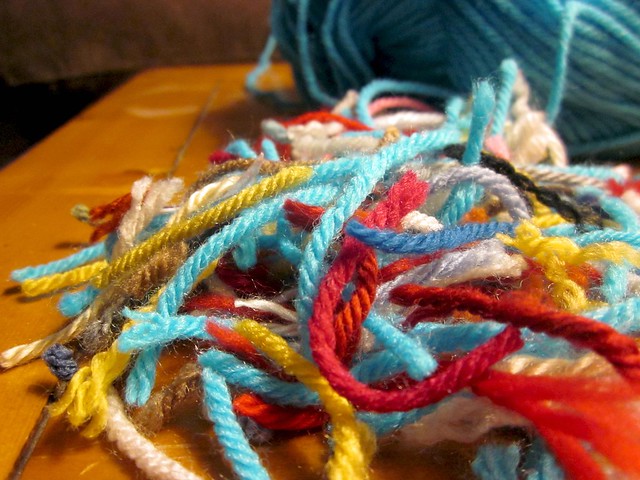
Here are my stacks upon stacks of squares, millions of ends just waiting to be woven in.

Have I ever mentioned how much I HATE weaving ends in?  Well, I do.  Hate.  Ughh.  But one at a time, I got it done.

Here's some proof:

Crochet and Amigurumi 038

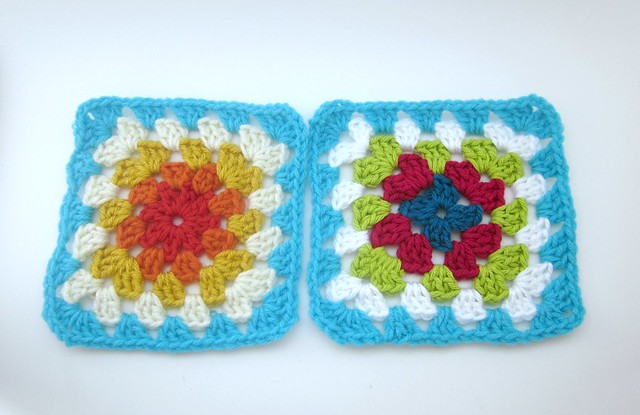
I edged all of the squares in a turquoise color (Pound of Love by Lion Brand--only $4.00 with an awesome coupon deal!).

Granny Squares 004

It seems like it took forever. 

Granny Squares 006

You know you're spending too much time crocheting when this is the only way your dog can get your attention...

Crochet and Amigurumi 041

I spent some time laying them out to evenly distribute the colors.

Crochet and Amigurumi 025

Crochet and Amigurumi 029


It came together beautifully (keeping in mind that beauty is in the eye of the beholder).  I realize not everyone shares my love of granny squares, bold colors, and funkiness in general.  If you leave a comment telling me how ugly this is, I will delete it so please don't waste your time.  Granny love only, please.  I know there will be some haters.  Keep it to yourself and go and comment on something you do like.  Even if it's elsewhere.  This is how you should handle all of your blog comments. Thanks. (Whoa, someone just got a little soapboxy!  Yeah, you don't want to mess with me today. Or any day for that matter.)

And here she is, in all her crazy glory:

Granny Square 005


I'm in love!

Crocheted Mary Janes

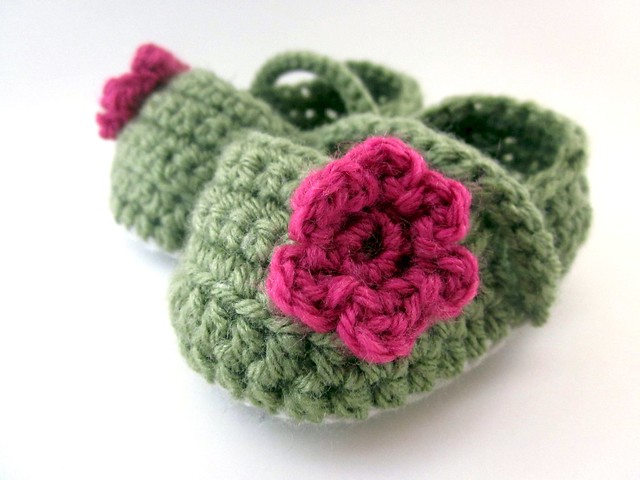
These Mary Janes have been on my to-craft list since I received the patterns several months ago.

Crochet and Amigurumi 064

So when I found out I was having a gal, I got on it.  And then I got to thinking...

Umm, I practically NEVER put shoes on Elliott before she started walking.  Well, my sister-in-law bought some of the cutest shoes ever (mostly from Old Navy) and those made it onto the kid.  But for the most part, shoes were totally overrated for her skinny little tootsies, especially given the fact that she was born in the summer in Florida (just like baby # 2 will be).
 
Crochet and Amigurumi 066

So, I sent these to a friend who's having a baby girl in a few weeks. You know her as Jessica of Sew Homegrown. (Yes, Jessica, they were originally intended for my kiddo--I'm admitting it!)

I mean, why keep something I'm probably not going to put on my kid?  Maybe, just maybe, someone else will use them. Or not.  And that's obviously fine, too.

As for the pattern, it was extremely well-written and even included pictures to help explain things.  As tedious as these little buggers were to make, they were pretty simple because of the good instructions.  Will I be making more?  Sure!  The pattern came from Crochet Dreamz.  I won the pattern as part of the Maybe Matilda Crochet-Along a few short months ago.

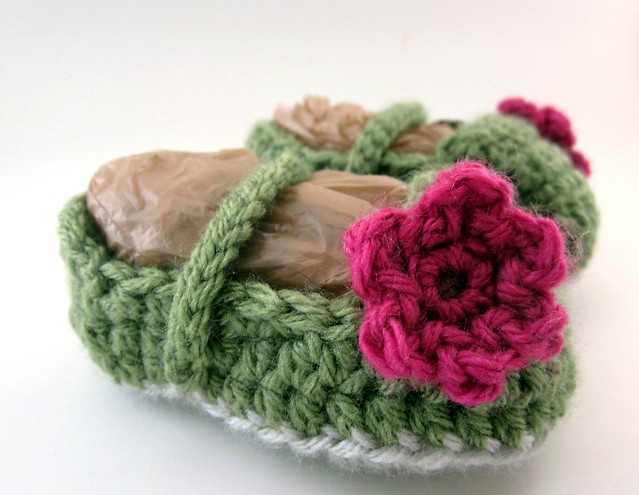
I learned some lessons in blocking shaped crochet items with these Mary Janes.  Here are some good tips on "blocking"  if you're interested in making your crochet items just a bit more crisp and professional.  I used a crumpled plastic bag for shaping these teeny shoes.

Crochet and Amigurumi 056

Blocking turned out to make these go from looking very homemade to looking very crisp--like handmade stuff from an expensive kids boutique.  So, yeah, worth the little bit of extra effort.

-Tristin

Day 11: Crocheted Snow-Covered Ornaments with Winkieflash of A Creative Being

Hello crafty pals and welcome to day 11 of the 12 Days of Christmas Series. Today, we have some awesome crocheted ornaments from Wink of A Creative Being. Without further ado...


This is the pattern I use to make Christmas ornaments with. It's fun, easy and fast. Let's get started! :)

What you'll need:
  • Regular, colored yarn, and white yarn. You can use whatever yarn you want, as long as the colored yarn and the white yarn are the same weight. (or close enough)
  • Sparkly yarn! For this pattern I used silver yarn (Lumina by DMC)
  • Stuffing. I use polyester filling, but you can use whatever you want, for instance yarn scraps!
  • Hooks. Use the appropriate hook for your yarn, and then go down 1 size. Because we will be stuffing the ornaments, you need a tight fit.
  • Stitch markers. You're going to be working in the round, so you'll need a marker to keep track of where you are.
  • A pair of scissors.
  • A darning needle, to weave in the ends.
  • The Christmas album of She & Him. Trust me, it's so relaxing to crochet by, and a must to get you in the right mood! :)

The terms I use are all US terms. This pattern consists solely of single crochet stitches, which are double crochet stitches for you UK people.

Alright, got everything? Here we go!

For this pattern, I'm going to use an existing crochet sphere pattern. It's written by Emily Premise-Conclusion, and I got it from her Ravelry page here. If you have a different sphere/ball pattern you'd like to use, go for it! :)

For this pattern and the yarn I'm using, which is Stylecraft Special DK, I'm using a sphere pattern that consists of 22 rows. The ornament will measure about 3 inches.

When it says 'inc' in the pattern, increase; make 2 single crochet stitches in 1 stitch. Where it says 'dec', decrease; single crochet 2 stitches together (sc2tog). I always use an invisible decrease. If you don't know how to do this, check this out.

With the colored yarn, we're now making the bottom halves of the sphere. If you're using a different pattern from mine, just follow it until you get to one row before the middle row.
  1. Start with the colored yarn. Crochet 6sc in a magic circle, or ch2, 6sc in 2nd chain from hook. (6)
  2. inc in each stitch around. (12)
  3. *1, inc* around. (18)
  4. 1, inc, 2, inc, 3, inc, 2, inc, 3, inc, 2 (23)
  5. inc, 4, inc, 3, inc, 4, inc, 3, inc, 4 (28)
  6. 3, inc, 6, inc, 6, inc, 6, inc, 3 (32)
  7. 1, inc, 7, inc, 7, inc, 7, inc, 6 (36)
  8. 6, inc, 11, inc, 11, inc, 5 (39)
  9. 8, inc, 12, inc, 12, inc, 4 (42)
  10. 15, inc, 26 (43)
  11. inc, 42 (44)
Cut the yarn but leave a little tail. Don't fasten off. Okay, that's it! You now have a colored bottom half of a sphere. I made a couple of bottom halves in different colors.


Now onto the really cool part! With white yarn and the sparkly yarn, we're now going to make the snow layer of the ornament.

So, with white and sparkly yarn attached, go as follows:
  1. Crochet around (44), using a spike stitch. If you don't know how to do this, check this out. Basically you're just making sc's, but you're inserting your hook into a different row, below the one you're in. I've done cascading spikes all around the bottom half. So I started 1 row below, then 2, then 3, then 4, then 5, and then back up again in row 4, row 3, row 2, row 1 and finally in the actual row.
    See how this creates the illusion of snow falling? You can vary your own spike stitch by making it more random, or leaving it out completely at some places. You're in charge! :)
  2. That was basically it. Now all you have to do, is complete the sphere. If you're still on this pattern, go as follows:
    42, dec (43)
  3. 26, dec, 15 (42)
  4. 4, dec, 12, dec, 12, dec, 8 (39)
  5. 5, dec, 11, dec, 11, dec, 6 (36)
  6. 6, dec, 7, dec, 7, dec, 7, dec, 1 (32)
  7. 3, dec, 6, dec, 6, dec, 6, dec, 3 (28)
  8. 4, dec, 3, dec, 4, dec, 3, dec, 4, dec (23)
  9. 2, dec, 3, dec, 2, dec, 3, dec, 2, dec, 1 (18)
    You can start stuffing now.
  10. *dec, 1* around (12)
  11. *dec* around (6). Fasten off, leaving a tail. With the tail, weave through each stitch in the opening. Pull tight to close.
And that's it! You've created your first snow-covered Christmas ornament :)


Wait, what is that you say? It doesn't look very Christmassy? Well, you're right. It needs something else! :)

Now we're going to make that little thingie on top with the loop in it, so you can actually hang this in your tree.
  1. With the sparkly yarn, crochet 6sc in a magic circle, or ch2, 6sc in 2nd chain from hook. (6)
  2. inc in each stitch around. (12)
  3. Sc around two times, so you end with 4 rows.
Finish off and leave a tail. Now pull the first tail through the center to create a loop, and tie the end to the other tail. Like this:


Now using the tail we left at the end, sew the loop thingie to the top of the ornament (the white part). And that's it! A completed ornament :)


Now you can easily adapt this pattern to make all kinds of ornaments. A couple of examples?

For instance, you could use self-striping yarn to create a stripy ornament:

Or use gold sparkly yarn and colored yarn to crochet a sphere:

Use rich, velvet yarn (which was impossible to photograph well!):


And if you crochet in the backloops only, you'll get a ridged ornament!

The possibilities are endless; let your mind go wild this holiday season! :)

xo,
wink

Little Hoot Costume

Ions ago, I shared a small brooch I made for a friend who lovingly called her baby "little hoot" while he lived in her uterus.  (What?!  That's where he used to live!)  Now that he's born, "little hoot" is named Jasper and we looove baby Jasper.  Especially Junebug.  She talks about him non-stop.

little hoot

Anyhow, Jasper's momma shared with me that she wasn't going to have time to make a costume for her little man like she'd wanted to.  Some lame excuse about having a newborn and lack of sleep and yadda yadda yadda... I say let the baby scream and craft away, but I guess that's just me.  (Umm, before you turn me in to the authorities, let me just say I'm kidding and I do not advocate neglecting your children so that you can craft.  Neglect your laundry and housework, yes, but never your children.) 

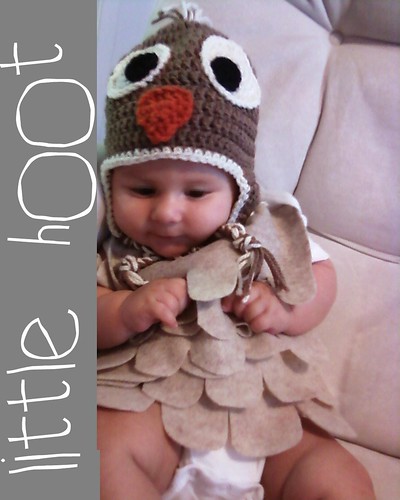
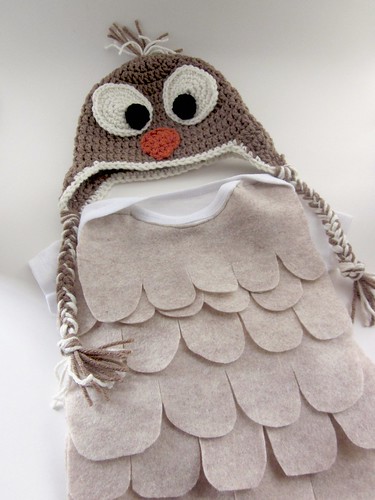
I took advantage of having my in-laws visiting and entertaining Junebug and here's the owl costume I made for "little hoot":


simple infant owl costume

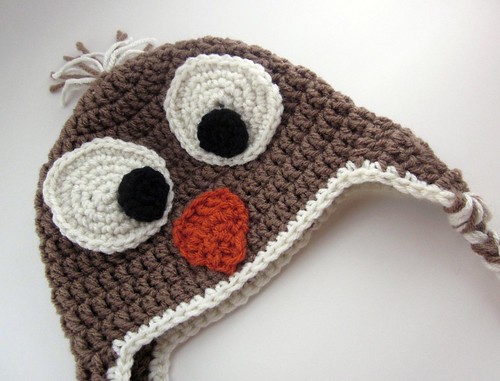
The hat was made using the Owl Hat pattern from Maybe Matilda's Etsy shop.  Be sure to check out her shop because she has some cute patterns you can whip up in time for Christmas gifts!

crocheted owl hat

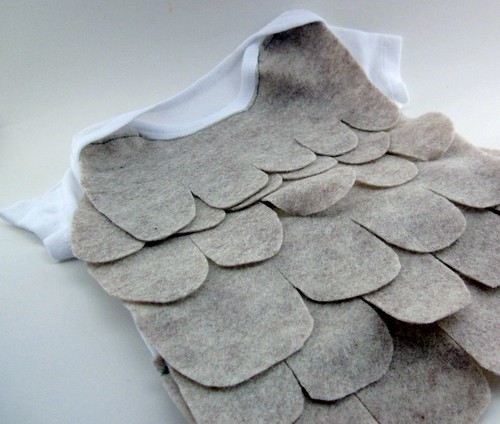
The body of the owl was made by cutting scallops into one side of strips of felt and sewing them onto a plain onesie.  Why not let your little one be super-comfy in a onesie rather than itchy in some polyester costume?

owl onesie

Little Jasper made the perfect owl.  Happy first Halloween, little man!
Related Posts Plugin for WordPress, Blogger...