Pages

Showing posts with label Magnets. Show all posts

DIY Photo Glass Magnets

Magnets 010

This magnet is pretty similar to yesterday's DIY Glass Magnets but WAY cooler because it's personalized with a photo.  Same directions, same concept, but by using a photo instead of scrapbook paper your results are a super-personalized and lover-ly treasure.


I used my favorite photo of Junebug for this magnet.  She was four months old when this photo was taken and she's without a doubt the most beautiful baby I've ever seen.  I may be slightly biased, of course.  You can use a photo of the most beautiful baby you've ever seen. 


It's currently holding a Papa John's coupon.  What, you never order pizza?  Yeah.  That's what I thought.  I know you do it, too.

My mother-in-law visited this weekend and commented on what a great gift this magnet would be for a Mom or a Grandma.  Hmm.  Do you think that may have been a hint??  She's right though; Mother's Day is right around the corner and nothing says "I'm a Mom" like a magnet with your kid on it.


Tristin Signature

P.S. There are still more magnets to come.   ; )

DIY Glass Magnets (The alternative to gift cards!)


Nothing says "I have absolutely no idea what to get you" like the gift of magnets.  You know?  But if they're homemade it's somehow legit.  I love to use the word legit.  I'm just too legit to quit.  I crack myself up.

Magnets 007


This whole craft came about when I found some lovely large-ish sized flat-bottomed glass gems at the Dollar Tree.  They're meant to be used as a vase filler, but there's so rules so let's make some magnets!  I thought I was brilliant as my mind raced with the possibilities of a new craft--only to come home see a similar project while perusing How About Orange.  It burst my crafty bubble, y'all.  Whatevs.  Great minds think alike.

On with the show...

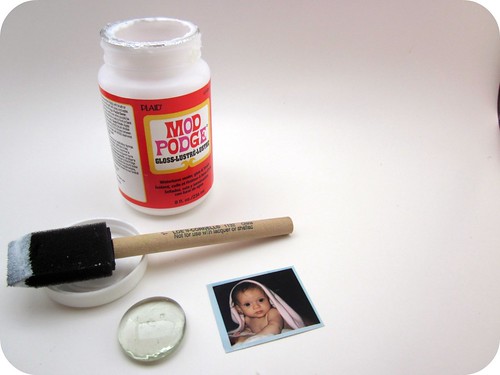
To do this lovely craft, you'll need:
Flat-bottomed glass gems (the kind for filling vases with; I found mine at the Dollar Tree)
Scrapbook paper you love
Mod Podge
Paintbrush
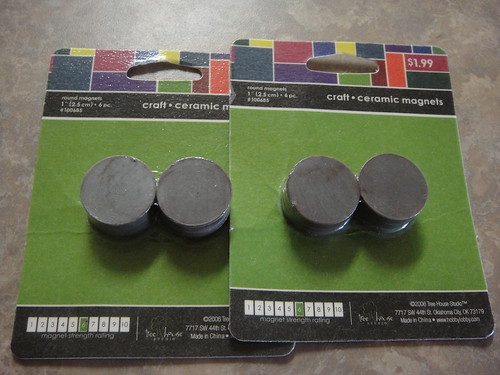
Magnets (strong ones since the glass gems are heavy)
Gorilla Glue
Clamps

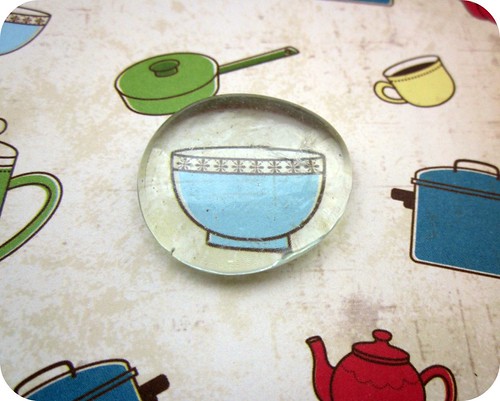
First of all, you'll want to roll a gem over your scrapbook paper in order to find a design that's suitable for a magnet.  Patterns are fun, but I have been holding on to this paper for months in hopes of the perfect project 'cause I love the cute kitchen objects.  This is the perfect use of this paper.  (I purchased it at Jo-Ann Fabric and it's still available there if you want it, too!)

DIY Glass Magnets

Then cut out your design to fit the bottom of the glass gem.  Trace if you need to.  (I needed to.)

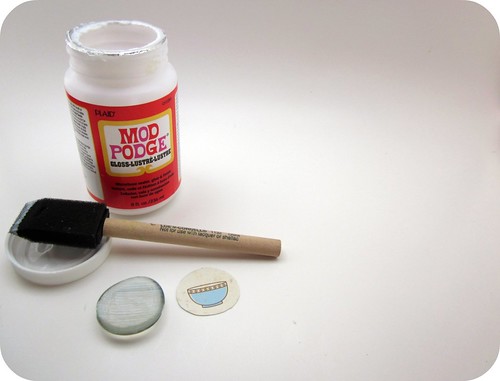
Apply a thin layer of Mod Podge to the flat side of the glass gem and affix your paper.  Let it dry.  (Duh.)
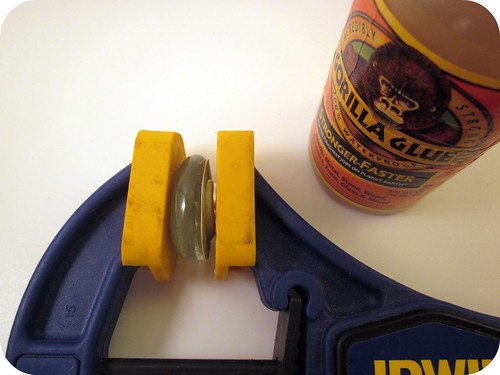

DIY Glass Magnets

Apply Gorilla Glue to back of gem and add your magnet.  Then clamp it per Gorilla Glue instructions. (Initially I tried to do this part with hot glue.  Fail!  The hot glue is not strong enough and it will just detach from the magnet at the first sign of stress.)


DIY Glass Magnets

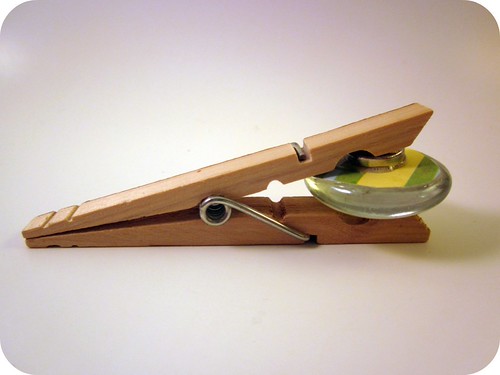
If you don't have clamps, you can use a clothespin, though I'll admit, it takes a lot more finesse.  Plus it feels better to use manly tools like clamps when crafting.  Don't you agree?

Clamping glass magnet with gorilla glue


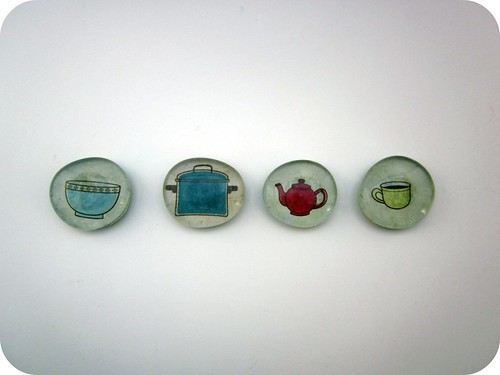
So, keep some of these simple little magnet sets on hand for those "I have no idea what to give you!" occasions that are sure to pop up.

Magnets 007


Isn't the theme of these magnets perfect for a kitchen??


A friend from church shared a yummy recipe with me that I can't wait to try.  It's on the fridge with one of my new magnets.


Keep your eyes peeled this week for a few more magnet crafts. I'm kind of on a kick.

Tristin Signature

Fabric Birdie Magnets

Adorable Fabric Birdie Magnets

One chic new trend I'm falling for quickly (and have been for a while) is the adorable and simplistic bird shape that's been adapted into everything. Pillow appliquesprecious baby room decorwall art... you can seriously do anything with this cutie shape. So, I made magnets.

Bird shape tracing

I used this bird shape as a template. I placed a thin piece of paper right on top of my laptop screen and traced it as is. Trace the wing as well. Don't forget to give yourself a seam allowance.

Bird template

Then, I just cut out a cardboard template and traced the shapes (both the bird's body and wing) onto different fabrics. This is another great way to use up any scrap fabric you may have in your stash.

Sew the fabric bird magnet together

Trace and cut out a separate piece of fabric for the backing. Since you rarely see the back of magnets, I used a plain white fabric. Sew the wing on. (I hand stitched everything using a back stitch, but a sewing machine would have been nice..)

Sew back on

Now sew the backing on leaving a hole at the belly for a little bit of poly fill. You could definitely sew these birdies with the right sides together and then turn them inside out. I sewed the seams right on top because I like how it looks. It gives it a playful childhood feel. Or something. Let's not get too technical here - I just think it looks cooler.

Stuff that Fabric birdie

Next step: stuff that fabric birdie! And then sew him up. Don't stuff it too full, or your little birdie will lose its shape, and then people will just look at your fridge and wonder why you have a colorful, fat blob as a magnet. Looking back, I probably would have just cut out one or two layers of felt and sewed them in as stuffing. I think that probably would have proved sufficient. But we learn from our mistakes. (And I have a few colorful, fat blob magnets to prove it. Poor birdies.)

Magnets for the Fabric Birdies

Finally, add magnets. I bought two packets of six magnets each (12 total) for around $4.00. It was the only purchase for the whole project. I hot glued one magnet directly to the back of each bird. But after having done so, my husband said "why didn't you just attached them to the fabric inside the birds so you can't see the magnet from the outside?" What a super craft genius. He's going to overtake me someday - you'll see. So, there are two ways of adding a magnet. (You'd better choose my way.) It's really up to you whichever option you choose. (But my way is better.)

Bird magnet collage

And you're done! Enjoy your birdie magnets!!
Yes, maybe I went a little overboard and made too many magnets.
I was powerless over all of the cuteness going on!

XO,

Related Posts Plugin for WordPress, Blogger...