Pages

Showing posts with label Embroidery. Show all posts

Embroidered TOMS


Before Elliott started preschool, I went on a search for the "perfect" everyday shoes.  She's a Florida girl through-and-through and lived in jellies up to the point that she was required by school rules to wear close-toed "tennis shoes".  Her narrow feet (SO unlike her momma's) don't agree with most kids tennis shoes on the market, and throw in the whole laces vs. velcro debacle and as it would turn out, picking shoes for your four-year old isn't so cut and dry.  Not to mention, this girl has her own preferences.  Sheesh.  

After much research and time spent reading reviews for all the shoes that hit my criteria (had to be able to be put on independently, option to wear without socks, breathable, good for romping on the playground, would look good with a variety of types of outfits, E likes the look) we settled for Toms. 

I may be a bit biased, here.  I have a pair of Toms, too, that I adore.  Navy blue, in fact.  Are you seeing a trend?  I think it's cool that for now she's excited to have matching shoes with me.  That day will pass, so I'm digging it while it lasts.


Elliott was SOO excited for school to start, but continued to voice one concern.  

"Mommy, what if you forget to pick me up?" 

It pretty much broke my heart.  I couldn't convince the girl that it was impossible for me to forget to pick her up, because when I am away from her, it's like a piece of me is missing and that I'm counting the minutes until it's time to get her again.  (Oh, I sound so sappy, but it's SO true!)  I decided I wanted to give her a symbol that would remind her that Mommy loves her and would always be back for her.  This symbol came in the form of a simple heart that I embroidered into the side of her shoe.  When she's sitting with her legs crossed, as kiddos in preschool do, she sees the heart that reminds her that Mom loves her and will be back for her.

Those worries have since left her tender heart, but my reminder remains, just in case they creep back in.


{Project deets: It's literally a freehand heart, backstitched with pink embroidery floss, a needle, and my hand. Cost is like 20 cents, if you have to buy embroidery floss.  Lucky for me, I have unimaginable amounts of embroidery floss, thanks to a momma who cross-stitched a lot in decades past.}


A Fox-y Potholder

Did you know Prudent Baby is having a contest to win one of two AWESOME Brother sewing machines?

Have you noticed that neither Sharon nor I ever use a sewing machine in our crafts?  Well, guys, that's because between the two of us, we don't have a sewing machine.

Fer reelz.  Sheesh.  So, in hopes to win their generous contest, I created this little guy and sewed every piece BY HAND!

In order to be eligible to win one of the sewing machines, you had to create a potholder.  That's it!  The deadline for the contest is tomorrow--and as usual, I'm running behind!  In my defense, I started this potholder right after they announced the contest, but hand sewing is not a quick process for me.  If it was, I probably wouldn't need a sewing machine.

So, Jaime and Jacinda, if you're here reading our little blog, here's why I need a sewing machine:

1.  I don't have one but I know how to use one.  (I saw many of the potholder entries and honestly, they ALL looked machine sewn.  That means the person who made them has a sewing machine--therefore simple reasoning suggests that the people making the other entries don't need yet another machine when poor souls like me don't even have one!  Right?)

2.  I'm a contributor to a craft blog.  A CRAFT blog.  And I don't have a sewing machine.  Pathetic?  Yes.  My blog-mate doesn't have one either.  It's like we're missing a limb.

3. I have several sewing projects started, but not completed because...I don't have a sewing machine.  Are you getting the picture?

4. I could just buy a cheap machine, but you get what you pay for when it comes to sewing machines.  I'm not in a place right now where I can justify a several hundred dollar machine--so winning one would be super-fab. 

5.  I have tons a good-sized stash of fabric that needs to be used! (Including awesome home decor fabric that I bought for a song that severely needs to be made into window treatments.)  I'd use my fabric, but I don't have a...well, you get the picture.

6.  When I have used a machine in the past few years, it has been my Mom's and, well, her machine is a cheapie that sews extremely inconsistently and is wrought with problems (she admits that it's true!).  In other words, I need a new machine that Mom and I can both use (she only lives a few blocks away so we don't mind sharing!).

7.  I want to make a quilt!  It's on my bucket list.  My bucket list for goodness sake. 

The list could go on and on, but you get the gist, right?  By the way, yeah, I know I sound whiny and pathetic--but it's all in good fun.  And really I'm happy without one.  But it would enrich my life SO much to be able to sew dresses for Junebug and to finally make a quilt.  I'd be ecstatic. 

If I don't win? 

Well, I have a super-cute potholder that I would not have made if it weren't for the contest, so I guess I'm already a winner!

To embellish the potholder, I drew this little fox (after learning that Jaime from Prudent Baby thinks that foxes are the new owl!) and appliqued him on to my fabric with a blanket stitch.  Before I stitched him down, I fused him to the fabric using Steam-a-Seam to make sure there was no shifting, etc.


I quilted the potholder with a simple running stitch and then used double-fold bias tape for the edges.  Naturally, I used Prudent Baby's "How to Sew with Bias Tape" tutorial to ensure I edged it correctly.


There it is, in all its glory.


So, who thinks I'm gettin' a sewing machine? 
Tristin Signature

Easy Custom Embroidered Ornament

Do you like my super creative, non-descript title?


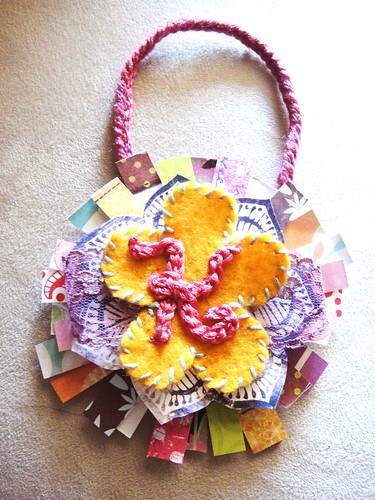
custom embroidered ornament with scrapbook paper background


Christmas is the time for giving. (Yes, I know – soo cliche, but there are only so many ways to say it!) Tristin has already shared with us her idea for a yummy gift for friends as well as other precious gift ideas like her cameo bag. I guess it’s time to share some gift ideas that I have.

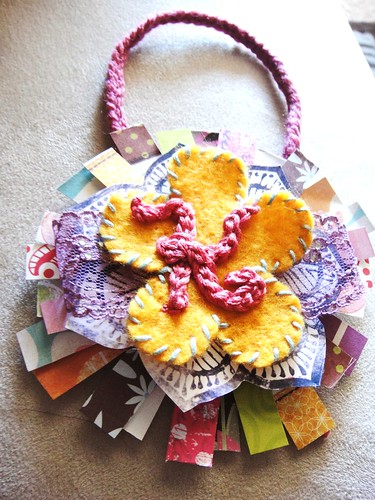
I made these custom embroidered ornaments for my friends with their last name initial in the center. They aren’t at all what they sound like, but it is incredibly difficult to describe these ornaments, and even worse to come up with a name for them. But that’s probably because they’re not a real thing yet. When they catch on, we’ll have a name for them. ;) There’s really no method to these ornaments… it’s just whatever you want it to be. You can put anything on these bad boys – beads, feathers, glitter, rocks… whatever you can think of. I hope you’re super duper inspired right now.

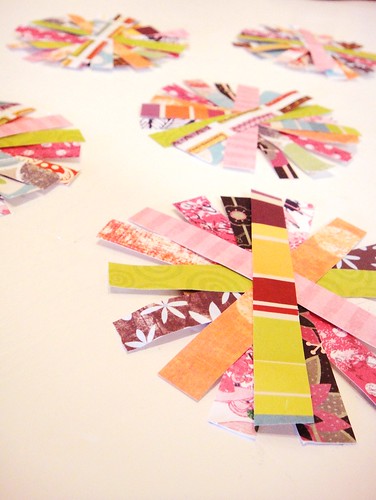
ornament scrapbook paper flower background


I started mine off with a scrapbook paper “flower” background. (Oh, did you know that I’m obsessed with scrapbook paper? Cause I am.) I got the inspiration from Amy Heller's Flower Embellishments from Scraps. The only variations I had were making the cardboard circle using a high-tech tea candle and hot gluing the strips of scrapbook paper right onto the circle.

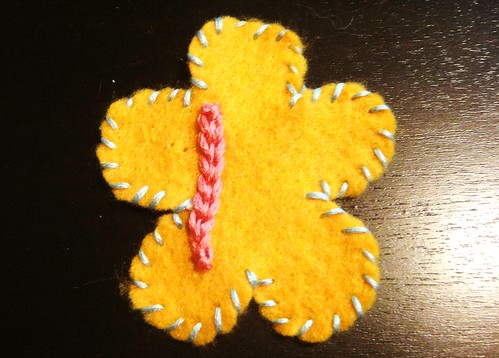
felt flower with chain stitch embroidery


Next, I cut a flower out of felt and added a fun edge with embroidery floss. Now is where I admit that I have tons and tons of embroidery floss, but no embroidery experience. While I was searching online how to do thick embroidery, I came across a technique called “chain stitching”. I’m sure all my crocheters recognize that term. No, it doesn’t mean the same thing in the embroidery world. And no, I didn’t attempt to learn how to do it. Instead, I chain stitched (the crochet way) two threads of embroidery floss together to create a nice thick chain. I then shaped this into whatever letter I wanted and attached it onto my felt flower with embroidery floss. Maybe someday I’ll learn how to embroider properly… but for now, the “Sharon stitch” will have to do.

custom embroidered ornament with scrapbook paper background

Thoughts? Comments? Embroidery tips for me? All are greatly appreciated!


signature

Doggie Bag (and not the kind from restaurants!)

I'd be remiss if I didn't start by saying that I am digging this COLD Florida weather! A few nights ago it dipped down to a chilly 29 degrees--what?!  It feels like Christmas and I hope the cold snap lasts a while...let's just hope my outdoor plants survive it! 

This Christmas, my brother's wife and I committed to only make handmade gifts for one another.  One of the projects I chose to make for her is an embellished canvas bag.  I always pass by the canvas bags at Hobby Lobby and feel inspired, and keep on walking.  But when I saw the plain canvas bags on sale, I snatched 'em up and was immediately flooded with ideas on how to decorate the blank canvases...

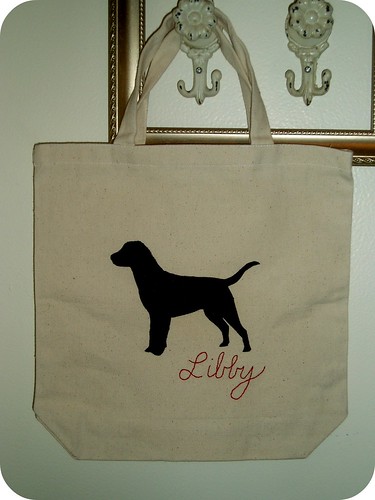
Here is my favorite completed bag:

Doggie Bag Complete

I settled on using freezer paper stencils.  There are about a million freezer paper stencil tutorials out there, so I won't bore you!   Craftster has a very straightforward tutorial here.  It's a great craft for those who are not "crafty" because it requires very little in the way of specialized tools--and very little skill, too!

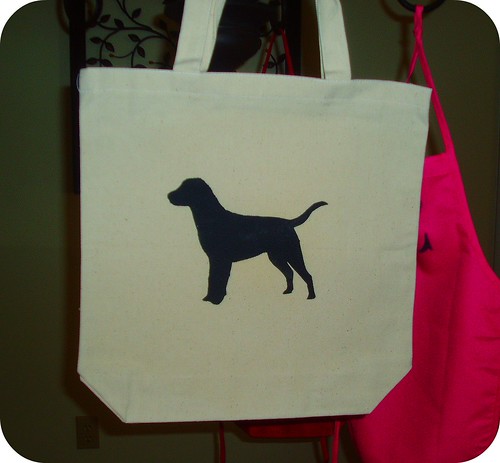
To find the Labrador silhouette image, I simply did a google image search.  Pretty easy, right?  Then I followed the instructions from Craftster.  Here's what I ended up with:

Freezer Paper Doggie Bag

It looked pretty plain to me, so I pulled out my stash of embroidery floss and got to work.  If you're new to embroidery, Jessica from Sew Homegrown recently had a guest provide an embroidery primer, complete with some really great links.  

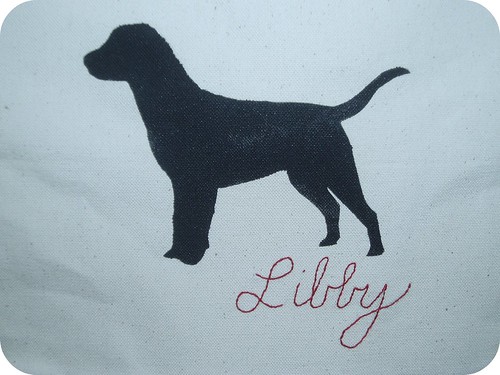
Using a backstitch, I wrote the name of my brother and sis-in-law's lab, Libby (short for Liberty). 

Don't you think it really livened up the bag?

Doggie Bag with embroidery

I think that any dog lover/owner would be thrilled to get a bag like this with their favorite breed on it.  The embroidery adds a very special "custom" touch.

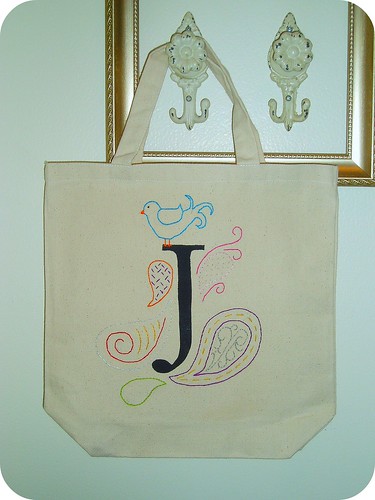
After making this bag, I realized it was a bit more dog-centered than I'd anticipated, and I thought my sis-in-law would appreciate one that was focused a bit more on her.  So, I found a great website that offers free printable alphabet templates and downloaded her initial.  I embroidered some paisley shapes with bright colors, and was quite pleased with the funky bag that resulted.

Initial bag with paisley embroidery

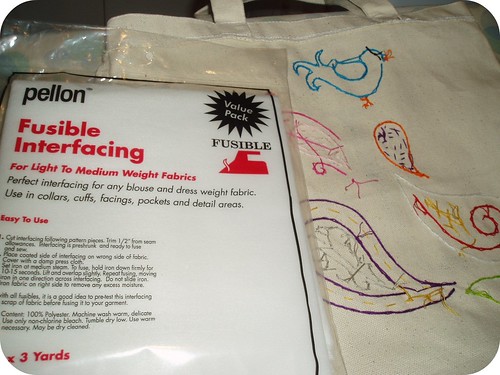
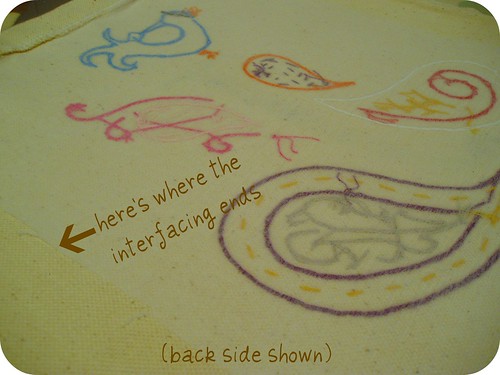
The only problem left to tackle was the ugly backside of the embroidery.  You know, the knots, the weird looking stitches, etc...  To handle that problem, I looked to my sewing notions drawer and grabbed some fusible interfacing.

Back side of bag and interfacing

The bag is turned inside out, showing the funk that was hiding inside the bag.  The strings on the back could easily snag and break once the bag has been used a few times if it's not covered.  I cut a piece of interfacing big enough to cover the area of gnarly stitching and ironed it on according to the package instructions.  Voila!  A usable AND gorgeous canvas bag (if I do say so myself!).

Interfacing over back of embroidery

If you're still struggling for last-minute gift ideas for the holidays (or any occasion) these bags are really simple, quick, and inexpensive--and thoughtful, too.

As always, questions, comments, and constructive feedback are appreciated!

Tristin Signature

Related Posts Plugin for WordPress, Blogger...