Pages

Showing posts with label Wreaths. Show all posts

DIY House Number Plaque


Hey!  Today I have for you the simplest of crafts that adds a fun touch to the exterior of your home.  I bought an old Lenox platter from a thrift store and hung it inside my home for a while.  The only problem was that it was exactly the color of the interior walls of my house (I know, white walls, we're SO boring) so I never loved it.  

Since it already had a plate hanger on it, I decided to try it outdoors.  Cool, but it needed something.  So, natually I went to Hobby Lobby, grabbed some of their numbers (and paid for them, I might add) , glued 'em on with E-6000 and the rest is history.  And I literally mean history--I actually did this project two (TWO!) years ago and I'm just now sharing it.  But hey, now you know the glue lasts outdoors--I have proof!


Supplies:
Thrifted platter
Numbers (or letters could be cool, too)
Strong adhesive (E-6000 should be in every crafter's arsenal.)
Plate hanger

Glue the numbers on your platter/plate/tray and let cure according to adhesive directions.  Then hang it. Pretty straightforward stuff, right?  Really, it's just a good jumping board--imagine the possibilities of what yours could be!

My total project cost was around $5-6, because I can't quite recall how much I paid for the platter but it was inexpensive.  And you guys know I love cheap crafts.

Much love,
T

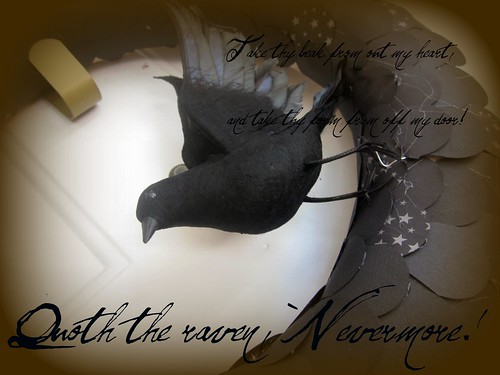
The Raven Wreath

Let's start with a quick excerpt from Edgar Allan Poe's well-known poem, The Raven:

"Take thy beak from out my heart, and take thy form from off my door!'
Quoth the raven, `Nevermore.'"

raven wreath

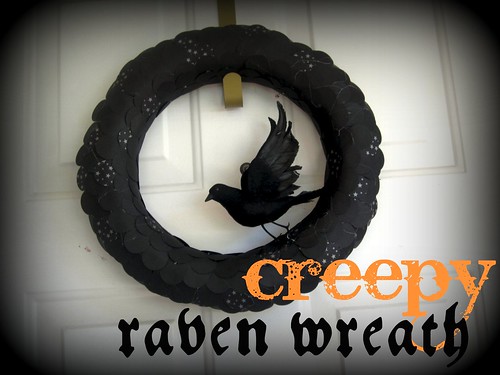
In direct opposition to Poe's request to take the raven off of the door, I'm going to share with you the Raven-inspired wreath I made this year (which is proudly displayed on my front door--sorry Edgar!)

I used plain black cardstock for this wreath, but also threw in a sheet of starry scrapbook paper just for fun.  My goal was to create the look of feathers or scales (depending on your imagination).  I snagged this raven at my favorite thrift shop for a buck--but they're available at most craft stores for about the same price.

Fall Crafts 030

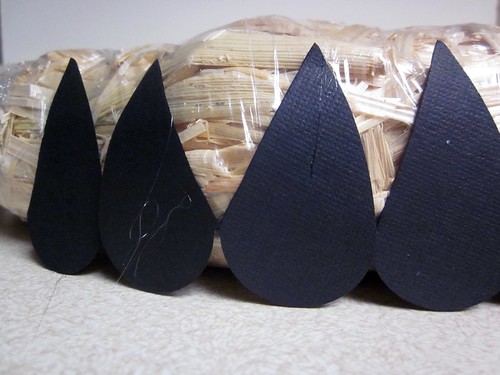
To make the scales/feathers, I used a heart-shaped punch and then cut each heart in half.  Obviously you don't have to use a punch--you can use scissors and this would be the perfect time to do free-hand cuts.  No need for perfection on what is meant to be a creepy wreath!

Fall Crafts 033

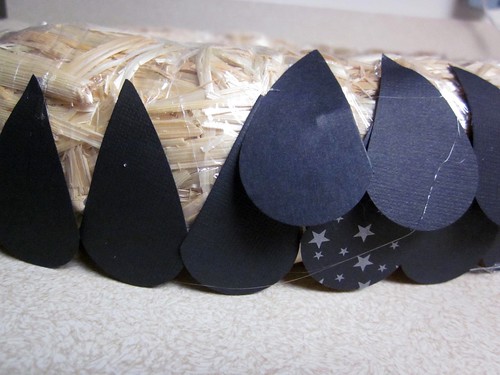
Hot glue is the perfect medium for affixing the paper to the wreath, and if you stagger the paper just right you'll cover the wreath without showing the ragged straw form below.

Fall Crafts 035

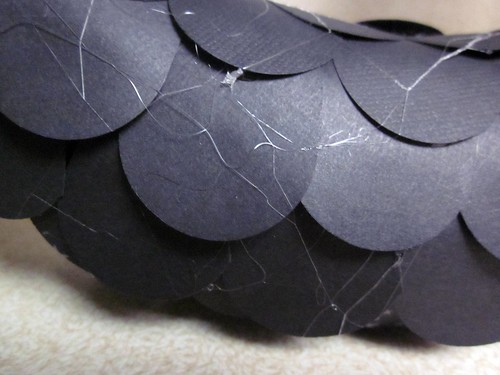
I left the hot glue strands because they kind of look like spider webs.  It had nothing to do with laziness and the fact that didn't want to spend an extra 5 minutes picking them off.  Yeah, right.

Stick your bird on the wreath, and there you have it!

poe quote raven wreath

P.S. A few days after I completed this wreath, Dana from made pinned this wreath on Pinterest


Very similar, huh?  Made with felt cut into oval shapes.  I almost decided not to share the project I had created after seeing this similar wreath, but then I got over it!  With so many blogs out there, it's tough to be original even when you think you're being original.  In the end, great minds think alike.

Tristin Signature

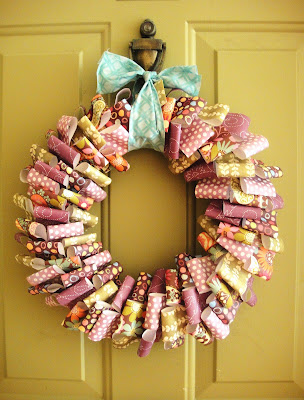
Scrap Candy Designs makes a Patterned Paper Wreath

Are you sick of our Patterned Paper Wreaths yet?  I hope not!  One of our readers, Crystal from Scrap Candy Designs made Sharon's version of the Patterned Paper Wreath with a slight change and had fabulous results that we can't help but want to share.


Crystal cut her paper into 1"x6" strips (Sharon used 2"x4") and came up with super-fluffy and full results.  Didn't she do a great job?


If you want to see scrapbook paper used in its intended form, check out Scrap Candy Designs for some inspiration.  Sharon and I will continue to use it in every form possible besides scrapbooking 'cause we're rebels like that!
Tristin Signature


P.S. If you're a reader and you make one of our crafts, please let us know.  We'd love to see what you've made and perhaps share it with our readers!

Patterned Paper Wreath - Remix!


Did you know that the first post Sharon and I ever worked on together was her Patterned Paper Wreath?  It was several months ago, before Two Girls Being Crafty was even a thought, and I was blogging elsewhere.  Sharon told me about a craft she was making and I asked for pictures so I could share it with my readers, and a very popular wreath was born.

Here's Sharon's awesome original wreath:

So, now I have made Sharon's Patterned Paper Wreath like three or four times...  Each time using the same wreath form but different festive papers.  Honestly, as cute as it is, I was ready to mix it up a bit.  You crafty gals know what I mean.  You can only do the same craft so many times, right?  So, here's a remix on the original. 

You'll need the same supplies as you do for the other wreath, which is:

5 or 6 12x12 sheets of scrapbook paper
Hot glue
14" wreath form
Ribbon or fabric for bow, or some other sort of embellishment


Here's the paper I chose.  If I were to do it over again, I'd do 6 pages of paper instead of just 5. 


Anyhow, cut your scrapbook paper into strips measuring 1"x4".  This means that you'll make 36 loops from each sheet of paper.

To make each loop, all you have to do is fold the paper in half (without creasing, of course) and glue the ends together.  You'll end up with a pile of loops!


Lay your wreath down on a flat surface and start gluing the loops on with the round end of the loop touching the surface.  This mimics the wreath hanging on a flat surface, so it's important to start this way if you don't want naked places on your wreath.  Go around the whole wreath gluing on your loops...


Then use the same basic method for row 2, and so on...


I crocheted an embellishment 'cause I love to crochet these days and I have lots of scraps of yarn.  You can buy a flower or make a flower, or do a bow of some sort--the possibilities are endless.  Or you really don't have to embellish at all--you can do whatever you want to do!  I made a fabric-covered button for the center of the flower to add another layer and some extra texture.  (Tristin's note: because some readers asked for it, you can learn how to make these crocheted embellishments on this post.)


Here she is, in all her glory!


If you make one, please send us a link to your site!  We'd love to check it out. 

So, what do you think about the Patterned Paper Wreath Remix?  I'm obviously already in "Spring" mode!

Tristin Signature

More awesome wreaths!

Happy New Year!  Is it just me or are you breathing a sigh of relief now that the holidays are over?  I love  Christmas and the New Year, but I also love when they're over and things get back to normal.  I'll bet you know exactly what I mean.

A few days ago, I dropped Junebug off at her Yaya and Poppy's for some fun grandparent time (and so momma could get things accomplished without a very active toddler underfoot).  This lovely wreath greeted me on my parent's front door:

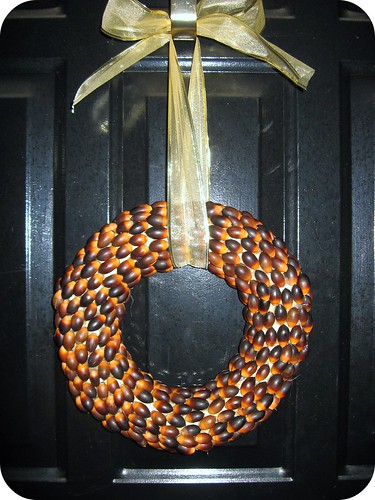
Mom's Acorn Wreath

Cool, huh?  We've all had a "bumper crop" (as my dad called it) of acorns this year.  They're pretty pesky, but my mom used this tutorial from Dana of MADE to make a lovely wreath out of the acorns from the yard.  She bought the wreath form for $2 and the acorns were free, so it was a super-inexpensive craft.  The trick to making it last is BAKING the acorns!  The tutorial explains why, but let's just say it's important!  Thanks for sharing, Ma!

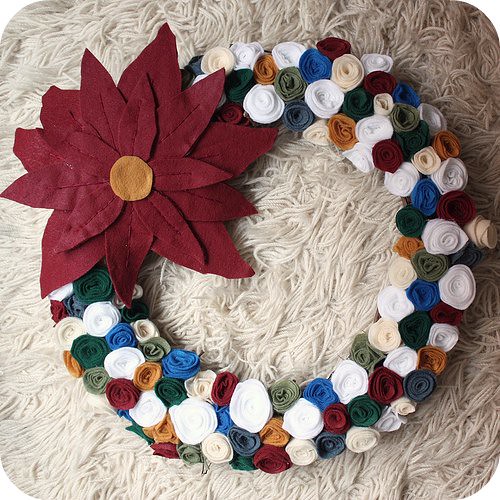
I also received a comment from a reader of my previous blog (Spartan Living, and sorry, I no longer post there!) where the Poinsettia Pillow tutorial was initially featured.  A reader sent me a link of how she used the poinsettia pattern on a wreath and I couldn't resist sharing!  It's so cool to see how people use your ideas!

Poinsettia and felt flower wreath

Thank you for sharing how you used the poinsettia pattern, Iris.  You can check out her full post at her blog B.Y.O.V. (Bring your own vegetables).
Tristin Signature

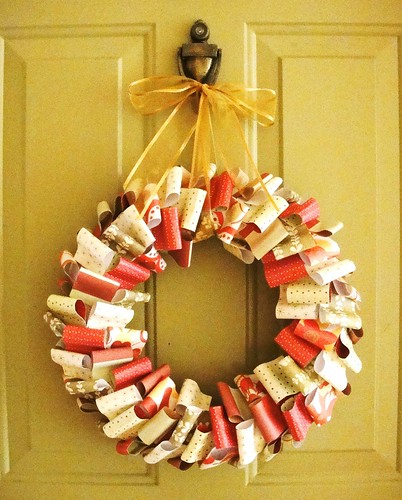
Christmas patterned paper wreath

You're probably tired of the patterned paper wreath, but we just wanted to remind you that you can reuse your wreath form and make it seasonal with Christmas or winter-y patterned paper.


DSC03661.JPG3

Here's one we did in traditional Christmas colors.


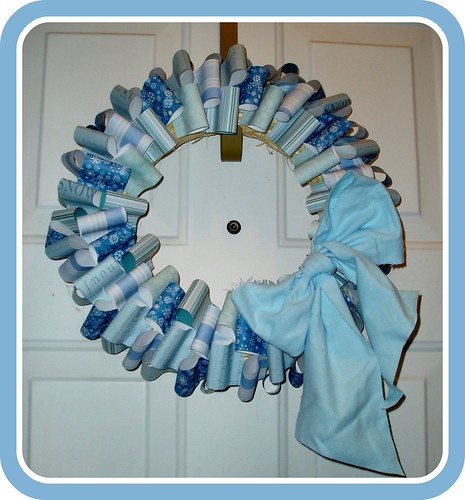
Winter-y Patterned Paper Wreath

Check out Tristin's wreath that she re-did in winter-y blues and whites.


Now go make a seasonal patterned paper wreath because you can finish that Christmas shopping later!

signature

A warm welcome with a wreath tutorial

(Edited---Oh my goodness!  I wrote the title of this post a few days ago for the "meantime"--until I could come up with something creative and fun... but I forgot to come back and change it!  So, it's pretty uninspired.  On the first post.  You won't hold it against me, right??  Wait, I mean,  I meant to be abrupt and matter-of-fact 'cause that's how I roll.  Yeah, that's the ticket.)


Welcome to a new blog on the bloggy scene--Two Girls Being Crafty!  And that's exactly what we are!  It seemed appropriate that our first post should be the first project we worked on together--the Patterned Paper Wreath Tutorial.  So, without further adieu, check out our first collaboration.  (If you'd like to learn more about the two girls who are being crafty, why not check out our "about us" section?)

We share a love for scrapbook paper--though neither of us are "scrapbookers".  Are there any others like us out there?  Sharon used scrapbook paper in an unconventional way to make this fabulous wreath for less than $5--you'll definitely want to give it a try!

Here's what you'll need:


5 12x12 sheets of scrapbook paper
Hot glue
14" wreath form
Ribbon or fabric for bow

Cut scrapbook paper into 2" x 4" strips.  Being careful not to crease the paper, make a loop of each strip and secure the ends with hot glue.


Glue each loop to the wreath form, working your way down and around the entire form, covering the glued edges by overlapping the loops.  (Picture explains this much better than I can!)


Once your wreath is covered in paper loops, add a pretty bow and hang on your door.  Voila!  How simple and fabulous is that?  Not to mention, only a few inexpensive items needed--now that's how we craft!


After Sharon shared her awesome wreath with me, I just had to get supplies to make one of my own.  I thought I'd do something with fall colors so I picked out these pieces of paper:


I used the technique and my end result was this bad boy:


Still needs a bow or something... We'll see if it happens!

My project total was the same as Sharon's--just under $5.  Now that it's Christmas time (YAY!) I'll just pull the paper off of the form and use new paper on the same form.  It costs about $1 for 5 sheets of paper if you buy them on sale, so you can change out your wreath with the seasons for only a buck!  Now that's what I'm talkin' about!


Related Posts Plugin for WordPress, Blogger...