Pages

Showing posts with label Upcycling. Show all posts

Day 9: Bottle and Branch decor with Michael of Blue Velvet Chair

Hey pals!  Due to an email glitch, I have day 9 of the 12 days of Christmas series for you a few days out of order.  So, we have Michael from Blue Velvet Chair sharing a beautiful point of attraction with us--beautiful bottles and branches. 

Hello to everyone here at Two Girls Being Crafty. My name is Michael and I'm the host of Blue Velvet Chair, a blog dedicated to showcasing recycled and repurposed design, arts and crafts. I've looked forward to sharing a bit of holiday cheer with you since the day I 'got the call' to join this fabulous line-up of creatives for the 12 Days of Christmas.

When I'm decorating for the holidays I have two things in mind...how can I do it on the cheap and how can I reuse what I already have. Today I'd like to share my table 'centerpiece' that is a bit thrift, a bit recycle, and a bit creating something new.


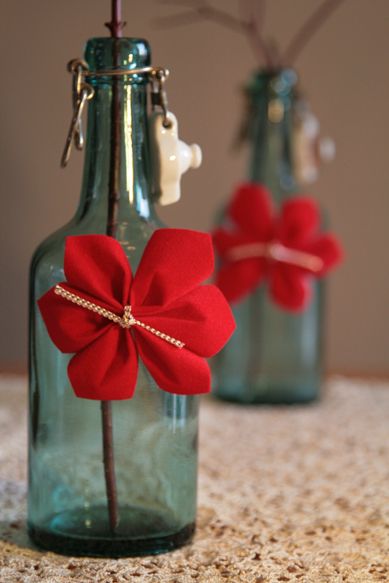
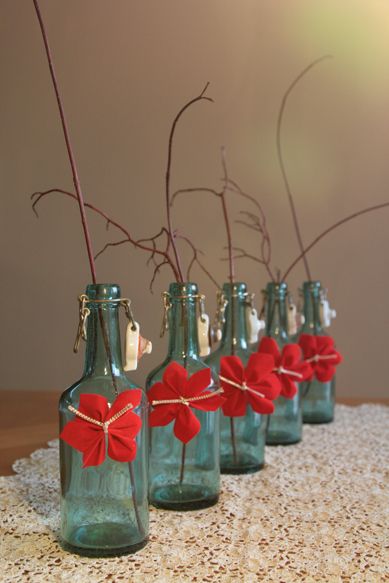
Back in May, I picked up some antique turquoise bottles from the early 1900s during a thrift store run. They became the perfectly understated centerpiece for our Thanksgiving dinner with friends when I added some simple red-colored twigs that a neighbor had trimmed from their shrub. So now we have the thrift bit.


The recycle begins when I decide to use these same bottles and twigs for my Christmas table decor. But what could I do to add some holiday cheer?  Create a little something new to add to the bottles.


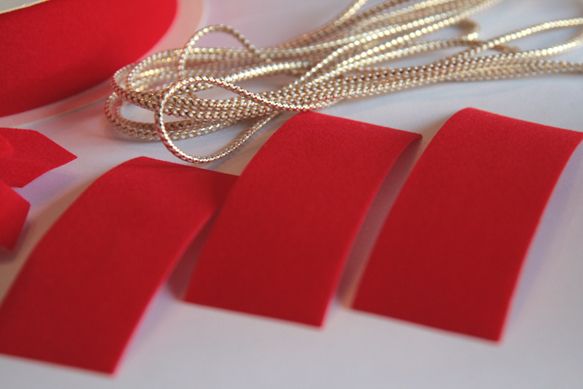
Now I'd like to share how to DIY your own little poinsettias to add 'instant holiday cheer' to something you already have that can be recycled as Christmas decor. I used an old roll of red velvet ribbon (this stuff seems to last forever!), some gold braided ribbon, and scissors. Simple.


Cut three strips from the red velvet ribbon. Mine were about 3.5 - 4 inches long (about 10 cm).


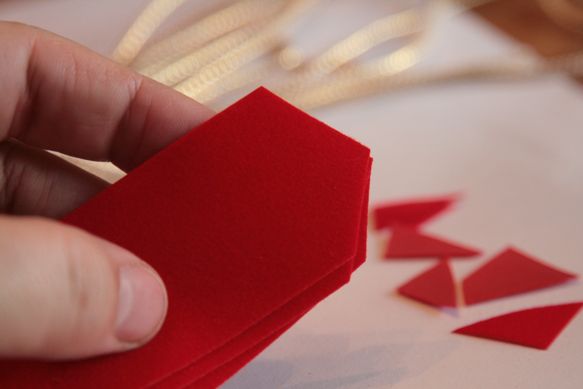
Cut the tips of the ribbon as shown below.


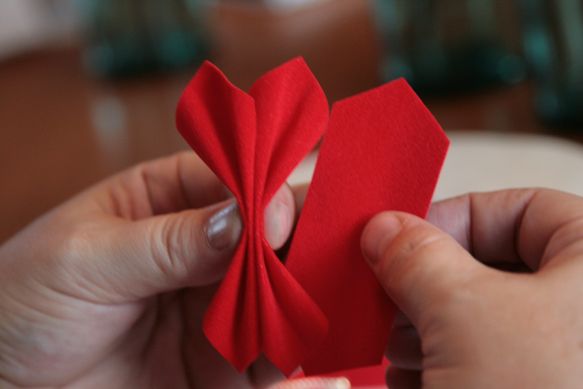
Here's where I wish I could show you via video (maybe I can make one quick and post later at Blue Velvet Chair). Press in the center of the ribbon with your thumb,while you use your pointer fingers to fold down the outside edges. I hope the photo below shows this well for you. So the center and the two outer edges are all folded downwards.


Because you want to put three of these together, you'll have to hold the first two between your thumb and pointer finger on one hand while you use the other hand just beside to create the next folds.


There. All three folded and held in a pinch. This process (folding the three pieces of ribbon) literally takes a total of 1 minute max.


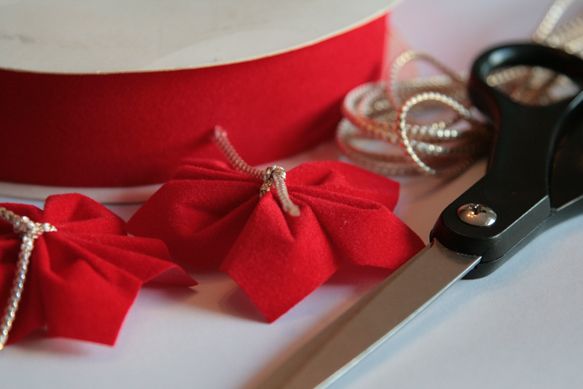
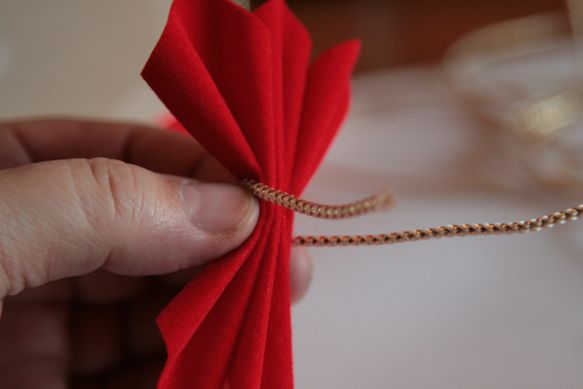
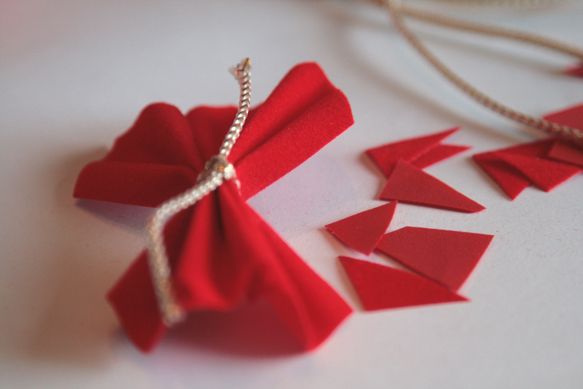
Take a (pre) cut piece of the braided gold ribbon - or use whatever you have around - and tie around all three 'petals'.


It will look like this once you get it tied and knotted.


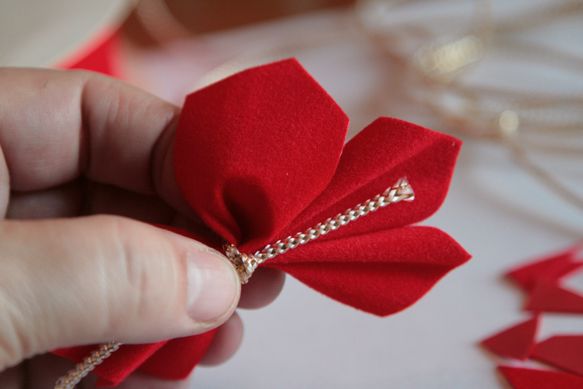
And now time to create the poinsettia! Simply take your pointer finger and push from the bottom near the knot in order to 'spread' each petal. This will create the roundness of the flower due to the stiffness of the red velvet ribbon.


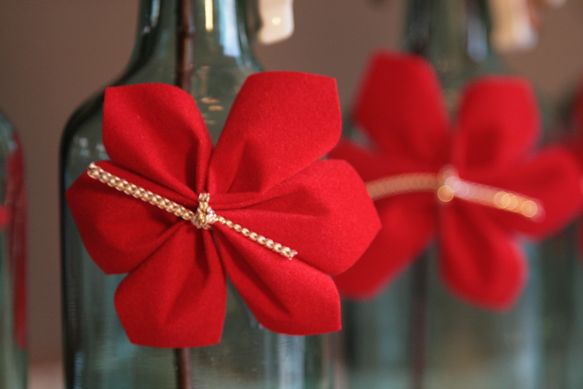
Ta dah!  Your own little DIY poinsettia flower. I promise these little pops of holiday cheer can be added to almost anything and you'll get some fun results.


I just love the contrast of them against my old turquoise thrift bottles. This color combo works so well because they are contrasting colors on the color wheel.


Happy holiday cheer.


Happy happy.


Happy holidays to you all.


There you have it. Mere minutes to create your own little recycled-thrifted-creating something new holiday cheer.  My dream project is to create a big beautiful wreath full of these little beauties. My sister made one back in the 90s, and I've been wanting to create one ever since. 15 years should be enough time for the idea to simmer...don't you think?


If you'd like to see some more of my hybrid style holiday decor, you are welcome to visit Blue Velvet Chair. We'd love to see you there!


Happy Holidays everyone!


Michael

Day 3: Sarahndipities shares a gift for a teacher

Hi!  I'm Sarah from Sarahndipities!  I'm so excited to be sharing this quick little project with you today!

My husband is a teacher.  He teaches the 5th grade.  Over the years he's brought home a lot of interesting gifts from students during the holidays:  body wash...candy...coffee mugs...hair gel...cocoa...and even a stuffed animal or two!

But guess what?  The best gifts he's ever received are the ones he can actually use in his classroom.

I asked him once what the best thing to give a teacher was and he said, "A raise."

But after that he said, "Hand sanitizer...and tissues."

He knows all about germs.  He's surrounded by them all day long...especially at school.

So when I was trying to think of a teacher gift for kids to give their teachers this year that's what I immediately thought of.

But how to make it cute...and something that the kids could actually help with?

Well, here's what I came up with!  It's soooo simple, and the kids can help with most of it (unless you don't want them to come anywhere near a permanent marker...which I completely understand, believe me.)

Here's what you'll need:

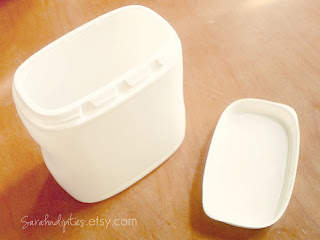
-  A Smallish container of some kind...I used an empty French's Onions can, because it was already white and had a lid...plus I have three of them left over from Thanksgiving meal preparations!
-  a couple packages of pocket sized tissues
-  a couple of sample size hand sanitizers
-  a bit of Christmas-y ribbon
-  a sharpie marker
First, remove the label from the container, and wash it thoroughly...you don't want it to smell like french fried onions, after all.
 Next, use your sharpie marker to draw eyes and a smile on one side of the container...
 ...and to color the lid black (like a hat).
 Next, tie a piece of ribbon around the base of the container.  You might want to secure it with a dab of hot glue or a couple of glue dots if you feel so inclined.
 Lastly put the hand sanitizer and tissues into the container, and snap the lid back on!

I included a note on the back of this little guy that reads:  "We TISSUE a Merry Christmas, and a HANDY New Year!"

There are so many cute ways to dress up a simple gift like this, but my kids loved that this was an upcycled project that they could REALLY help with!

Handmade gifts are always appreciated...so if you are looking for some great handmade items, hop on over to my Handmade Holidays Shop Guide to check out some wonderful gifts ideas!

Thanks again to Tristin for inviting me to be a part of the fun!  Happy Holidays!! :)

Halloween luminaries for (practically) free

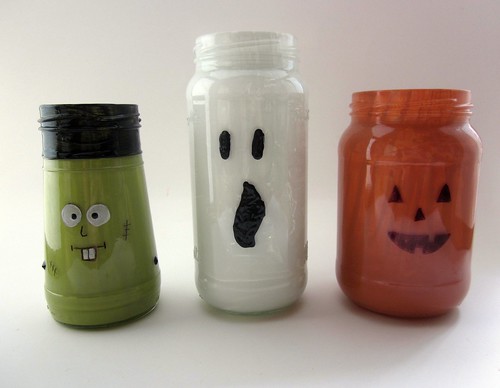
All over Pinterest I have seen numerous versions of cute little Halloween luminaries made from jars.  In a stroke of complete non-genius and unoriginality, I made some, too. 


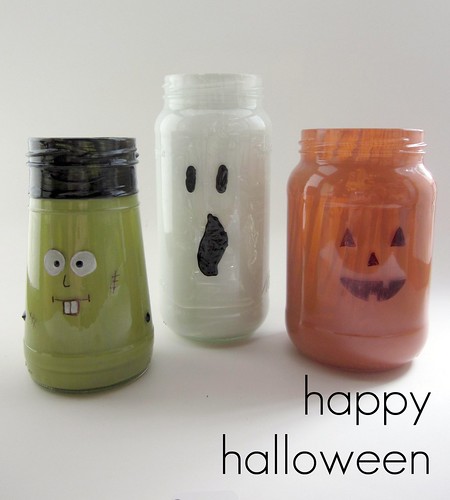
They're upcycled jars of various shapes and sizes, painted a solid color on the inside with details painted onto the outside.  Easy peasy, right?  And you most likely don't have to buy anything to make some of these.  In fact, your kiddos could do it.


I used a fine point sharpie for the finer details.  


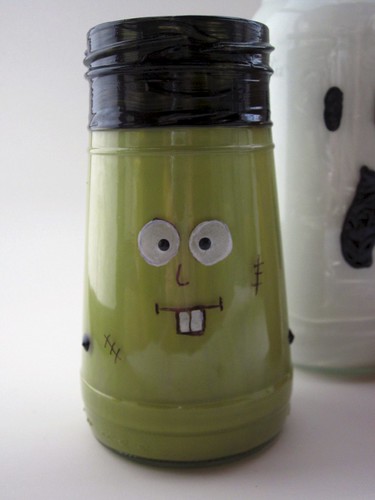
My favorite happens to be this young Frankenstein.  He's kinda cute.

Why not polish off that jar of green olives and make some cute luminaries, too?  Mmmm.  Or perhaps some delicious bread and butter pickles. 

I'm feeling more luminaries coming on before the big day!

Tristin Signature

Kid's Table and Chair Overhaul

Throw your hands in the air if you love hand-me-downs!  (That's my way of keepin' things gangsta!)

Table and Chairs Redo - Chalkboard Paint

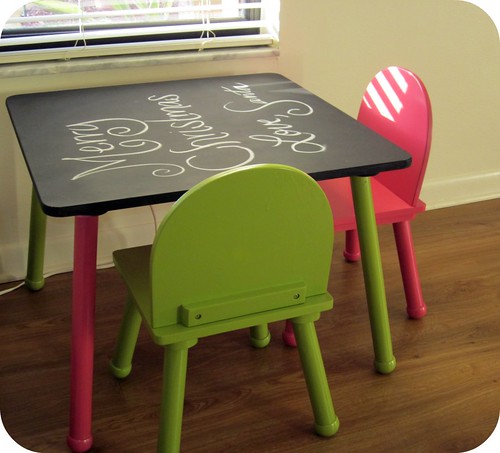
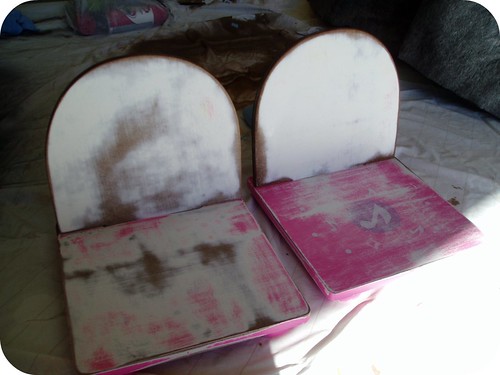
In December, my sister-in-law passed down a well-loved Dora the Explorer table that her gals had outgrown.  That very table ended up being Junebug's Christmas gift from Santa--that is, after Santa's elves did an overhaul!  (And it has taken me 3 months to actually post the transformation!)

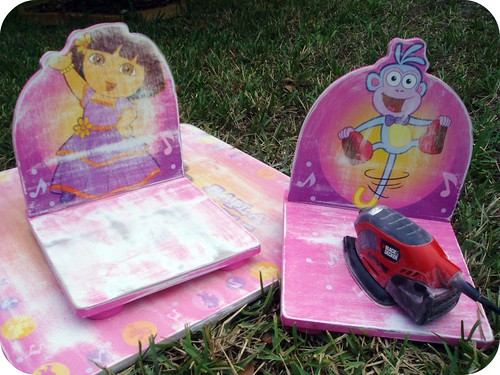
Here's what we started with...

Chair redo

I forgot to take a photo before I started sanding the paint down.  I wanted nice plain chairs, and as you can see the chairs are formed in the same shape as the characters that are painted on them.  The "elves" didn't want to have funky shaped chairs, so we called in the assistance of our dear friend (and one of Junebug's favorite people because he always plays "3-2-1 BLAST-OFF" with her), Mr. Tim.  Tim does some fabulous woodworking so he had the tools and the skills to round off the chairs to make them a bit more uniform. 

December 22 2010 002

It's great to have other creative folks in your circle who are willing to help! 

Table and Chairs Redo - Chalkboard Paint

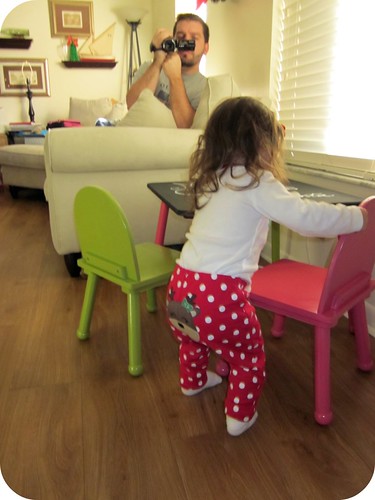
So, a few coats of spraypaint later, we had a table!  The top is chalkboard paint, which in hindsight is a bad choice for a toddler since now is the time to teach that it's inappropriate to write on furniture.  Live and learn, I guess.
Junebug with new table

Here's the moment Junebug discovered that Santa brought a new table and chairs.  Isn't that little Reindeer on her bottom to-die-for??

If you love chalkboard paint like I love chalkboard paint, keep your eyes peeled for Sharon's next post! 

Tristin Signature

Linky Love: Upcycled Object Accessories

Happy weekend!  Lately I have stumbled upon some awesome jewelry and accessories that have been made from upcycled objects and today I'll share a few of my favorites.

Maya from Little Treasures shared this fun necklace.  It gets its shape from underwire removed from a bra.  Mixing crochet with old bra wires?  Brilliant!


Rhonda at Dollar Store Crafts made this washer necklace from a plastic cup and some permanent marker doodling skills.  Seriously?!  Yes, I have actually tried the craft myself and ended up with interesting results--the trick, I have learned, is to use Solo brand cups.  The generic ones just don't do the trick.  (You will be able to see my project failure over at Craft Fail soon--be sure to check it out!)


Jessica from Sew Homegrown created an awesome Braided Head Wrap from old T-Shirts.  I could never get away with wearing this wrap on my head, but Jessica pulls it off quite nicely, don't you think?  I just made T-Shirt yarn for the first time recently and it's really a much quicker and easier process than I had imagined-and the possibilites for using it are endless!


The next two recycled accessories are earrings made by Jessica of Homemakin and Decoratin.  The heart-shaped pair is made of paint chips and the second pair is pretty obviously made from Scrabble pieces!  (Y'all know I'm a sucker for Scrabble art these days!)  Inventive, huh?


How 'bout some good old-fashioned shameless self-promotion now?  Tristin from Two Girls Being Crafty (hey, that's me!) shares a super-fab tutorial (if I do say so myself) on how to make a bracelet out of a toothbrush.  Go get some water boilin', and in an hour you can don one on your wrist, too!


So, maybe you're into super-expensive jewelry, but why not take a break from the norm and make something original?  If nothing else, you'll have an awesome conversation starter!

Tristin Signature

Upcycling Toothbrushes into Bracelets

First and foremost, we're so excited that Thrifty Decor Chick featured our blog on her series of newbies!  We're so excited to have so many new people visiting and we're equally stoked to welcome so many new followers!  Isn't Thrifty Decor Chick the bestest?  We think so.  Thanks, Sarah!  (If you're interested, you can see our highlight on the TDC blog here.)

And on to the crafty-ness...

When I was in middle school in California, I knew this gal named Kathryn who was super-cool.  You know, just one of those naturally cool kids--a trendsetter, too.  She wore a rad bracelet that she made out of a toothbrush and I thought it was awesome (naturally) so when she gave me the secret on how to make one, I rushed home to do it myself.  (See, even back then I was a DIY gal!)


Any-hoo, wanna make your own?  I thought you did! 

Here's what you'll need:

An old toothbrush (sans rubberized texture stuff)
Needle-nosed pliers
Vise grips (or you can get creative with whatever tools you have)
Tongs
A pot big enough to accommodate your toothbrush


You'll want to start with a super-plain toothbrush and avoid any of that grippy/soft plastic stuff that most toothbrushes have these days.  I use child-sized toothbrushes (What?!  I'm a small person with a small mouth... you wanna make something of it?  Obviously I have a short girl complex, too.) so they are pretty plain and perfect for making bracelets.


I used needle-nosed pliers to remove all of the bristles.


Umm, when you're using said needle-nosed pliers on the bristles, take it easy...  I teach by example guys.  So, learn a lesson from me be and gently remove the bristles from the toothbrush, and provide ample support to the neck of the toothbrush.


Obviously, I had to restart with a different toothbrush.  And I was much more gentle the second time around.


Doesn't the naked toothbrush look so awkward?


Once you have a naked toothbrush, boil that naked toothbrush for an hour.  Seriously, do it for a whole hour--don't skimp on time!  If you check it midway through, the toothbrush will seem like it will be pliable enough to form but if you bend the brush too early you may cause ugly white streaking (think: stretch marks) and possible snapping.


Once the toothbrush has boiled for an hour, you're ready to shape it into a bracelet.  You can use a bracelet you have as a size reference or you can just wing it.  I guesstimated and it came out fine!  I used tongs to hold the toothbrush in the middle and vise grips to shape the hot plastic.  If you make a mistake, don't worry--you can pop it back in the boiling water for 15-20 minutes and reshape. 

Common sense warning: that toothbrush is HOT!  You would be too if you'd just been boiled for an hour.  Be careful!


Once you're happy with your shape, drop the bracelet into a bowl of cold water to "set" the shape.  (I think that the Lemongrass Fiestaware bowl compliments the purple toothbrush quite nicely!)


And there you have it--a gorgeous toothbrush bracelet!

Pretty fun and simple, right?  I'm not a jewelry girl--but I think that even if I was, I'd much prefer for my husband to make me one of these for V-Day than to buy some generic piece of bling.  But that's just me.

Tristin Signature
Related Posts Plugin for WordPress, Blogger...