Pages

Showing posts with label Mod Podge. Show all posts

Fancy-Schmancy Heart-Shaped Stool

I know that some of you will read the title and think I'm talking about a heart-shaped bowel movement.  I'm not.  I'm definitely not.  That's not crafty.  That's gross.

Mod Podge Stool 006

Anyhow, I recently noticed a need for a stool in Junebug's bathroom.  She's washing her own hands now but I have to assist with helping her up and down to the sink.  Being a terribly independent little gal, she's not always so keen on having mommy help.  So, I thought a stool would make my little big girl happy.

I found this beauty at my favorite local thrift shop.  It's just one of those generic bare wood pieces that you can find at most craft shops--I noticed from the tag on the bottom that it originally retailed for $9, but my thrift shop listed it for $3.  SOLD!

August crafts 037

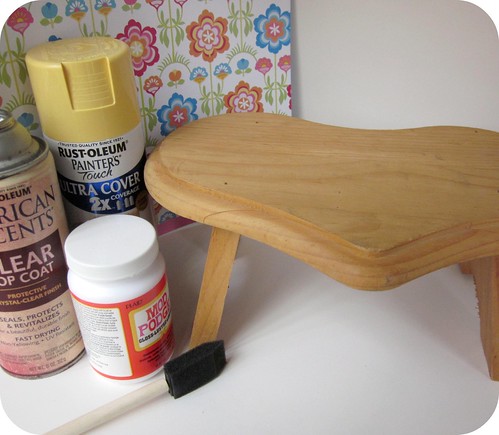
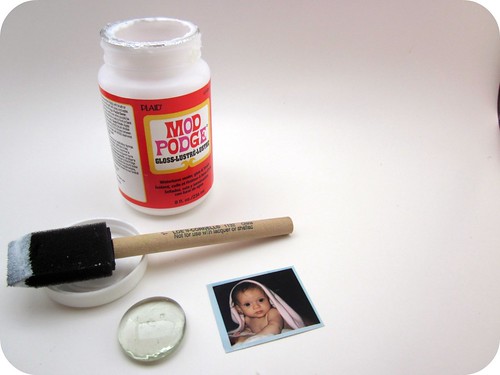
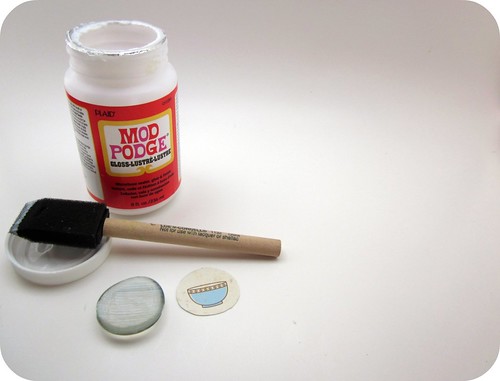
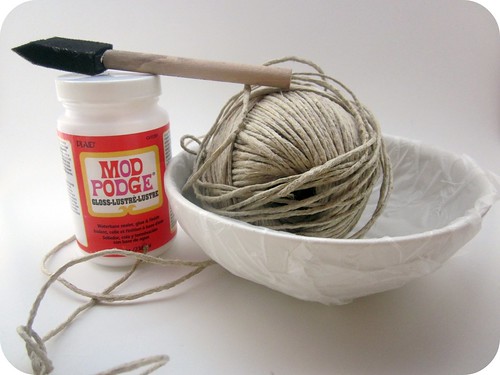
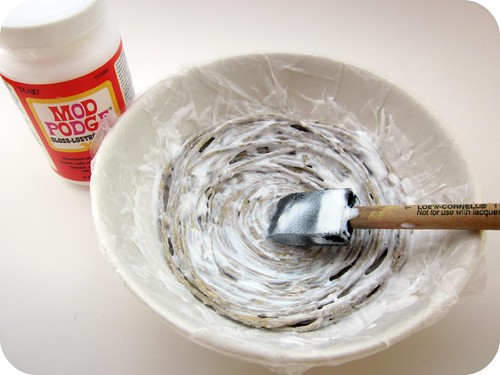
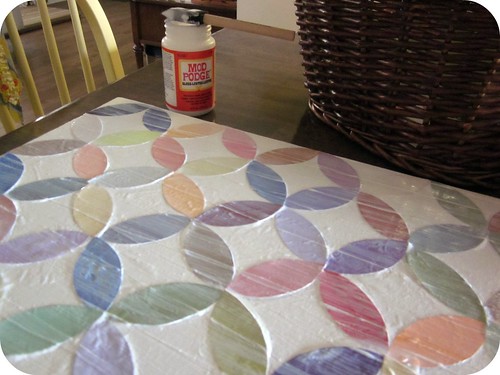
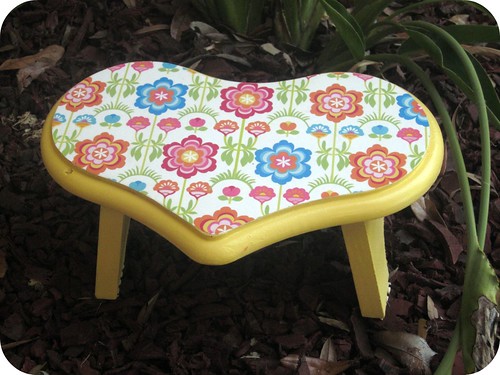
I spray painted the stool bright yellow (left over from my mirror) and once it dried, I mod podged a lovely piece of scrapbook paper over the top.  (Since Mod Podge is both a sealer and an adhesive I coated the top of the stool with a thin coat before and after the paper was applied.)

August crafts 040

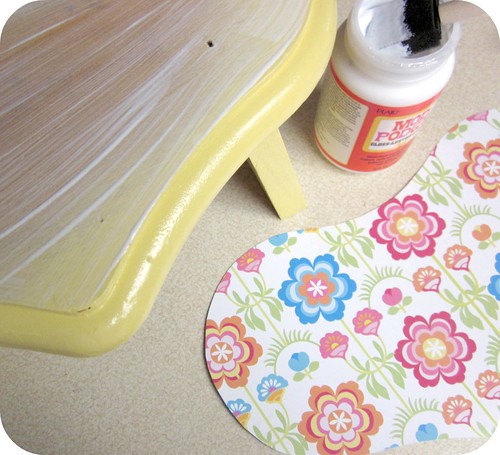
You won't see the strokes once the Mod Podge dries.

August crafts 042

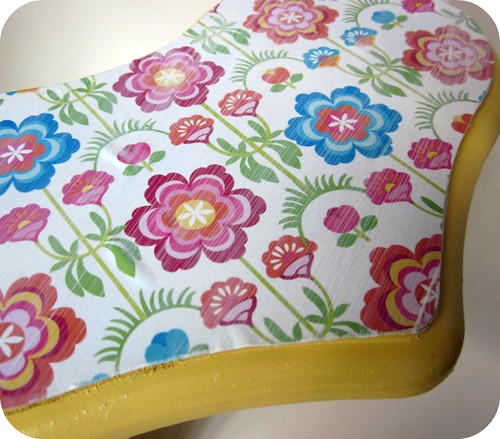
Once the Mod Podge is dry, spray with a clear sealer since feet and who knows what else will be stepping on the stool.

Badda bing, badda boom.  A darling one-of-a-kind stool.

Here's where it gets really real.

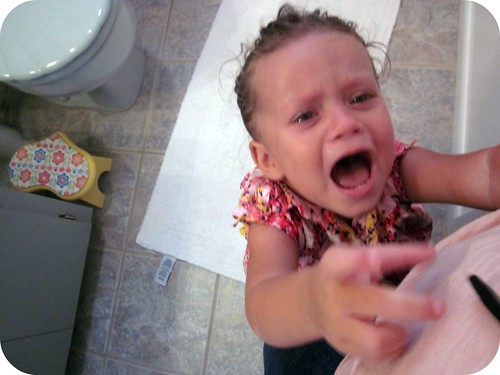
I thought I'd take a pic of the stool in action.   You know, I thought you'd like to see it.

Terrible idea.

You see, Junebug, just like her momma, is short.  Like majorly short.

I told her she could use the stool to wash her hands but... it still doesn't get her to the faucet.  Which is terribly frustrating if you're two years old.  Apparently lots of things are frustrating when you're two.

August crafts 062

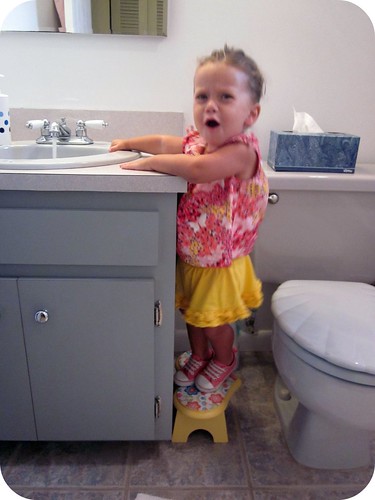
See?  I keep it real.  Really real.  I'll share with you my ugly 1985 builder-grade grey bathroom with blue tile (seriously, who picks blue tile?!) AND my fit-throwing toddler--all in the same post!  You're welcome.

August crafts 066

I think I may need to get one of these awesome inventions to complete the bathroom:
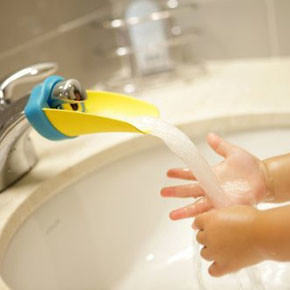
2011-aqueduck
Found via Pinterest

And here's the stool again, in all its finished glory--sans screaming toddler:

Mod Podge Stool 006


Cute, huh?


Tristin Signature


DIY Photo Glass Magnets

Magnets 010

This magnet is pretty similar to yesterday's DIY Glass Magnets but WAY cooler because it's personalized with a photo.  Same directions, same concept, but by using a photo instead of scrapbook paper your results are a super-personalized and lover-ly treasure.


I used my favorite photo of Junebug for this magnet.  She was four months old when this photo was taken and she's without a doubt the most beautiful baby I've ever seen.  I may be slightly biased, of course.  You can use a photo of the most beautiful baby you've ever seen. 


It's currently holding a Papa John's coupon.  What, you never order pizza?  Yeah.  That's what I thought.  I know you do it, too.

My mother-in-law visited this weekend and commented on what a great gift this magnet would be for a Mom or a Grandma.  Hmm.  Do you think that may have been a hint??  She's right though; Mother's Day is right around the corner and nothing says "I'm a Mom" like a magnet with your kid on it.


Tristin Signature

P.S. There are still more magnets to come.   ; )

DIY Glass Magnets (The alternative to gift cards!)


Nothing says "I have absolutely no idea what to get you" like the gift of magnets.  You know?  But if they're homemade it's somehow legit.  I love to use the word legit.  I'm just too legit to quit.  I crack myself up.

Magnets 007


This whole craft came about when I found some lovely large-ish sized flat-bottomed glass gems at the Dollar Tree.  They're meant to be used as a vase filler, but there's so rules so let's make some magnets!  I thought I was brilliant as my mind raced with the possibilities of a new craft--only to come home see a similar project while perusing How About Orange.  It burst my crafty bubble, y'all.  Whatevs.  Great minds think alike.

On with the show...

To do this lovely craft, you'll need:
Flat-bottomed glass gems (the kind for filling vases with; I found mine at the Dollar Tree)
Scrapbook paper you love
Mod Podge
Paintbrush
Magnets (strong ones since the glass gems are heavy)
Gorilla Glue
Clamps

First of all, you'll want to roll a gem over your scrapbook paper in order to find a design that's suitable for a magnet.  Patterns are fun, but I have been holding on to this paper for months in hopes of the perfect project 'cause I love the cute kitchen objects.  This is the perfect use of this paper.  (I purchased it at Jo-Ann Fabric and it's still available there if you want it, too!)

DIY Glass Magnets

Then cut out your design to fit the bottom of the glass gem.  Trace if you need to.  (I needed to.)

Apply a thin layer of Mod Podge to the flat side of the glass gem and affix your paper.  Let it dry.  (Duh.)


DIY Glass Magnets

Apply Gorilla Glue to back of gem and add your magnet.  Then clamp it per Gorilla Glue instructions. (Initially I tried to do this part with hot glue.  Fail!  The hot glue is not strong enough and it will just detach from the magnet at the first sign of stress.)


DIY Glass Magnets

If you don't have clamps, you can use a clothespin, though I'll admit, it takes a lot more finesse.  Plus it feels better to use manly tools like clamps when crafting.  Don't you agree?

Clamping glass magnet with gorilla glue


So, keep some of these simple little magnet sets on hand for those "I have no idea what to give you!" occasions that are sure to pop up.

Magnets 007


Isn't the theme of these magnets perfect for a kitchen??


A friend from church shared a yummy recipe with me that I can't wait to try.  It's on the fridge with one of my new magnets.


Keep your eyes peeled this week for a few more magnet crafts. I'm kind of on a kick.

Tristin Signature

Nesting. Two Ways.

Do you have a "Type A" or "Type B" personality?  I find it hard to categorize myself, but when it comes to crafting, I lean more toward "Type B".  Go with the flow, you know?  Every now and then, though, the perfection bug bites me and I have a fit and throw my crafts across the room.  What, you've never done that before? 

DIY Nest 032

Recently I picked up a ball of hemp at my favorite thrift shop for 30 cents--an AMAZING bargain.  Normally a ball of hemp of the size I purchased costs like $10.  You better believe I snatched that hemp right up!  Because it's spring time, it seems appropriate to celebrate my awesome hemp find by making a gorgeous and simple nest.  Want to make one, too? 

Whether you're "Type A" or "Type B", you'll appreciate this craft because you can have it your way, just like at Burger King. A Burger King ad slogan on a crafty blog?  I'm lovin' it.  (Did you catch that?)

DIY Nest types

Regardless of the type of nest you choose to make, you'll need the same supplies.


DIY Hemp/Jute/Twine/Raffia nest

Mod Podge and a brush
Hemp (or jute, twine, raffia... feel free to use whatever you have on hand)
A bowl that will provide a good nest shape
Plastic wrap (to cover said bowl)
Clear spray-on sealer (optional)

For the "Type B" nest, I used the inside of the bowl because it provided better support for the nest shape.

DIY Hemp Nest

Paint a thin layer of mod podge on the inside of your plastic-lined bowl.  Then coil your hemp/jute/twine/raffia starting in the center and work your way up the bowl slightly.  I dabbed mod podge over the top of the coils as I went to keep the hemp from uncoiling.  Then, just start circling the bowl with the hemp in a random circular motion.  Dab mod podge on as needed to help it keep the shape.  Let dry and remove it from the bowl and spray with sealer if desired.  There you have it! 

DIY Nest 028

Voila!

For the "Type A" nest, I inverted the bowl and covered it with plastic wrap.  I use Glad Press'n Seal plastic wrap because it sticks to objects.  It's a very handy thing to keep on hand for craft projects.  And leftovers, of course.

DIY Nest 001

Paint a thin layer of mod podge on the outside of your plastic-lined bowl.  Then coil your hemp/jute/twine/raffia starting in the center and work your down the bowl until your nest is the desired size.  Dab mod podge on as needed to help it keep the shape.  Let dry and remove it from the bowl and spray with sealer if you want to.  There you have it! 

DIY Nest 022

And there you have it, DIY nests, two ways.

DIY Nest types

All of you "Type A" people are probably bothered that I have the A & B out of alphabetical order in the picture.  I did it just to mess with you.

Are you a "Type A" or a "Type B" crafter?  Which nest do you prefer?

If you're feeling extra crafty, keep that Mod Podge out and make some Decoupage Eggs like Sharon did last week.  They'll look great in your nest!

Tristin Signature

Intersecting Circles Wall Art Tutorial

Remember how I promised a fun paint chip project a few weeks ago?  Well, here it is (finally)!  It's more DIY art for us "non-artists", so I hope you have some bare space on your walls 'cause you're sure to want to make this.

Circle Paint Chip Wall Art 014

Just like my last DIY art for non-artists, this masterpiece is a knock-off of a pretty canvas from World Market. 

Jodi Fuch's Collective artwork

Yeah, it costs $129 at World Market.  My version cost about $3.  Total.  No joke.

If you want to make one, here's what you'll need:

one canvas in a size of your liking
TONS of paint chips
Mod Podge and a foam brush
Lots of patience
Saran wrap
A book (I used the Complete Works of Shakespeare Volume 1, but you can use any book you like--lol)
A template (Directions on making one follow)

Ok, first let's talk technical stuff.  You're going to need to think about math for a few minutes, so brace yourself and don't be scared.  Your canvas needs to have sides in a size where you can find a common denominator.  For instance, if your canvas is 15"x30", your common denominator would be 3" or 5", so you'd want to choose either 3" or 5" circles (I'd recommend 3").  If your canvas is 12"x18", you'll want to choose 3".  I used a 16"x20" canvas, so I used 4" circles.  Whatever you do, just make sure you have a common denominator when you choose your canvas, preferably 3" or 4". 

If you're mathematically inclined, a picture like this may help you envision what we're trying to accomplish.
Circle4Intersection_700

Or, here's a simple way I came up with to make my own template--it's easier than it looks so please don't get scared now!


1. Start with a circle in the size you need.  (Remember to use a canvas where the sides share the same multiples or else you will not get an exact match up and you'll be disappointed.)
2.  Fold it into quarters
3.  Cut out your quarters. You'll need two.
4.  Overlap the quarters by lining up the corners (the curved sides should overlap one another).
5. Trace along the exposed curved side.
6. Cut along the line you just traced--and badda bing--you have your template!

Use your template and trace a it a bajillion times on a bajillion paint chips and cut those shapes out.  (Really, you need 4 chips per circle. Think of it this way, I used a 16"x20" canvas and 4" circles, so there are 20 circle shapes on the canvas. I needed 80 "leaf shaped" pieces cut out.)

Circle Paint Chip Wall Art 002

To make placement of my pieces easier, I lightly traced a 4" circle in rows over the canvas.

Circle Paint Chip Wall Art 004

I also laid out my paint chips in the intersecting pattern prior to placing them permanently onto the canvas to ensure I was happy with the color distribution.

Circle Paint Chip Wall Art 005

Finally, you're ready to place the leaf-shaped pieces onto your circles.  It's not rocket science--look at the finished project and you'll be able to see how to lay them out.  To adhere them to the canvas, I used a thin layer of Mod Podge.   The paint chip cut-outs will begin to warp and fold up--don't worry!  Just brush a layer of Mod Podge over the top of the paint chips, cover with a piece of saran wrap and then lay a book over it for about 15 minutes.  This should prevent the edges from curling up.  Be sure to remove the book and saran wrap before the Mod-Podge dries!  I worked in sections over the course of a few hours to accomplish this.  (It's worth the effort, pinky promise!)

Circle Paint Chip Wall Art 011

Once you have all of your pieces firmly secured, cover the whole canvas with a thin layer of Mod Podge.  Once the first layer dries completely, go ahead an do one more layer just for luck.  You're done!  Now find a purdy spot to hang your masterpiece!

Circle Paint Chip Wall Art 019

I put it in my living room for taking pictures...

Circle Paint Chip Wall Art 025

But it found a permanent home in Junebug's bedroom with the Felt Heart Garland from Valentine's Day.  She loves the bright colors!

Circle Paint Chip Wall Art 014


Tristin Signature

DIY Decoupage Napkin Eggs

DIY Decoupage mod podge napkin egg

I know what you're thinking... another decoupage egg tutorial?? And sorry to disappoint, but yes. This concept has already been done numerous times this season, so I'm not sure who to give credit to. Just know that this is not my original idea. If you haven't heard of these yet, great! If you have, I hope you find some of my tips helpful in creating your own way of doing this craft. Enough talk. Let's get down to business.

supplies for decoupage napkin eggs

Supplies:

Pretty napkins
Plastic eggs ($0.35 - half off at Hobby Lobby)
Mod Podge and felt brush
Newspaper
Saran wrap (not pictured)

Once again - the supplies for this project are almost completely free! Booyah! Cause that's how we roll. That was lame. Sorry, continuing on...

What To Do:

First, before you do anything - take your eggs out to a well ventilated area and spray paint them white. This is so you can't see the extreme(ly nauseating) neon colors through the napkin. Like a dummy, I didn't take a picture of this step. Some people choose to glue the two halves of the eggs together, but I didn't feel this step was necessary, and mine turned out fine. If you plan on reusing these for years to come, I would probably glue them.

Decoupage Napkin Eggs

Next, remove the back layer of your napkin. You only need the thin top layer.

DSC05799

There are two ways of approaching this. You can tear your napkin into pieces...

Napkin eggs

Or tear long strips. Or both! (Which is what I did.) If you try to put the whole napkin on at once, it won't adhere smoothly. Above are the simple steps to creating long strips.

DIY Decoupage Napkin Eggs

Mod Podge your pieces or strips onto your eggs, and place them on a piece of saran wrap to dry. Once they have almost nearly dried, apply another layer of mod podge for more of a glossy effect (my mod podge is glossy vs. matte).Warning: This gets extremely messy! If you were one of those kids who put Elmers glue on your hand so you could peel it off once it dried - you're going to love this project!

You can certainly do this with scrapbook paper or even fabric. But to achieve the best results it is better for your material to be as thin as possible. Which is why I chose napkins! Looking back now, I would have chosen a more colorful floral print because I think that would have looked better decoupaged.

What kind of egg projects have you done this year?


Related Posts Plugin for WordPress, Blogger...