
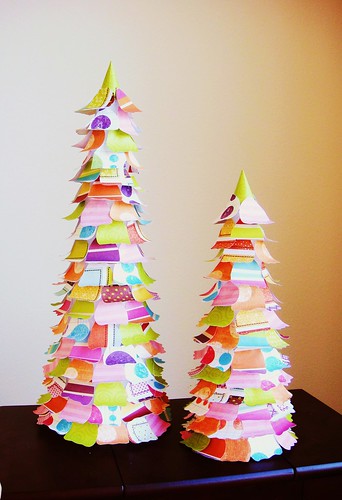
I’m not a big fan of red and green. Like the red red and the kelly green. Blech. (No offense to you red + green lovers. I can have my opinions. Don’t hate!) I prefer Christmas decor that steps out of the red and green box and shoots for something unconventional. That’s why, when Tristin shared with me the link to these unusually colorful Christmas trees – I knew I had to make them! They are Lolly Chessie’s crate paper Christmas trees. I didn’t stray much from Lolly’s end result, but my methods in getting there were a little different.
Gather your materials:
• Two Styrofoam cone forms of different heights. Mine were 12 and 16 inches tall. These can be found at Hobby Lobby, Michaels, Jo-Ann, or any other craft store. The dollar tree even has some of the smaller-sized ones.
• Scrapbook paper – also found at Hobby Lobby (but available at most craft stores). I bought six 12 x 12 sheets of various patterns, but I didn’t use all of it – I had at least 1/3 of each sheet left. You could probably get away with using 5 sheets.
• Scissors
• A little scrap of cardboard, poster board, or cardstock – anything that’s thick and sturdy enough to use as a template to cut out your “petals”. I used a piece of a manila folder.
• Hot glue gun + glue sticks
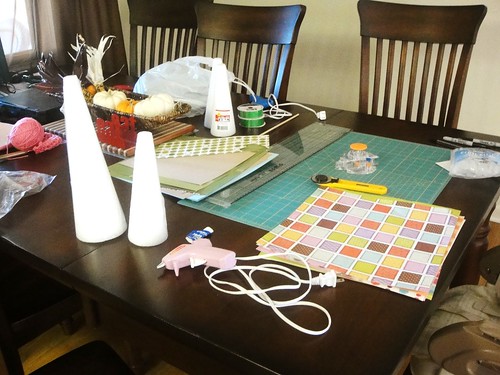
Excuse the mess - there were multiple projects in progress. I mostly included this to show you the Styrofoam cone forms.
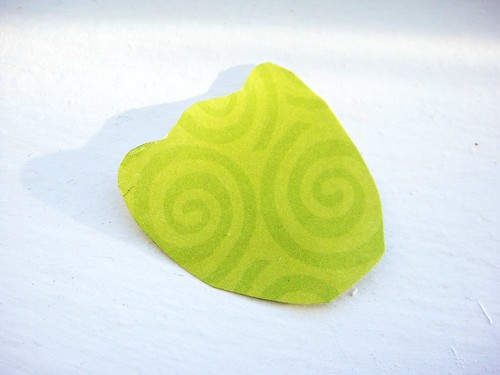
Start by tracing and cutting out your template petal on your scrap of cardboard. This is the petal shape I used. The scalloped edge gives the tree a softer look. Use this template to trace petals on the scrapbook paper in rows. Cut the petals out. This is the part that takes so long you feel like taking scrapbook paper behind the middle school and punching it in the face. Yes people, sorry to be discouraging, but this part takes forever. Don’t worry, the end result is definitely worth it!
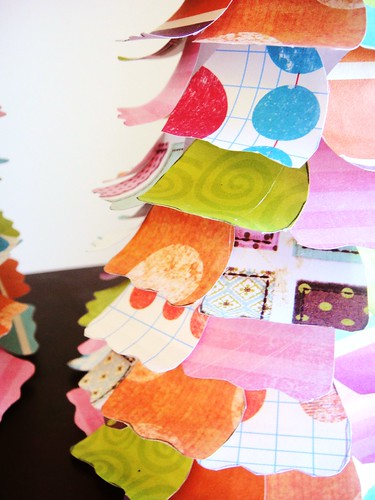
For a break in between the monotonous cutting, you can start to apply the petals to your cone form. In order to get petals to flip out, curl them on a pen or pencil with the wrong side facing out. Apply a dot of hot glue to the not scalloped side and stick your first petal on.
Start from the base of your cone and work your way up in overlapping rows. When you get to the top, use either some green scrapbook paper or green felt to make a nice pointy tip.
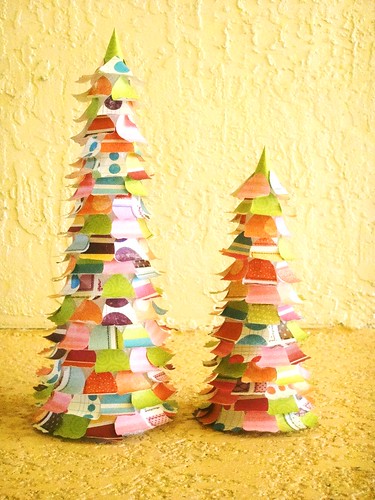
All done! If you don’t like the colorful look of my trees, try this project in winter-y blues, silvers, and whites or different shades of traditional reds and greens. Either way – try it!

These are Gorgeous! Great job Sharon
ReplyDeleteSo pretty - thanks for sharing =)
ReplyDeleteBeautifully done, so clever and creative. Kudos!
ReplyDeleteThis is one that I'm gonna HAVE to do!
ReplyDeleteHmmm. I love traditional red and green...However, love the little trees you made. Can't help but think how fun these would be in the kids rooms or in the play area :)
ReplyDeleteHow creative! Kids will like this idea.
ReplyDeleteWhat a great idea! Very cute. Thanks for sharing!!
ReplyDeletehttp://happy-go-lucky-harvey.blogspot.com
Love it!!!! I love non-traditional Christmas decorations too.
ReplyDeleteI just love anything made with scrapbook paper! Great idea! I would love you to link it up to my Saving Christmas Party at: http://spartasavings.blogspot.com/2010/12/saving-christmas-week-8.html
ReplyDeletelove it! these are some of the cutest i've seen this year!
ReplyDeleteLOVE the colors! You can use this idea for topiaries as well. Crafty!
ReplyDeleteSuper cute and festive! I love how easy they look but yet they're fun and snazzy :)
ReplyDeleteThese are fabulous!!!
ReplyDeleteI love Lolly Chessie!!!!!
=)
These are amazing! Thank you for sharing!
ReplyDeleteVery cute! I'm a scrapbooker, so I always have paper around. Love making crafts with scrapbook paper!
ReplyDeletethis is a fabulous blot.. i'm so glad i found one lik this!!!! thanku very much for sharing these simple but fantastic ideas...:):):).<3
ReplyDeleteLoved your tutorial! I featured it in my blog today. http://creatingthehive.com/blog-post/179590/some-fun-colorful-free-tutorials-easy
ReplyDeleteI made 8 of these as Christmas presents and posted them on my blog! I made sure to link your blog as well!
ReplyDeleteGreat creation.Thanks for sharing.I made one of these.All your tips are very helpful.Looking forward to many ore wonderful creations by you.
ReplyDeleteoff-white
ReplyDeletejordan shoes
yeezy outlet
chrome hearts
cheap jordan shoes
jordan outlet
bape
hermes outlet
bape
kd 14
ggolden goose sneakers off
ReplyDeletefear of god
fear of god outlet