Pages

Day 8: Woven Star Tree Toppers with Heidi of Mom's Crafty Space

Hi everyone! I'm Heidi from Mom's Crafty Space, and I'm super excited to be here today to share this tutorial for an inexpensive Christmas decoration that packs a lot of style! Woven stars made from straw or paper have been a holiday tradition for hundreds of years, and I'm going to show you how we can use modern materials to supersize our woven star into a shimmering tree topper.

All you'll need to make this gorgeous star is a sheet of 12" x 12" glittered cardstock, scissors and glue (hot glue works best). If you have single sided glitter paper you will need to glue two sheets back-to-back to create a double sided sheet.


First, take your paper and cut it into (20) 1/2" wide strips.


Fold two strips in half and crease to mark the center. Line up the center marks and glue the two strips to form 90 degree angles.


Add four more vertical strips (two on either side of your original + shape), weaving the horizontal piece through the vertical strips. Glue at all places where the paper intersects.


Continue weaving until you have a grid of 5x5 woven strips (the tails should be around 4" long).


This step is the trickiest to explain, so hopefully the photos will help! In each corner, take the two inner corner strips and join the tips, making a twist in each strip before gluing them together. Do this with the next interior set of corner strips as well, so that you end up with two twisted points on each corner.


When all your corners are twisted and joined, it should look like this.


Now make another!


Turn one of your pieces upside down and rotate it so that the tips form an 8-pointed star when placed on top of the first piece.


Weave the remaining tails into the points, glue down and trim the ends.


 Voila, an easy peasy and super cheap way to add a lot of sparkle and shine to your holiday season! These also look incredible when hung in small groups from the ceiling - use white or silver paper to create a flurry of shimmery snowflakes that's sure to impress!


Now go find a tree (preferably one where all the lights will light up for you!) and add your shiny new topper! Happy Holidays!

Be sure to stop by Mom's Crafty Space for our other fun tutorials, recipes and holiday ideas!


Day 7: NOEL Art with Hannah of Young and Crafty

I’m so excited to be guest posting over at Two Girls Being Crafty! My name is Hannah and I blog over at Young and Crafty and would love if you would stop by and visit. 


Y&C

I’ve got a SUPER easy Christmas craft for you today. 
DSC02477

Really, this is probably so easy a 4 year old could do it!
DSC02399

I took a 12x12 piece of scrap wood. 
DSC02460

I painted it green and then used my Cricut to cut out letters for a stencil.

DSC02466

Of course, no project is complete without lots of mess ups! Just go back and paint over the white with green paint. 
DSC02479

Done and Done!
Easiest.project.ever.
DSC02477

The simplicity is what I like about it the most. 
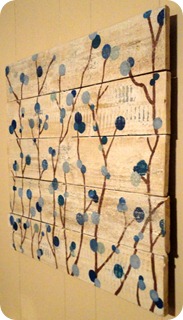
This is my all time favorite project, my pallet art (Tristin here: Hannah's pallet art happens to have been inspired by our very own DIY Art for Non-Artists!  Don't you love it on the pallet?):
DSC02187

If you are looking for a fun link party, I host one every Friday night called Free for All. I would love for you to link up and share your crafts and projects!
3
SD-SilverDamask-3-1

Day 6: Glitter Topiaries with Meg of A Little Knick Knack

Hello everyone! I'm so excited to be here at Two Girls Being Crafty for 12 Days of Christmas. I just love the holidays! I'd like to introduce myself. My name is Meg and I live over at A Little Knick Knack. I'm a midwest stay at home mom to three young children, and discovered that crafting helps me keep my sanity! I love to host fun giveaways and also a fun link party, Everything but the Kitchen Sink, on Fridays! Come check out A Little Knick Knack to join the fun.

Today I'd like to share my Christmas tree topiary with you!

First, gather your supplies. Some glitter (I used Martha Stewart Silver and Aqua. I found a 40% off coupon in Better Homes and Garden! Score!), wooden dowels (Walmart), Mod Podge, foam brush and your foam tree forms (also bought with a lovely coupon from Michaels). Also, some fun little ornaments for embellishment.


Use your bread knife (heh) to cut the top off the tallest of your tree form. I cut about 4 inches from the top.

Next (and I didn't do this, but I highly recommend it), cover your table with paper to catch all the wayward glitter. I also suggest shaking your glitter on your foam over a paper plate, so you can easily transfer the leftover glitter back into your glitter jar.

Apply a generous amount of Mod Podge onto your tree form. Shake your glitter over the glue, turn and start the process again until you have the amount of glitter you like on your form. Try a fun pattern! The possibilities are endless.


Once the glue is dry, take your dowel rod and push it through the middle of the tree form. Add the top of the tree to create a layered look.


I added a ribbon and some twine around the bottom to cover the raw edges of the foam.


Cute! I would like to make some more and use my extra dowel rods to put them in my planter on my porch. So many fun possibilities! Have a very Merry Christmas everyone!

Day 5: Merry Christmahanakwanza cards with Sunni!

Happy Black Friday to you all!  I hope that if you are one of those crazies who goes shopping that you stay safe--or better yet, that you WIN the fist fight, should you find yourself having to throw down.  Yeah, I love to keep things gangsta.  Today, I'm happy to have Sunni from Love Affair with my Brother visiting with a fun holiday card.  You're sure to like this one! -Tristin

Merry Christmahanakwanza to you!

I'm Sunni from Love Affair with my Brother. Yes! You read that right. I love my Brother sewing machine, and I'm not ashamed to admit it! (Let's just pretend that's what you thought when you read the title!)

I love to blog about quilting, sewing clothes for my daughters and quick and easy crafts. I'm hosting a giveaway of some beautiful Free Spirit solids from The Intrepid Thread and I'd love it if you came by and entered!


I started with a completely different idea, but ended up with these sewn cards!


Have you ever pitched an idea for a guest post or sponsor that put you in over your head? I found this to be that pitch!

I had visions of free pdf printables. A friend said "Oh, you know how to do those?" Ummm... no.

Then I wanted to do a carved stamp. Show you how to make your own custom name stamp or phrase stamp ("Merry Christmahanakwanza" for me). "Do you know how to do that?" Ummm..... no again.

These are my solution to my too lofty ideas. Sewn Christmas cards.

And even if you don't have a lot of time, I promise these are fast. I made all 4 of these in the span of about 15 minutes. If I stuck to one design, it would be even quicker!

You will need:

blank cards and envelopes

Sew line glue pen

Christmas fabric scraps

buttons

markers

fabric glue (optional and not pictured)


Use a Sew Line pen to tack down your fabric shapes before you sew.


Did you know you can sew through paper? I have a special needle, marked with a piece of tape, that I use for paper projects. The paper dulls your needle. You can use a standard foot like I did or a darning foot and free motion quilt to attach it.


When you are finished, you can tie the threads in the back, affix them with a little dab of fabric glue or just cut them. It's just a card and not likely to get the stitches pulled out!


Here's my little Christmas tree. I love the simplicity and folksy nature of these cards.


For this one I used my Sizzix Big Shot and iron on fusible. Just turn your iron down a bit from cotton setting and you are good!

This was the fastest one! Die cut, peel and iron. DONE!


A few years ago, when I lived in downtown Chicago, I had an incredible array of friends from all over the world. I have never believed that "Merry Christmas" is offensive or that we should only wish people a "Happy Holidays" to stay politically correct. But, I mashed all my friends holidays into one phrase and came up with "Merry Christmahanakwanza"! It was silly and good hearted and now I do it every year!


This one is my favorite! I used a Sharpie pen to add the details.


So take some time out from making gifts for friends and family, and creatively play. These cards are fast and simple and afford you ample opportunity to put your own inventive spin on it!

Day 4: Felt Garland with Homemade Ginger

Happy Thanksgiving pals!  I hope your day is fun-filled, food-filled, and family-filled! Today, we have Homemade Ginger making a lovely and simple craft--one you'll probably still have the energy to make even after standing and cooking for the masses all day.  I hope you'll have a few moments to reflect and count your blessings amongst all of the holiday hulabaloo.  And why not sneak in a peek at the Macy's Day Parade?  Wishing you the best, however you may celebrate this day of thanks. -Tristin

Hello everyone! I'm so excited and honored to be posting today as part of the 12 Days of Christmas Series.  I blog over at Homemade Ginger and love doing easy and frugal projects like the one I'm going to talk about today!  Right now on my blog, I'm in the midst of a 30 Day project where I'm posting a different repurposing project every single day this month.   Come by and say hi!

Now, for today's project. This a simple garland that I whipped up using some supplies I already hand on hand. 


I decided to use up some of my felt scraps and create an easy and adorable Christmas tree garland this year.  I've seen some similar around and knew it would be super easy to make!

The most tedious part was cutting out all the circles.  I made them all about the size of a quarter, but you could do various sizes if you wanted.


Then, I simply sewed them together, stitching down the middle of each circle and leaving a space in between each one. I used gray thread to blend with all the colors.


I love how it adds color to our tree! I made 2 fairly long garlands with my scraps.


These felt garlands are also super cute hanging on your mantle!

You could mix things up with different shapes of felt, hang them from a wreath, make a monochromatic garland...the possibilities are endless!


Happy crafting!!

Day 3: Sarahndipities shares a gift for a teacher

Hi!  I'm Sarah from Sarahndipities!  I'm so excited to be sharing this quick little project with you today!

My husband is a teacher.  He teaches the 5th grade.  Over the years he's brought home a lot of interesting gifts from students during the holidays:  body wash...candy...coffee mugs...hair gel...cocoa...and even a stuffed animal or two!

But guess what?  The best gifts he's ever received are the ones he can actually use in his classroom.

I asked him once what the best thing to give a teacher was and he said, "A raise."

But after that he said, "Hand sanitizer...and tissues."

He knows all about germs.  He's surrounded by them all day long...especially at school.

So when I was trying to think of a teacher gift for kids to give their teachers this year that's what I immediately thought of.

But how to make it cute...and something that the kids could actually help with?

Well, here's what I came up with!  It's soooo simple, and the kids can help with most of it (unless you don't want them to come anywhere near a permanent marker...which I completely understand, believe me.)

Here's what you'll need:

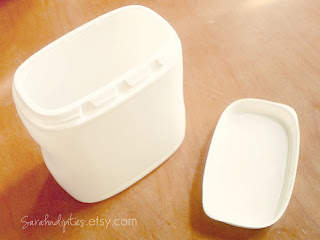
-  A Smallish container of some kind...I used an empty French's Onions can, because it was already white and had a lid...plus I have three of them left over from Thanksgiving meal preparations!
-  a couple packages of pocket sized tissues
-  a couple of sample size hand sanitizers
-  a bit of Christmas-y ribbon
-  a sharpie marker
First, remove the label from the container, and wash it thoroughly...you don't want it to smell like french fried onions, after all.
 Next, use your sharpie marker to draw eyes and a smile on one side of the container...
 ...and to color the lid black (like a hat).
 Next, tie a piece of ribbon around the base of the container.  You might want to secure it with a dab of hot glue or a couple of glue dots if you feel so inclined.
 Lastly put the hand sanitizer and tissues into the container, and snap the lid back on!

I included a note on the back of this little guy that reads:  "We TISSUE a Merry Christmas, and a HANDY New Year!"

There are so many cute ways to dress up a simple gift like this, but my kids loved that this was an upcycled project that they could REALLY help with!

Handmade gifts are always appreciated...so if you are looking for some great handmade items, hop on over to my Handmade Holidays Shop Guide to check out some wonderful gifts ideas!

Thanks again to Tristin for inviting me to be a part of the fun!  Happy Holidays!! :)

Related Posts Plugin for WordPress, Blogger...