Pages

Day 9: Bottle and Branch decor with Michael of Blue Velvet Chair

Hey pals!  Due to an email glitch, I have day 9 of the 12 days of Christmas series for you a few days out of order.  So, we have Michael from Blue Velvet Chair sharing a beautiful point of attraction with us--beautiful bottles and branches. 

Hello to everyone here at Two Girls Being Crafty. My name is Michael and I'm the host of Blue Velvet Chair, a blog dedicated to showcasing recycled and repurposed design, arts and crafts. I've looked forward to sharing a bit of holiday cheer with you since the day I 'got the call' to join this fabulous line-up of creatives for the 12 Days of Christmas.

When I'm decorating for the holidays I have two things in mind...how can I do it on the cheap and how can I reuse what I already have. Today I'd like to share my table 'centerpiece' that is a bit thrift, a bit recycle, and a bit creating something new.


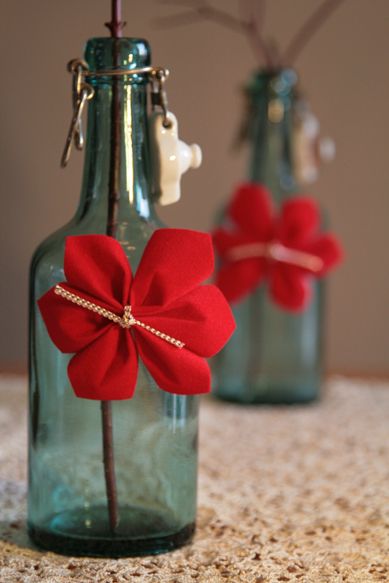
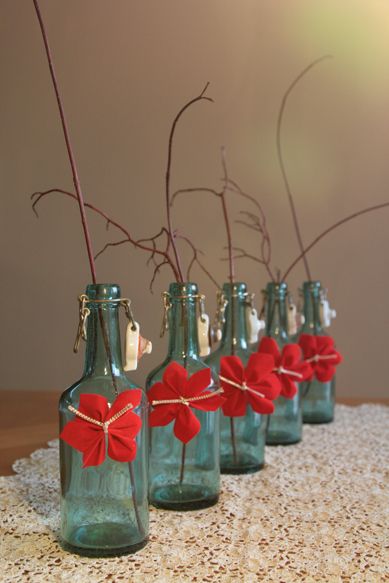
Back in May, I picked up some antique turquoise bottles from the early 1900s during a thrift store run. They became the perfectly understated centerpiece for our Thanksgiving dinner with friends when I added some simple red-colored twigs that a neighbor had trimmed from their shrub. So now we have the thrift bit.


The recycle begins when I decide to use these same bottles and twigs for my Christmas table decor. But what could I do to add some holiday cheer?  Create a little something new to add to the bottles.


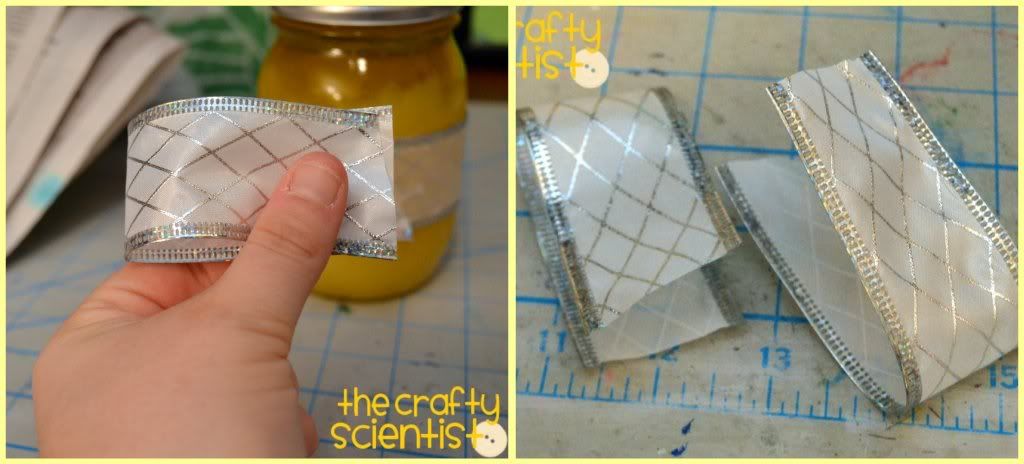
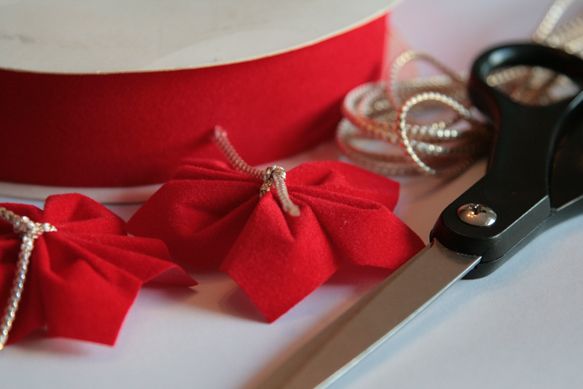
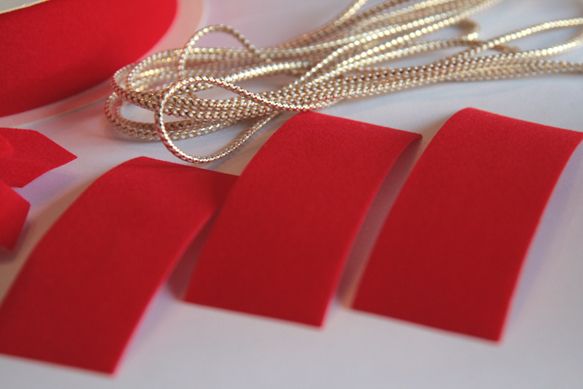
Now I'd like to share how to DIY your own little poinsettias to add 'instant holiday cheer' to something you already have that can be recycled as Christmas decor. I used an old roll of red velvet ribbon (this stuff seems to last forever!), some gold braided ribbon, and scissors. Simple.


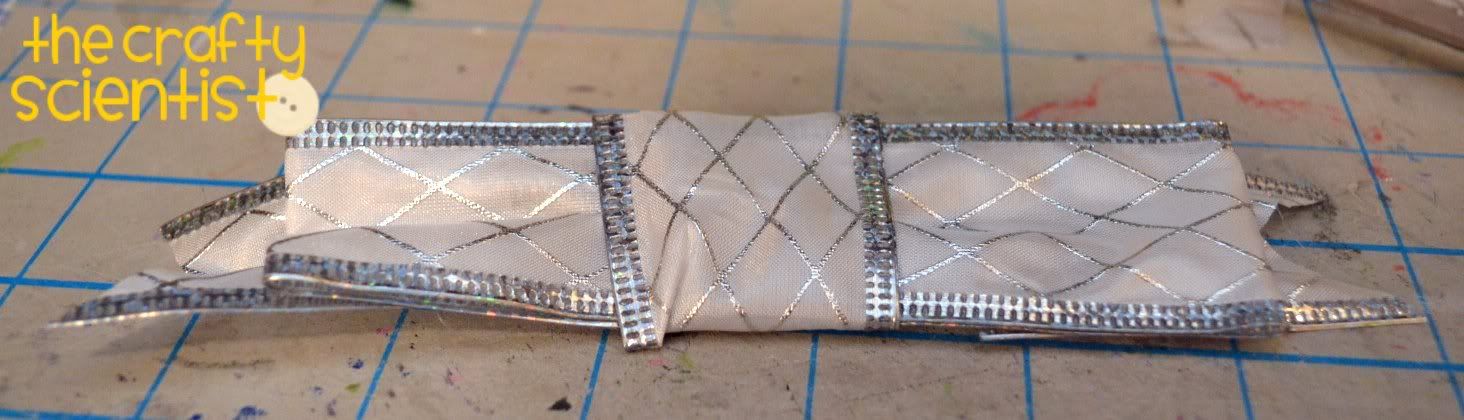
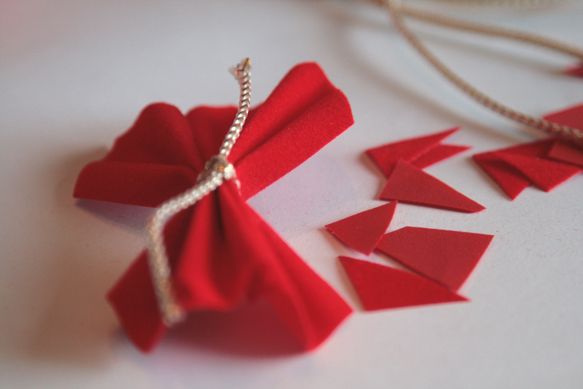
Cut three strips from the red velvet ribbon. Mine were about 3.5 - 4 inches long (about 10 cm).


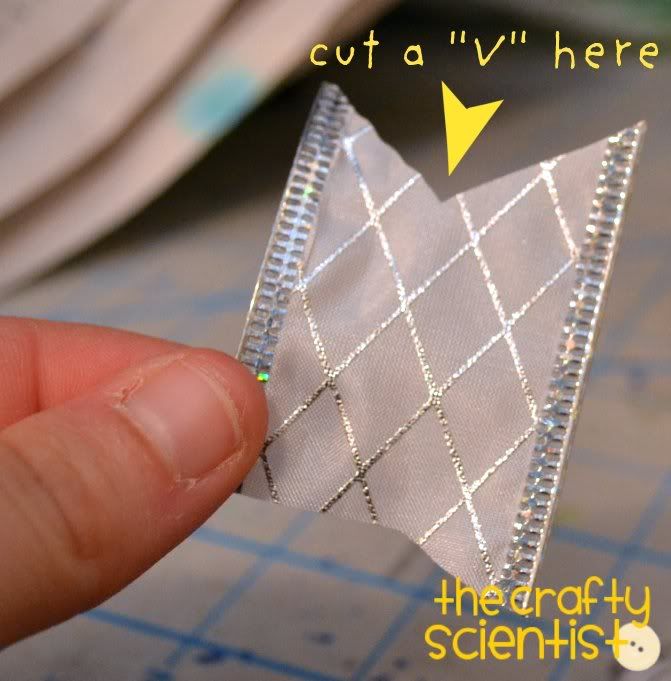
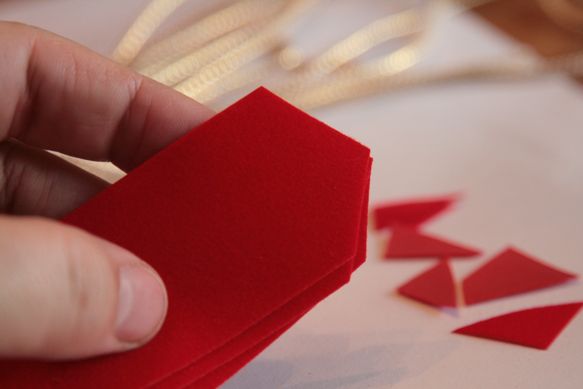
Cut the tips of the ribbon as shown below.


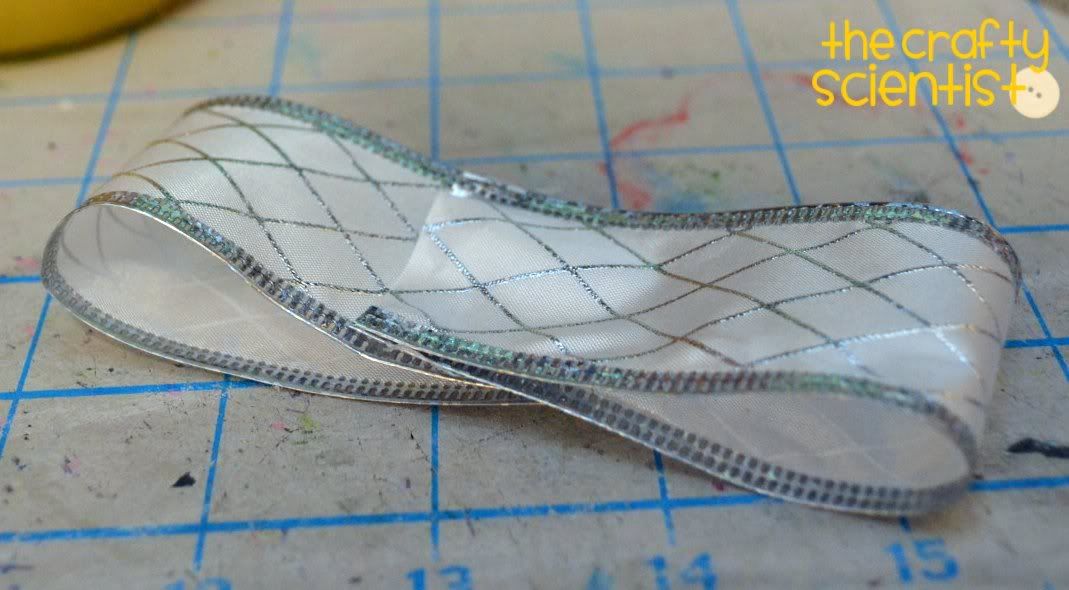
Here's where I wish I could show you via video (maybe I can make one quick and post later at Blue Velvet Chair). Press in the center of the ribbon with your thumb,while you use your pointer fingers to fold down the outside edges. I hope the photo below shows this well for you. So the center and the two outer edges are all folded downwards.


Because you want to put three of these together, you'll have to hold the first two between your thumb and pointer finger on one hand while you use the other hand just beside to create the next folds.


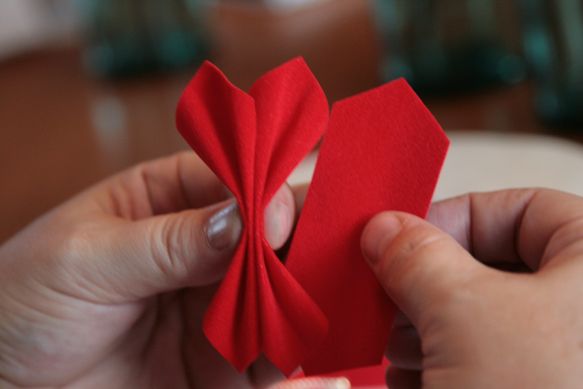
There. All three folded and held in a pinch. This process (folding the three pieces of ribbon) literally takes a total of 1 minute max.


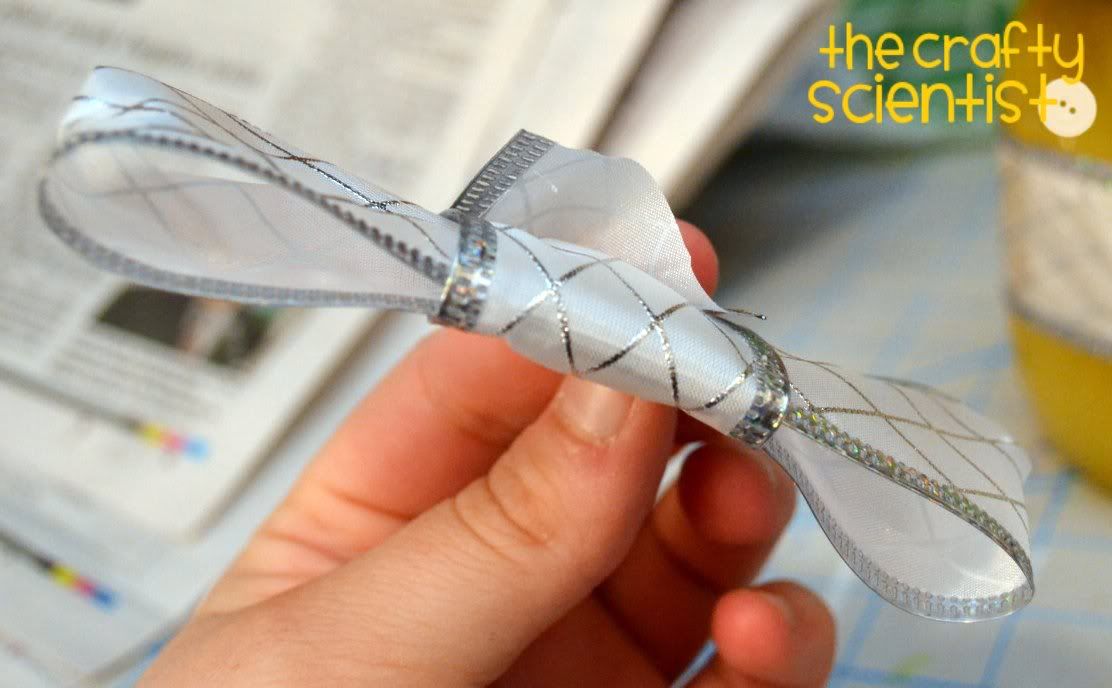
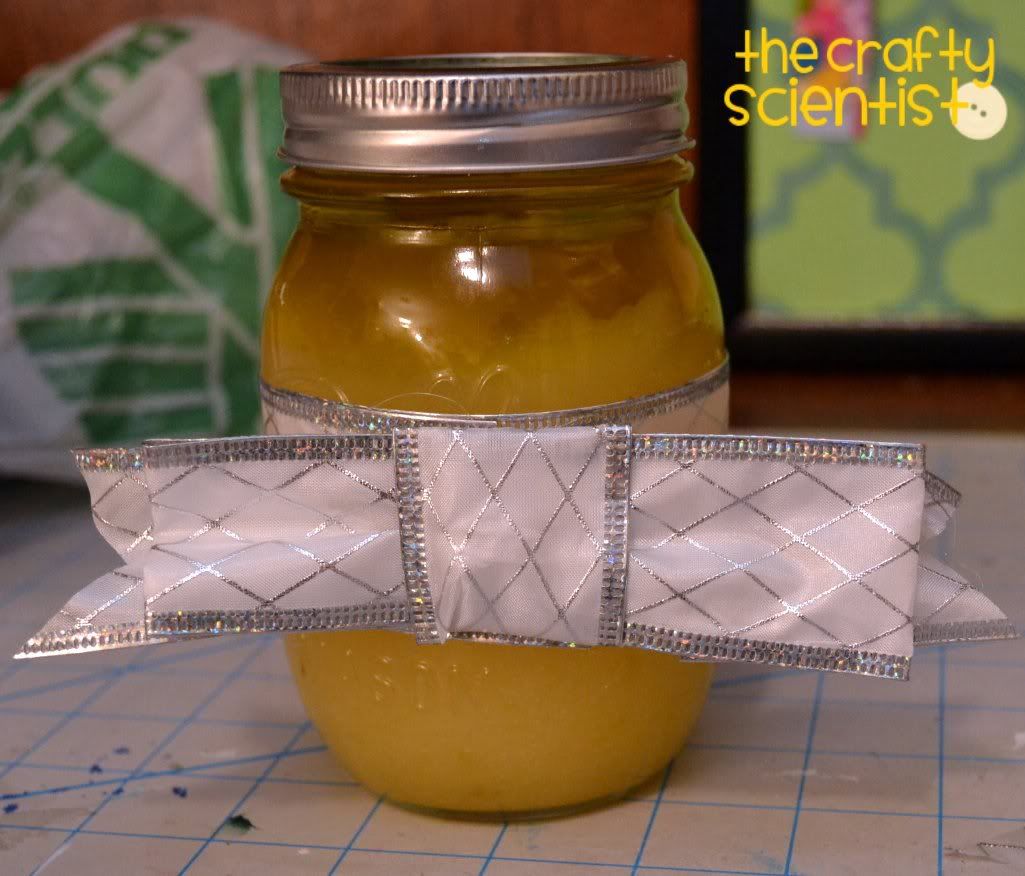
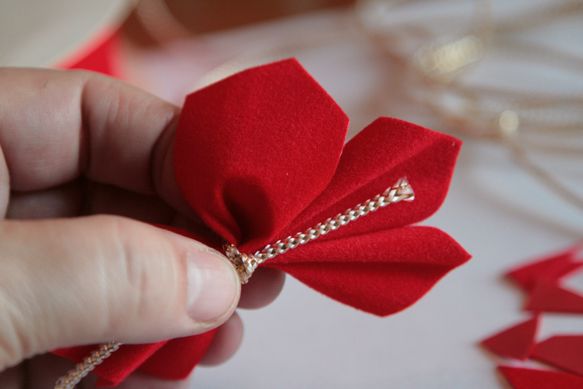
Take a (pre) cut piece of the braided gold ribbon - or use whatever you have around - and tie around all three 'petals'.


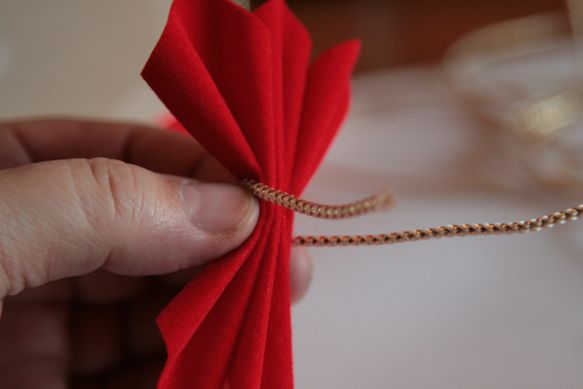
It will look like this once you get it tied and knotted.


And now time to create the poinsettia! Simply take your pointer finger and push from the bottom near the knot in order to 'spread' each petal. This will create the roundness of the flower due to the stiffness of the red velvet ribbon.


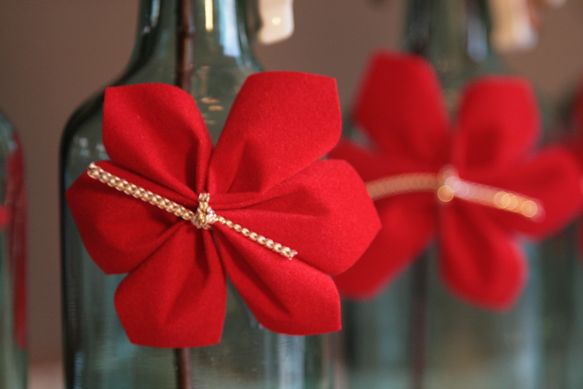
Ta dah!  Your own little DIY poinsettia flower. I promise these little pops of holiday cheer can be added to almost anything and you'll get some fun results.


I just love the contrast of them against my old turquoise thrift bottles. This color combo works so well because they are contrasting colors on the color wheel.


Happy holiday cheer.


Happy happy.


Happy holidays to you all.


There you have it. Mere minutes to create your own little recycled-thrifted-creating something new holiday cheer.  My dream project is to create a big beautiful wreath full of these little beauties. My sister made one back in the 90s, and I've been wanting to create one ever since. 15 years should be enough time for the idea to simmer...don't you think?


If you'd like to see some more of my hybrid style holiday decor, you are welcome to visit Blue Velvet Chair. We'd love to see you there!


Happy Holidays everyone!


Michael

Day 11: Crocheted Snow-Covered Ornaments with Winkieflash of A Creative Being

Hello crafty pals and welcome to day 11 of the 12 Days of Christmas Series. Today, we have some awesome crocheted ornaments from Wink of A Creative Being. Without further ado...


This is the pattern I use to make Christmas ornaments with. It's fun, easy and fast. Let's get started! :)

What you'll need:
  • Regular, colored yarn, and white yarn. You can use whatever yarn you want, as long as the colored yarn and the white yarn are the same weight. (or close enough)
  • Sparkly yarn! For this pattern I used silver yarn (Lumina by DMC)
  • Stuffing. I use polyester filling, but you can use whatever you want, for instance yarn scraps!
  • Hooks. Use the appropriate hook for your yarn, and then go down 1 size. Because we will be stuffing the ornaments, you need a tight fit.
  • Stitch markers. You're going to be working in the round, so you'll need a marker to keep track of where you are.
  • A pair of scissors.
  • A darning needle, to weave in the ends.
  • The Christmas album of She & Him. Trust me, it's so relaxing to crochet by, and a must to get you in the right mood! :)

The terms I use are all US terms. This pattern consists solely of single crochet stitches, which are double crochet stitches for you UK people.

Alright, got everything? Here we go!

For this pattern, I'm going to use an existing crochet sphere pattern. It's written by Emily Premise-Conclusion, and I got it from her Ravelry page here. If you have a different sphere/ball pattern you'd like to use, go for it! :)

For this pattern and the yarn I'm using, which is Stylecraft Special DK, I'm using a sphere pattern that consists of 22 rows. The ornament will measure about 3 inches.

When it says 'inc' in the pattern, increase; make 2 single crochet stitches in 1 stitch. Where it says 'dec', decrease; single crochet 2 stitches together (sc2tog). I always use an invisible decrease. If you don't know how to do this, check this out.

With the colored yarn, we're now making the bottom halves of the sphere. If you're using a different pattern from mine, just follow it until you get to one row before the middle row.
  1. Start with the colored yarn. Crochet 6sc in a magic circle, or ch2, 6sc in 2nd chain from hook. (6)
  2. inc in each stitch around. (12)
  3. *1, inc* around. (18)
  4. 1, inc, 2, inc, 3, inc, 2, inc, 3, inc, 2 (23)
  5. inc, 4, inc, 3, inc, 4, inc, 3, inc, 4 (28)
  6. 3, inc, 6, inc, 6, inc, 6, inc, 3 (32)
  7. 1, inc, 7, inc, 7, inc, 7, inc, 6 (36)
  8. 6, inc, 11, inc, 11, inc, 5 (39)
  9. 8, inc, 12, inc, 12, inc, 4 (42)
  10. 15, inc, 26 (43)
  11. inc, 42 (44)
Cut the yarn but leave a little tail. Don't fasten off. Okay, that's it! You now have a colored bottom half of a sphere. I made a couple of bottom halves in different colors.


Now onto the really cool part! With white yarn and the sparkly yarn, we're now going to make the snow layer of the ornament.

So, with white and sparkly yarn attached, go as follows:
  1. Crochet around (44), using a spike stitch. If you don't know how to do this, check this out. Basically you're just making sc's, but you're inserting your hook into a different row, below the one you're in. I've done cascading spikes all around the bottom half. So I started 1 row below, then 2, then 3, then 4, then 5, and then back up again in row 4, row 3, row 2, row 1 and finally in the actual row.
    See how this creates the illusion of snow falling? You can vary your own spike stitch by making it more random, or leaving it out completely at some places. You're in charge! :)
  2. That was basically it. Now all you have to do, is complete the sphere. If you're still on this pattern, go as follows:
    42, dec (43)
  3. 26, dec, 15 (42)
  4. 4, dec, 12, dec, 12, dec, 8 (39)
  5. 5, dec, 11, dec, 11, dec, 6 (36)
  6. 6, dec, 7, dec, 7, dec, 7, dec, 1 (32)
  7. 3, dec, 6, dec, 6, dec, 6, dec, 3 (28)
  8. 4, dec, 3, dec, 4, dec, 3, dec, 4, dec (23)
  9. 2, dec, 3, dec, 2, dec, 3, dec, 2, dec, 1 (18)
    You can start stuffing now.
  10. *dec, 1* around (12)
  11. *dec* around (6). Fasten off, leaving a tail. With the tail, weave through each stitch in the opening. Pull tight to close.
And that's it! You've created your first snow-covered Christmas ornament :)


Wait, what is that you say? It doesn't look very Christmassy? Well, you're right. It needs something else! :)

Now we're going to make that little thingie on top with the loop in it, so you can actually hang this in your tree.
  1. With the sparkly yarn, crochet 6sc in a magic circle, or ch2, 6sc in 2nd chain from hook. (6)
  2. inc in each stitch around. (12)
  3. Sc around two times, so you end with 4 rows.
Finish off and leave a tail. Now pull the first tail through the center to create a loop, and tie the end to the other tail. Like this:


Now using the tail we left at the end, sew the loop thingie to the top of the ornament (the white part). And that's it! A completed ornament :)


Now you can easily adapt this pattern to make all kinds of ornaments. A couple of examples?

For instance, you could use self-striping yarn to create a stripy ornament:

Or use gold sparkly yarn and colored yarn to crochet a sphere:

Use rich, velvet yarn (which was impossible to photograph well!):


And if you crochet in the backloops only, you'll get a ridged ornament!

The possibilities are endless; let your mind go wild this holiday season! :)

xo,
wink

Day 10: Lemon Hand Scrub with Mel the Crafty Scientist

Hi guys! I'm Mel the Crafty Scientist (my blog is actually The Crafty Scientist) and I'm so excited that Tristin asked me to be a part of the 12 Days of Christmas here because I LOVE Two Girls Being Crafty and I am thrilled to be included in the lineup of insanely talented ladies!


I love to make projects using stuff I already have and that don't usually take too long and this Lemon Hand Scrub is a perfect example of that. I actually found the recipe for this lemon hand scrub here at Under the Table and Dreaming last year and made some of it to give as gifts to friends and family members who loved it! It was awesome for everyone, including the super-masculine guys who work with cars and get lots of oil and gunk on their hands because it actually helps get that off. And I think gifts are always more fun in pretty packaging so I'm going to show you how to make the scrub, a pretty label for the jar, and a Martha-worthy ribbon to decorate your present!


For the Scrub

  • 2.5 cups sugar
  • 1 cup extra virgin olive oil
  • 4 tablespoons of lemon juice


For the Container & Packaging

  • Free Lemon Printables you can find here (printed out on sticker paper or cardstock)
  • Mod Podge + brush
  • Mason Jars (the scrub recipe is for a 12 oz. jar, but you can obviously recalculate to fit into whatever size jars you want!)
  • Ribbon
  • Scissors
  • Glue gun and hot glue


First, you want to gather up all your scrub ingredients. Then, you want to simply mix them together - the sugar, the extra virgin olive oil, and the lemon juice.


You get a sort of egg and sand looking mixture that looks a bit like this...


As you stir, it gets a little bit more like a mixture and less like a sand castle with moat...


You stir it up and put it into a jar (the amounts here will yield 12 oz. or so of the scrub) and seal it. It will separate over time, but if you just shake the jar up or use your fingers or a popsicle stick or something to stir it up, it'll mix up just fine!


Then, you want to download your free printable labels, found here. These actually came from the amazing, super-cute Wendy at Wendolonia (she made orange and lime versions too, originally for marmalade labels)! Wendy gave me permission to share the versions that I made, complete with sugar scrub label, with you all here! You can download the .png or .jpg versions from Box.net here and then simply print them out. There are 12 on a sheet and you can print them on some sticker paper or some nice white cardstock.


Then, you just want to grab your 2" circle paper punch and punch them out. You can cut them out by hand if you don't have a paper punch, but I'm not so good at cutting smooth curves so I needed the assistance...


Then I just used some Mod Podge to attach it to the lid of the jar and put some Mod Podge on top of the label so that it's protected from wet hands that might try to open it! (It's held up pretty well over time, but after about a year, this one does look a little dirty, unfortunately, but I promise, yours will look better... at least at first!)


After you put the labeled lid together, you might want to put a pretty ribbon and bow on it. Basically, you want to cut enough ribbon to wrap around the fattest part of the jar and just use a dot of hot glue to secure it. I'm showing you how I made this bow with wire-edged ribbon from the Dollar Tree...


Then, cut two pieces of the same length to make the loops for your bow. Put little dots of glue to keep the loops set.


Then, you want to glue one loop over the top of the other loop.


To make the bow look even more like a real bow, I sort of folded the bottom of the ribbon up a little.


Then, cut another small piece of ribbon and wrap around the middle of your two loops and glue in place.


Then you want to cut two small pieces of ribbon and cut "V" shapes into the ends and glue to the back of your bow.


A bow worthy of Martha!


Just glue to the ribbon you had around the jar and it's a gorgeous little present that you made with stuff you probably already have on hand (and even if you didn't, it costs almost nothing)! (You can see how fast it settles too - I literally stirred it up, made the ribbon and took pictures of that and went to take pictures of the finished product and it had already settled quite a bit, but it mixes up again just fine.)


Pretty, right?


Last year this was a big hit with the friends and family... and I might have even kept a jar for myself too because I loved it so much!


A big thanks to the crafty girls for letting me guest post here today. I'd love it if you came to visit me (and shared your experience if you make any scrub!) at The Crafty Scientist! Feel free to check out some of my other tutorials that might make awesome gifts...

The Yellow Chevron Frame + Printable Quote, Interchangeable Ribbon + Briolette Necklace, Argyle Yarn Wreath, and Paint Chip Art are all easy little projects I've shared step-by-step tutorials for creating and would love for you to check out at The Crafty Scientist!  Thanks again for having me, ladies!

Related Posts Plugin for WordPress, Blogger...