Pages

Linky Love: Shutters

I secretly have an obsession for shutters. I have never owned any, but I admire them in pictures when they are creatively used in the home. They have such a vintage, rustic warmness to them. (So many good words in one sentence.) And even though they are just worn, overlooked, old shutters; in a beautifully decorated space they create a sense of whimsical wonderment.

Let's take a look at all the innovative ways to use old shutters as decor and also some creative DIY projects...


Old world, rustic charm. Sigh. It's the perfect backdrop to both of these garden vignettes. 


Bringing the exterior into the interior. Gorgeous.


Make a headboard out of old shutters! I love the beach cottage feel. 
Shutters make everything more homey, don't you think?


The Nester from Nesting Place has beautiful robins egg blue shutters decorating her mantel above their cozy fireplace. It's a beautiful pop of color, and you don't need a single other thing up there.


Now for some DIY shutter projects:


The girls over at The Tortoise And The Hare created this useful and eye-catching  
Window Shutter Wall Display.They used glaze and some sanding to give it that antique look that I'm so in love with. Go check out their full tutorial here.


Gail from My (Re)purposed Life came up with the idea for this charming garden shutter bench. It's perfect!


This beach cottage peg board was the genius idea of Chania over at Razmataz
Find out how she transformed this old window shutter into something amazing.


Maybe you're brave enough to tackle a whole wall. 
Check out this incredible shutter wall made by Olive and Love. It's dynamite.


One of these days I will find the perfect old shutters and fix them up and find the perfect home for them. 
Until then, I'll just keep admiring pictures of them. :)
Do you have shutters in your home? If not, how would you choose to use them?
xoxo,


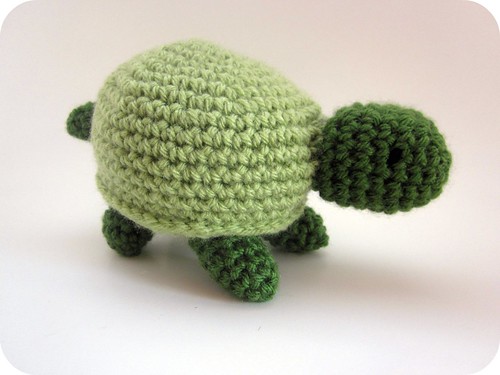
Amigurumi Turtle

Amigurumi is my new obsession.  In a few short hours you can create a precious, soft, and simple toy.  Crochet is the bestest craft ever!  (And amigurumi is so much easier than it looks!)


I found the pattern for this turtle on the Lion Brand Yarn website. It's FREE and it recommends Lion Brand Vanna's Choice yarn, which is my favorite!

He's going to be a gift for some friends who are having a baby boy, but in the meantime Junebug and I stare at him adoringly.

Tristin Signature

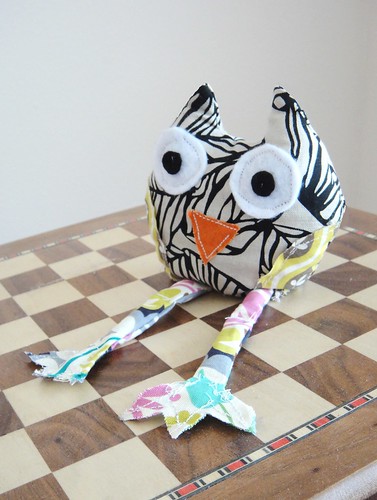
Owl Pin Cushion

I know it has been a super long time since I've posted anything. Things have been really hectic over here. Luckily, there are two of us. And Tristin has done a terrific job of updating the blog all by herself! (She's like a crafting wonder woman... sometimes I wonder how she accomplishes so many crafts and with a kid!)

DIY Owl Pin Cushion 2

Anyways, here's a little something that I have done recently. It's an owl pin cushion. I found the wonderful tutorial on My Owl Barn and just copied it exactly. The DIY Dish even did a video tutorial of Kim and Kris making one. With the free printable PDF pattern and clear directions, who wouldn't want to try to make one of these cuties??


Some modifications I made:
  1. I sewed a straight line across the middle of the legs to create the "knees" instead of knotting it. This is purely preference, but I liked the look a little better. 
  2. I forgot to do this, but I think it would be a good idea to add a little bit of litter to the bottom of the legs (in the feet) to add weight to them so they would hang easier. 
  3. And lastly, I used clay litter instead of walnut litter simply because I couldn't find it and clay litter was only $3 for a huge bag. It's slightly larger than walnut litter, but I think it works great for this project. 


    He's by no means perfect, but I think all his little imperfections give him character. :) If you have no need for a pin cushion, you can also try blowing up the pattern to make a kids pillow.


    Easter Recap

    I can't believe Easter is already over.  I feel like it's practically Christmas.   Does anyone feel me??

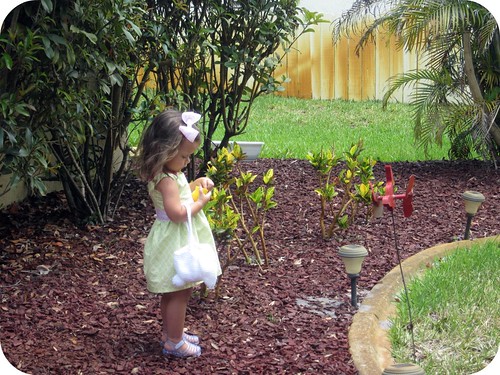
    Easter 2011 023


    Anyhow, we had a wonderful Easter.  Holidays like this are so enjoyable with kiddos.

    As for the things I made for Easter...


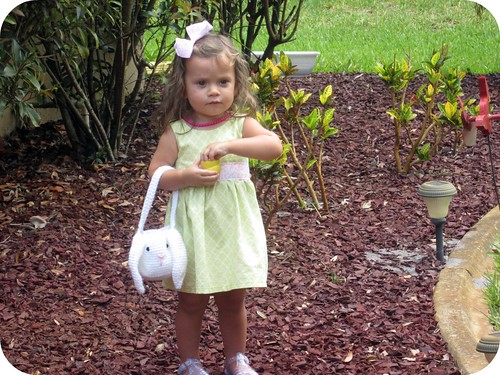
    Junebug's dress was made using the Charlotte Dress "method" over on Craftiness is not Optional.  Umm, brilliant tutorial!  I overcame my fears and sewed an invisible zipper into the back of the dress-and you know what??  It was pretty easy!


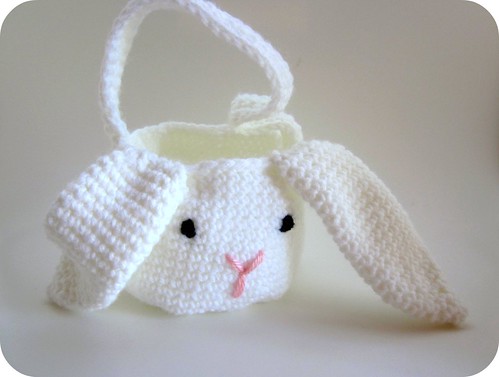
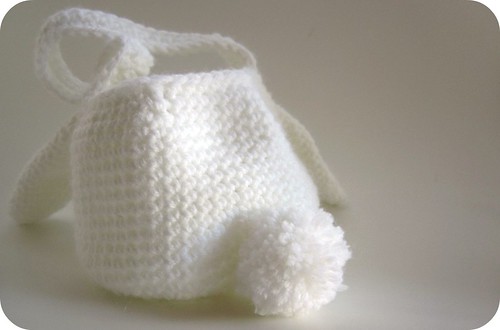
    I made this amigurumi Easter basket using a free pattern offered by Lion Brand Yarn.  Their website offers tons of great (and free) patterns. My favorite part is the pompom tail.  SO cute!


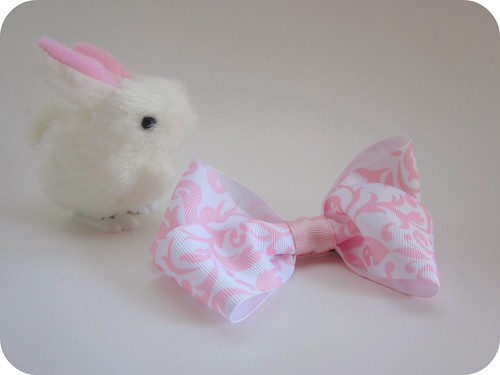
    This hairbow was created using a tutorial from Midwestern Moms.  Fast and fab!


    Isn't she precious?  Junebug loved hunting Easter eggs.  And I loved watching her.


    Tristin Signature

    Linky Love: Last Minute Hairbow Edition

    Easter's only a day away--are you ready?  I'm almost ready.

    Almost.

    One of the things that I just checked off my last-minute list was making a hairbow to match the Easter dress that I made for Junebug.  I'll share it soon.  If you're down to the wire and looking for inspiration, here ya go!


    Miswestern Moms has an easy tutorial for a boutique-style hairbow.  This is the tutorial I used for Junebug's hairbow and I am ecstatic about the results.


    Craft Snob created a cuh-yoot chick clip for her daughter.  What a great way to use some of the felt scraps that you may have lying about.


    Jessica of Sew Homegrown guest posts on Prudent Baby with a fabulous tutorial of how to make Anthropologie-inspired fabric hairbows.  


    The Purl Bee offers a printable template to make a sweet Rose Barrette out of felt.  I have made a bazillion of these (and by bazillion I mean a dozen) and am satisfied every time!

    So, if your little one is lacking a bow to match her fancy-schmancy Easter dress, you'd better get craftin'!

    Tristin Signature

    DIY Photo Glass Magnets

    Magnets 010

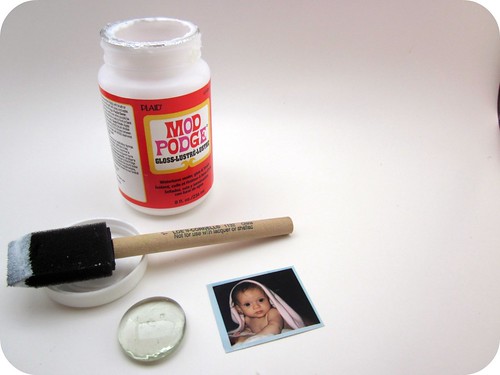
    This magnet is pretty similar to yesterday's DIY Glass Magnets but WAY cooler because it's personalized with a photo.  Same directions, same concept, but by using a photo instead of scrapbook paper your results are a super-personalized and lover-ly treasure.


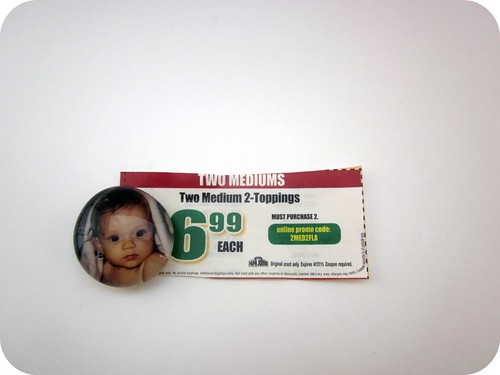
    I used my favorite photo of Junebug for this magnet.  She was four months old when this photo was taken and she's without a doubt the most beautiful baby I've ever seen.  I may be slightly biased, of course.  You can use a photo of the most beautiful baby you've ever seen. 


    It's currently holding a Papa John's coupon.  What, you never order pizza?  Yeah.  That's what I thought.  I know you do it, too.

    My mother-in-law visited this weekend and commented on what a great gift this magnet would be for a Mom or a Grandma.  Hmm.  Do you think that may have been a hint??  She's right though; Mother's Day is right around the corner and nothing says "I'm a Mom" like a magnet with your kid on it.


    Tristin Signature

    P.S. There are still more magnets to come.   ; )

    DIY Glass Magnets (The alternative to gift cards!)


    Nothing says "I have absolutely no idea what to get you" like the gift of magnets.  You know?  But if they're homemade it's somehow legit.  I love to use the word legit.  I'm just too legit to quit.  I crack myself up.

    Magnets 007


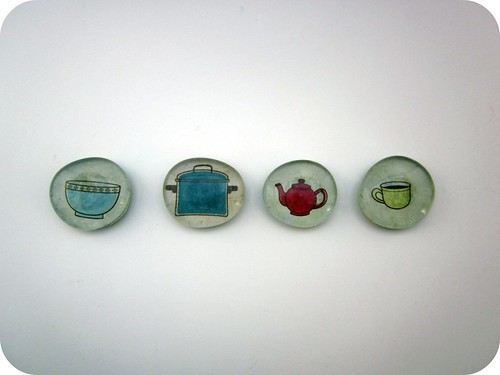
    This whole craft came about when I found some lovely large-ish sized flat-bottomed glass gems at the Dollar Tree.  They're meant to be used as a vase filler, but there's so rules so let's make some magnets!  I thought I was brilliant as my mind raced with the possibilities of a new craft--only to come home see a similar project while perusing How About Orange.  It burst my crafty bubble, y'all.  Whatevs.  Great minds think alike.

    On with the show...

    To do this lovely craft, you'll need:
    Flat-bottomed glass gems (the kind for filling vases with; I found mine at the Dollar Tree)
    Scrapbook paper you love
    Mod Podge
    Paintbrush
    Magnets (strong ones since the glass gems are heavy)
    Gorilla Glue
    Clamps

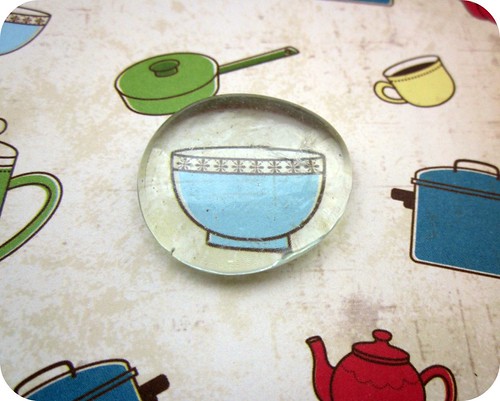
    First of all, you'll want to roll a gem over your scrapbook paper in order to find a design that's suitable for a magnet.  Patterns are fun, but I have been holding on to this paper for months in hopes of the perfect project 'cause I love the cute kitchen objects.  This is the perfect use of this paper.  (I purchased it at Jo-Ann Fabric and it's still available there if you want it, too!)

    DIY Glass Magnets

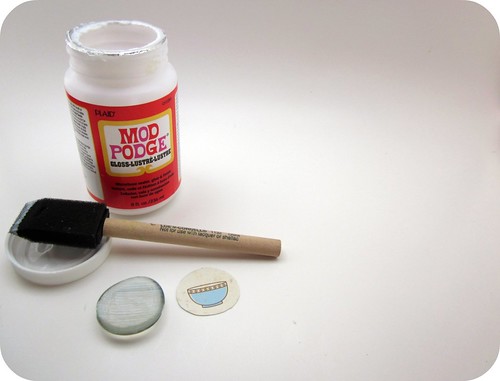
    Then cut out your design to fit the bottom of the glass gem.  Trace if you need to.  (I needed to.)

    Apply a thin layer of Mod Podge to the flat side of the glass gem and affix your paper.  Let it dry.  (Duh.)


    DIY Glass Magnets

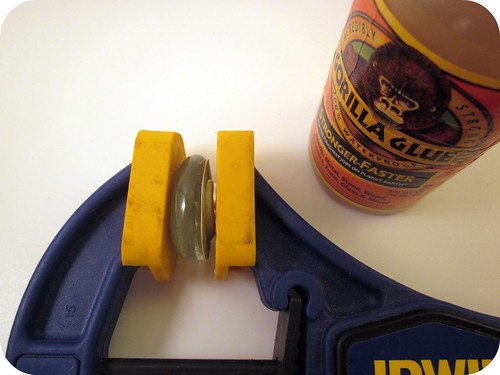
    Apply Gorilla Glue to back of gem and add your magnet.  Then clamp it per Gorilla Glue instructions. (Initially I tried to do this part with hot glue.  Fail!  The hot glue is not strong enough and it will just detach from the magnet at the first sign of stress.)


    DIY Glass Magnets

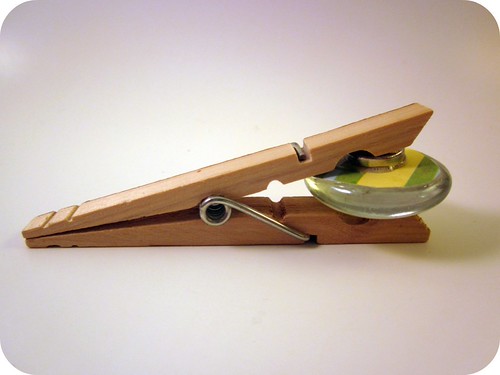
    If you don't have clamps, you can use a clothespin, though I'll admit, it takes a lot more finesse.  Plus it feels better to use manly tools like clamps when crafting.  Don't you agree?

    Clamping glass magnet with gorilla glue


    So, keep some of these simple little magnet sets on hand for those "I have no idea what to give you!" occasions that are sure to pop up.

    Magnets 007


    Isn't the theme of these magnets perfect for a kitchen??


    A friend from church shared a yummy recipe with me that I can't wait to try.  It's on the fridge with one of my new magnets.


    Keep your eyes peeled this week for a few more magnet crafts. I'm kind of on a kick.

    Tristin Signature

    Linky Love: Sweet, Simple Surprises


    Sometimes the smallest and simplest ideas astound me. 
    Projects don't have to be difficult to make a statement.


    Fashionable DIY Leather bow cuff bracelet by Clemence from Oh the lovely things

    Inexpensive and festive Paint chip egg garland from The SoHo.


    Precious DIY Button Clock by Jess from Epheriell Designs.

     Break out your crafting supplies and jump right into a short and sweet weekend DIY project.
    And remember, keep it simple. :)


    Frogs and Snails and Puppy Dog Tails... again!

    A family member is about to have a baby boy so naturally I take it as an opportunity to craft.  I mean, a gift is a legitimate reason to make something, whereas the rest is just "hobby", right?  (Though I still justify my crafting by reminding myself that it's cheaper than therapy...)

    Baby boy gift collage

    In addition to a few store-bought necessities (like the indespensable sleep-saving swaddle blanket) I made a few small gifts for baby Myles.  Isn't Myles a great name?

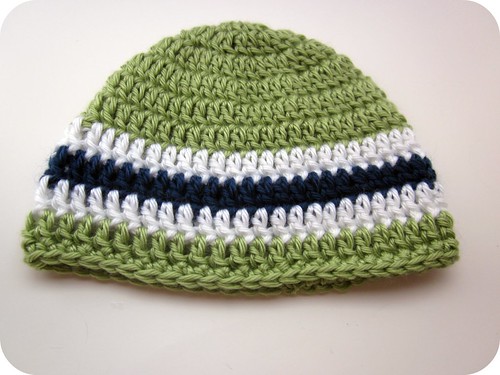
    Baby boy gift Hat

    This is the first hat I have not used a specific "pattern" for.  I did however look over my fav kid's hat tutorial over at Girl in Air to make sure I was starting it right.  I like the lime green and navy blue together. 

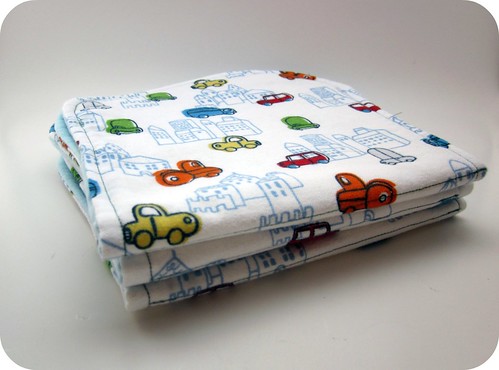
    Baby boy gift burp cloths

    These burp cloths are made using Homemade by Jill's burp cloth template.  Rather than fraying the edges like Jill does, I sew the pieces right-sides together with quilt batting (leaving an opening) and turn it inside out, iron and topstitch.  I just prefer them that way!

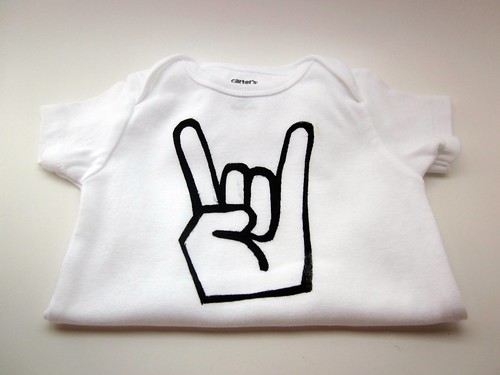
    Baby boy Rocker onesie

    This "Rocker" onesie was made using freezer paper stenciling.  I did a google image search for the rocker hand sign and when I found one to my liking I formatted it and went to town making a stencil with my Exacto knife.  Rock on!

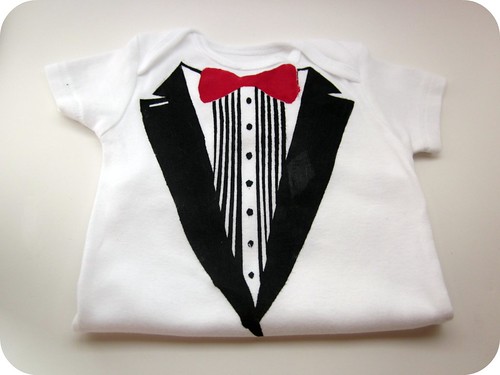
    Baby boy tux shirt

    This tuxedo onesie also uses a freezer paper stencil.  I used How About Orange's tuxedo printable but since I did not have fabric transfer paper, I went through the tedious process of making a stencil.  I'm (overall) happy with how it turned out!  Little Myles will really keep it classy with this onesie.

    What are your go-to baby gifts (both crafty and non-crafty)?  For all of you veteran mommas, what were your favorite baby gifts to receive?

    Tristin Signature
    Related Posts Plugin for WordPress, Blogger...