
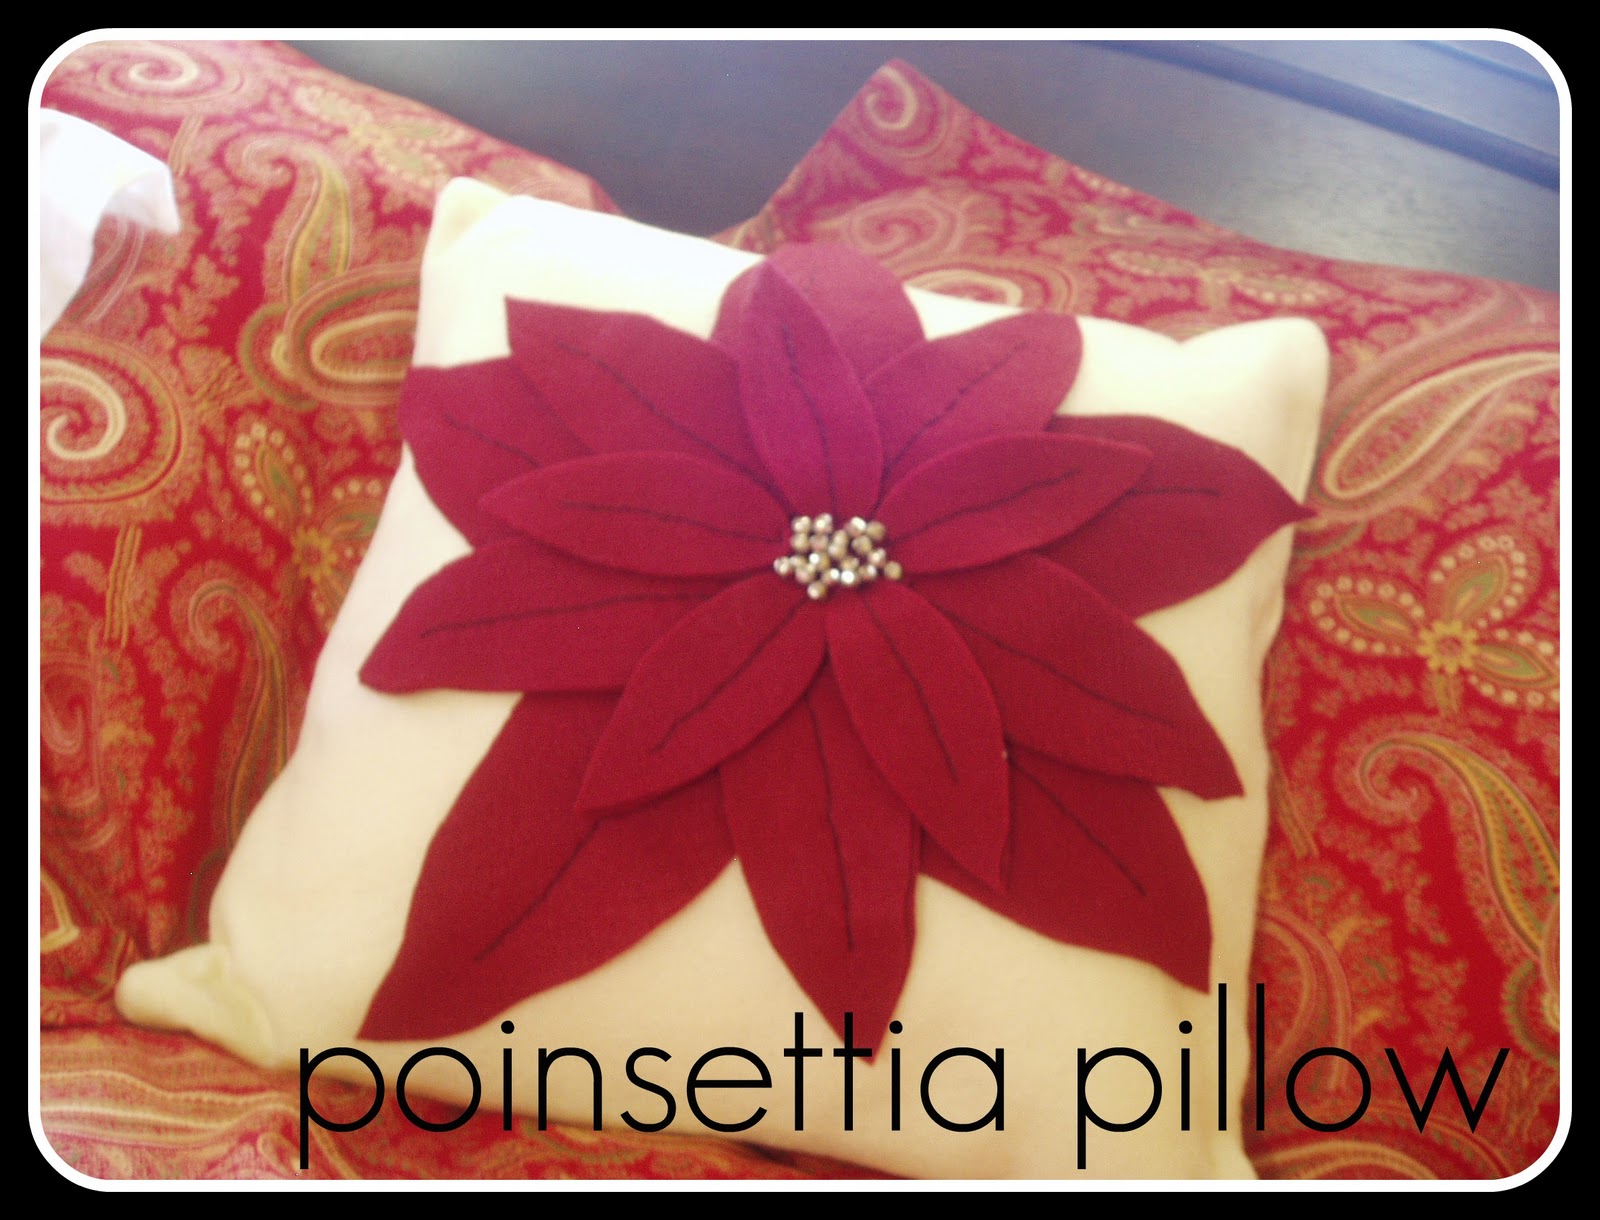
I LOVE Christmas. The music, the tree, the ornaments, the music, the food, the cookies, the music... Seriously, the music was worth mentioning three times. I love it. I am also excited for Christmas this year so I can finally display the Poinsettia Pillow I created for... $3. Yep.
The inspiration came from a Pottery Barn pillow in the most recent catalogue. The PB pillow is $29, which in my opinion is expensive for something that can only be displayed for one month of the year.

Want to make your own Poinsettia Pillow that blows Pottery Barn's away? Here's how:
First of all, you'll need :
1/2 yard of ivory felt (from this cut 2 16"x16" squares)
1/2 yard of ruby felt
coordinating embroidery thread
5/8" hem tape (aka fabric tape, fabric fuse tape, etc.)
20 6mm bells
sewing machine (for sewing pillow)
pillow form or poly-fil
And before we get started, here are a few things I'd like to share. First of all, I did not include my pillow form in the cost of the project because it can be reused year round with other pillow covers. It's a multi-tasker. Second of all, I bought all items on sale at my fabric store or with coupons. Stores like Jo-Ann offer 40% coupons frequently and even allow you to use competitor's coupons in the same transaction. Lastly, the amount of fabric will be enough to complete two pillows, but in order to have enough height to cut the 16x16 pieces needed for the pillow "background" you have to buy at least 1/2 yard. Got it? Good.

You'll need 10 small petals, 10 medium petals and 5 large petals.


Get a feel for how you want it to look--and appreciate how quickly the project is coming together!

Use Elmer's glue to adhere two small leaves to each other for some thickess. Do this with all of the small leaves so that the 10 you cut out turn into 5 thicker leaves. Do the same with the medium sized leaves.

Once the glued felt leaves are dry, use your embroidery floss to backstitch up the center of the petal for visual interest. I think you'll agree that this is a worthwhile step. It doesn't have to be perfectly straight--in fact it looks very charming with a little bit of veering off here and there.

Cut a 2" circle from your ruby felt and use a running stitch to affix it to the center of one of your 16x16 squares.

Lay out the first round of petals and adjust them to your liking.

When you're happy with the placement of your first later of petals, fuse the sides of the petals down with your hem tape. Leave the center of the petal free of hem tape to make embroidery easier. (It is next to impossible to stitch through the hem tape adhesive--I would avoid it at all cost!)

Now that you have fused the leaves to the ivory felt pillow front, use the same backstitch method that you used on the small and medium-sized petals to affix the petals to the pillow.

Next, use hem tape to affix second round of petals. Use a running stitch in the center to further affix the petals to the pillow front. Repeat step for the small petals, too. Then stitch bells into the center.
Sew pillow as you would any other pillow. (If you're new to pillow-making, check out HGTV's Pillow Making 101.)
Wasn't too hard, was it? Please let me know what you think! As always, your constructive comments and questions are sincerely appreciated.
Beautiful knockoff! I did one too--I love how they each turn out so unique!
ReplyDeletehttp://craftingintherain.blogspot.com/2011/11/poinsettia-pillow.html
Great tutorial! Thank you! Here's my version. http://sweeeterthanhoney.blogspot.com/2012/01/pottery-barn-poinsettia-pillows.html
ReplyDeletepalm angels
ReplyDeleteoff white t shirt
jordan shoes
bape clothing
kevin durant shoes
off white jordan 1
bape outlet
bape hoodie outlet
kevin durant shoes
bape clothing
golden goose
ReplyDeleteoff white shoes
hermes outlet
golden goose sneakers sale
bapesta
off white outlet
Transforming your designs into stunning embroidered creations has never been easier, thanks to this top-notch Embroidery Digitizing Company in the UK with their expert digitizers and state-of-the-art technology, they bring your visions to life with precision and detail.
ReplyDeleteLooking for a professional body to body spa for ultimate relaxation? Our therapists specialize in luxurious, stress-relieving massages that leave you revitalized.
ReplyDelete