
I know what you're thinking... another decoupage egg tutorial?? And sorry to disappoint, but yes. This concept has already been done numerous times this season, so I'm not sure who to give credit to. Just know that this is not my original idea. If you haven't heard of these yet, great! If you have, I hope you find some of my tips helpful in creating your own way of doing this craft. Enough talk. Let's get down to business.
Supplies:
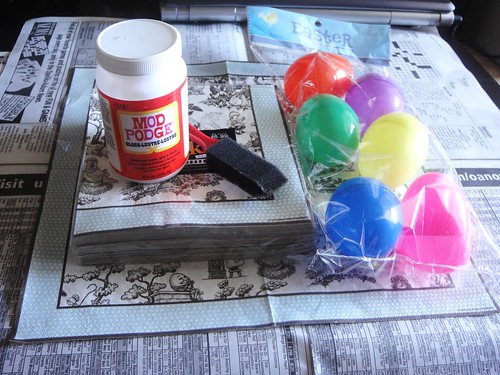
Pretty napkins
Plastic eggs ($0.35 - half off at Hobby Lobby)
Mod Podge and felt brush
Newspaper
Saran wrap (not pictured)
Once again - the supplies for this project are almost completely free! Booyah! Cause that's how we roll. That was lame. Sorry, continuing on...
What To Do:
First, before you do anything - take your eggs out to a well ventilated area and spray paint them white. This is so you can't see the extreme(ly nauseating) neon colors through the napkin. Like a dummy, I didn't take a picture of this step. Some people choose to glue the two halves of the eggs together, but I didn't feel this step was necessary, and mine turned out fine. If you plan on reusing these for years to come, I would probably glue them.
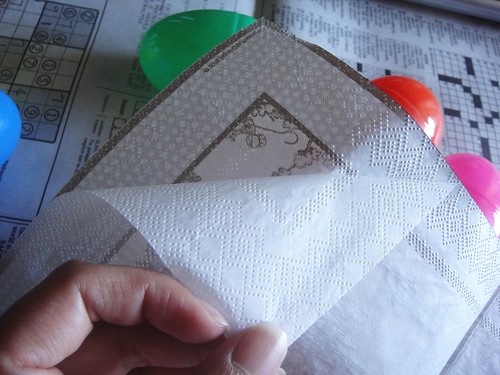
Next, remove the back layer of your napkin. You only need the thin top layer.

There are two ways of approaching this. You can tear your napkin into pieces...
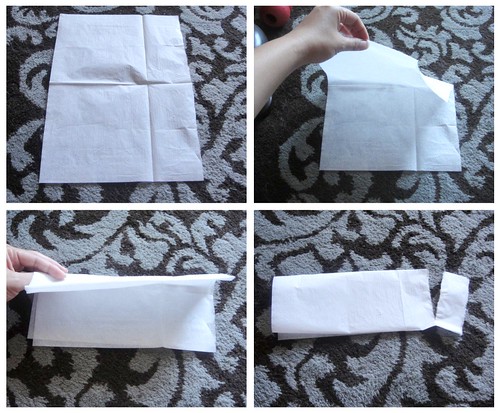
Or tear long strips. Or both! (Which is what I did.) If you try to put the whole napkin on at once, it won't adhere smoothly. Above are the simple steps to creating long strips.
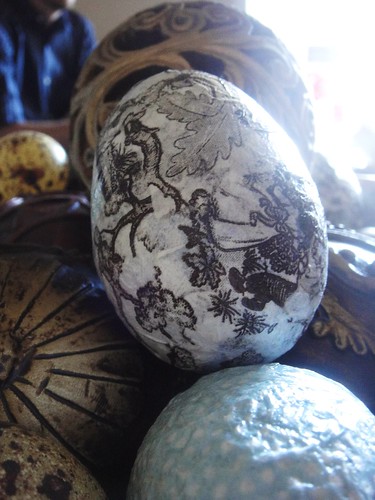
Mod Podge your pieces or strips onto your eggs, and place them on a piece of saran wrap to dry. Once they have almost nearly dried, apply another layer of mod podge for more of a glossy effect (my mod podge is glossy vs. matte).Warning: This gets extremely messy! If you were one of those kids who put Elmers glue on your hand so you could peel it off once it dried - you're going to love this project!
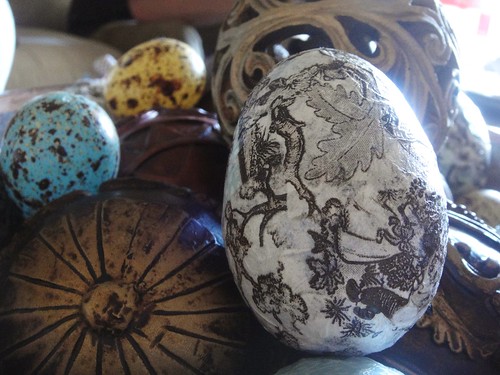
You can certainly do this with scrapbook paper or even fabric. But to achieve the best results it is better for your material to be as thin as possible. Which is why I chose napkins! Looking back now, I would have chosen a more colorful floral print because I think that would have looked better decoupaged.
What kind of egg projects have you done this year?

Do you think that there are actually people out there that DIDN'T put Elmer's glue on their hands and peel it off? It's one of the true joys of being a kid! Anyway, great post as usual Sharon...
ReplyDeleteYou can NEVER have too many of these kinds of projects Sharon! I love this....whoda thunk those ugly plastic eggs could be so elegant???? And it wouldn't bother kme to leave them out all spring either...they are just beautiful!!! Thanks for another "I gotta do this" project!!!
ReplyDeleteCute!!!!
ReplyDeletegreat job!
ReplyDeleteLove this idea, I now cannot wait until easter so I can give it a go.
ReplyDeleteI have done hodge podge for many thing, but I actually have never seen the egg one. Great idea, gonna try this one.
ReplyDeleteI think you made a great choice with the paper napkins; it's elegant without being fussy. Kinda French country or something...
ReplyDeleteI do this with blown eggs (I throw an extreme egg decorating party every year), but I never would have thought of spray painting the hideous plastic ones!
My Dr. totally loves Easter like he loves Christmas and he's all about eggs so my hubby and I are going to make these this weekend and then give them to him the next time we see him. I know he will enjoy these year-round. Thank you gals for such a great project to do!
ReplyDeleteCome and visit!
http://conversationswithcarolyn.blogspot.com/