Pages

Kid's Table and Chair Overhaul

Throw your hands in the air if you love hand-me-downs!  (That's my way of keepin' things gangsta!)

Table and Chairs Redo - Chalkboard Paint

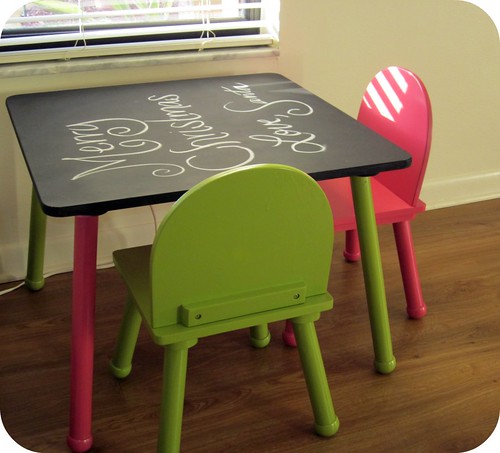
In December, my sister-in-law passed down a well-loved Dora the Explorer table that her gals had outgrown.  That very table ended up being Junebug's Christmas gift from Santa--that is, after Santa's elves did an overhaul!  (And it has taken me 3 months to actually post the transformation!)

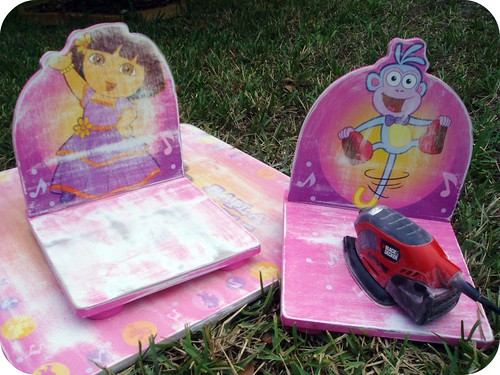
Here's what we started with...

Chair redo

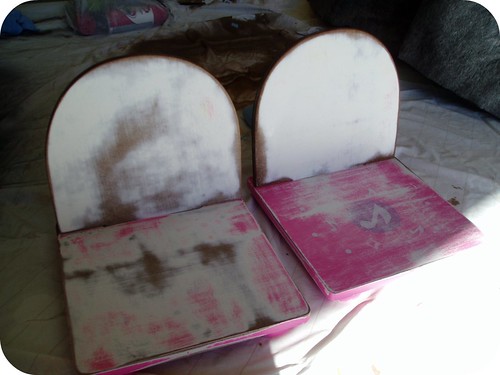
I forgot to take a photo before I started sanding the paint down.  I wanted nice plain chairs, and as you can see the chairs are formed in the same shape as the characters that are painted on them.  The "elves" didn't want to have funky shaped chairs, so we called in the assistance of our dear friend (and one of Junebug's favorite people because he always plays "3-2-1 BLAST-OFF" with her), Mr. Tim.  Tim does some fabulous woodworking so he had the tools and the skills to round off the chairs to make them a bit more uniform. 

December 22 2010 002

It's great to have other creative folks in your circle who are willing to help! 

Table and Chairs Redo - Chalkboard Paint

So, a few coats of spraypaint later, we had a table!  The top is chalkboard paint, which in hindsight is a bad choice for a toddler since now is the time to teach that it's inappropriate to write on furniture.  Live and learn, I guess.
Junebug with new table

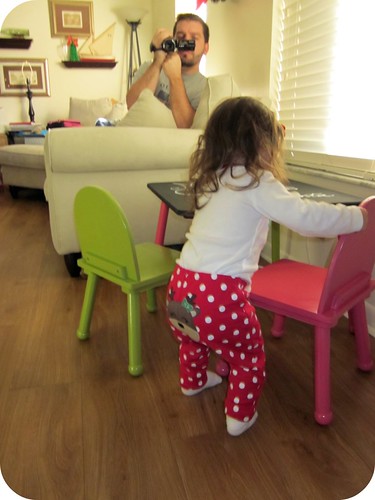
Here's the moment Junebug discovered that Santa brought a new table and chairs.  Isn't that little Reindeer on her bottom to-die-for??

If you love chalkboard paint like I love chalkboard paint, keep your eyes peeled for Sharon's next post! 

Tristin Signature

Crafty Projects Made by YOU!

Do you ever get bored with seeing what Sharon and I do?  Well, you're in for a treat today! 

A few of our readers have been gracious enough to share crafts that they have made using our tutorials--and we're so excited to know that we're inspiring others to "get their craft on".  So, here goes...

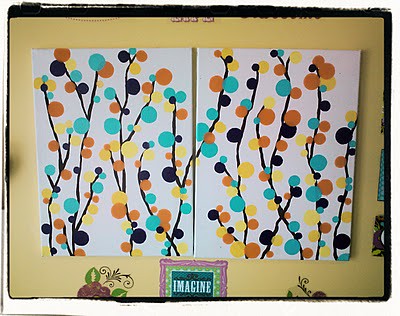
Made by YOU Canvas Art

Lesley from Fabulously Flawed made some of our DIY Painted Wall Art for Non-Artists in funky colors.


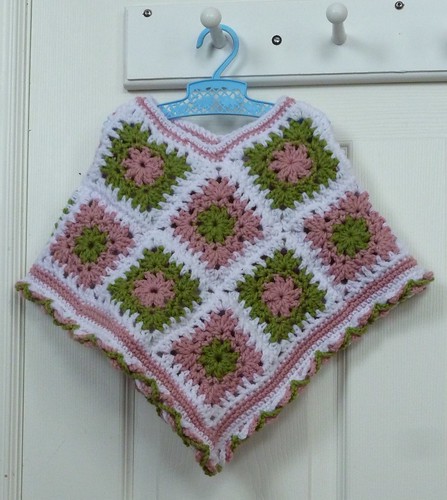
Made by YOU Poncho

St. John's Mom made an adorable poncho using our Granny Square Poncho Tutorial.  She used a granny square variation that added a lot of visual interest!


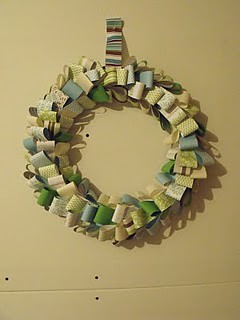
Made by YOU wreath

Miss Curly Sue made a Patterned Paper wreath in soothing colors.


Reader Leah made a Crocheted Rose Pillow.  She took the advice from my trial and error and put the scallops closer together--and isn't her pillow fabulous?! 

Seeing YOUR finished Two Girls Being Crafty projects makes Sharon and I feel that our effort is SO worthwhile!  Please keep sharing the things you create with our tutorials.  It makes us so very happy!

Tristin Signature

Awesome Homemade Headbands

Sharon called around 3pm on Friday afternoon and the phone call ended in dinner plans at my home at 5pm.  Don't you love impromptu get-togethers?  Yeah, we do.  Sharon and I threw together a restaurant-quality steak dinner within two short hours 'cause we're amazing like that. 

After our spontaneous dinner, the guys naturally retired to the living room to play video games.  So, what did the crafty girls do?  Clean the kitchen, of course. And put the wee one to bed.  And finally, we got our craft on!

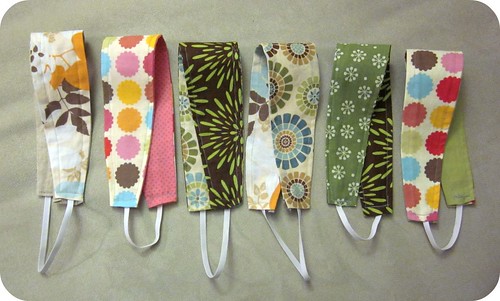
Ever since Sharon's last Linky Love post about using fabric scraps, we've both been wanting to make some funky headbands.  Here's what we came up with:

Homemade Headbands 017

Pretty awesome for un-planned crafting, huh?

We used a template and pattern offered by thelongthread.com.   It was super-simple and oh-so-satisfying!

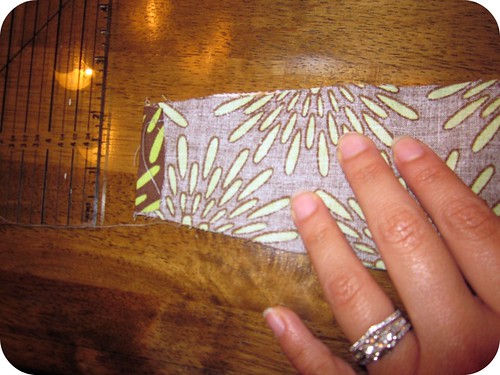
When making the headbands, we made sure to iron down the ends of the headbands up so that we had finished ends to insert our elastic into.

Homemade Headbands 011

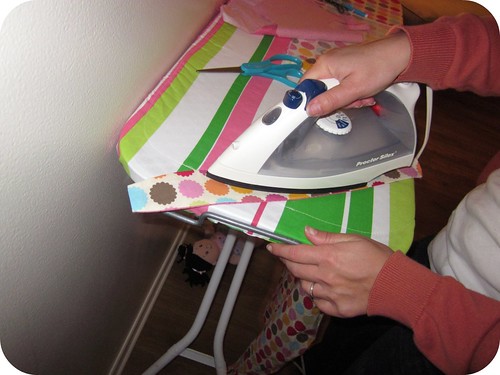
We both got pretty annoyed while ironing the pieces flat after turning the fabric tubes inside out.  The seams just want to stay tucked in!  Ughh.

Homemade Headbands 013

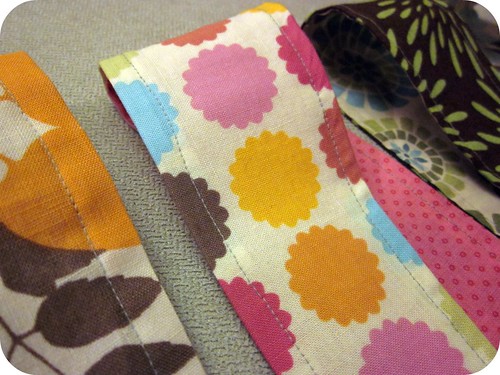
It was worth the effort though, because we loved how the headbands came out.  Aren't they awesome?

Homemade Headbands 020

We're both kind of lazy seamstresses so we used grey thread for all of the headbands.  Seriously.  We didn't want to have to change out the thread and bobbin each time we made a different headband.  Don't judge!
Homemade Headbands 030

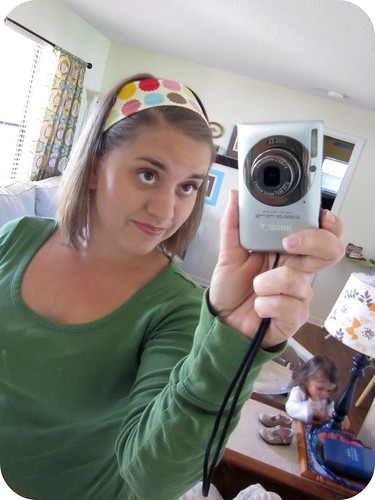
For your viewing pleasure, here I am modeling my favorite headband.  Junebug is in the background "patting the Bible" like she learns in Bible class. So adorable! 

Sharon and I took pictures together "modeling" the headbands, but the world is just not ready for such awesomeness...err...that's my story and I'm sticking to it!  (I mean, we are "Two Girls Being Crafty", not "Two Girls Being Models", right?)

Tristin Signature

Linky Love: Paint Chip Crafts Edition

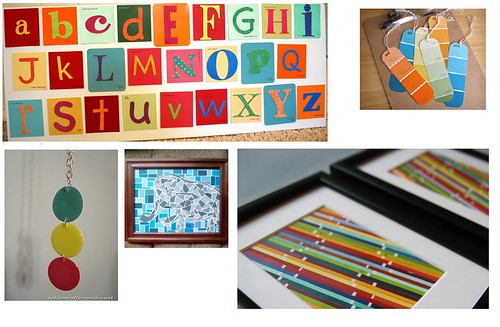
Paint Chip LL - COLLAGE

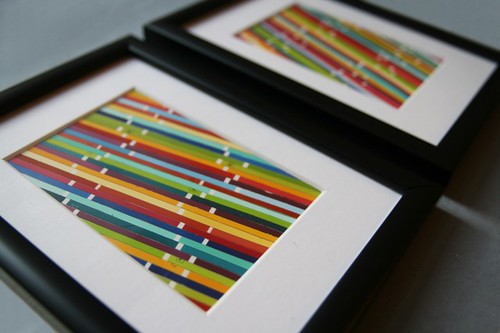
Happy Saturday crafty pals!  As of late, I have been hoarding collecting paint chips from my local hardware store.  The people at the counter probably think I'm crazy as I haphazardly select random color samples, but I've been doing it for a reason.  Next week, you'll see a new and original way I've come up with to use paint chips to decorate your home, but until then, here are some other fun paint chip projects.

Paint Chip LL - Framed Stripes
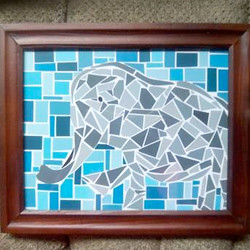
Paint Chip LL - Elephant Mosaic

Elephant mosaic made by Craftster user LittleGirl.

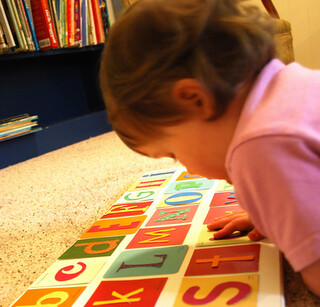
Paint Chip LL - Alphabet board


Paint Chip LL - Bookmarks


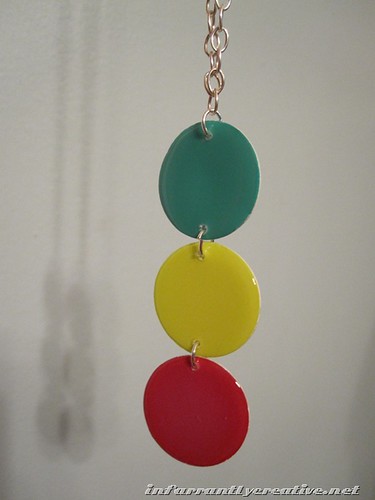
Paint Chip LL - Pendants

Paint Chip Pendants with Beckie of Infarrantly Creative over on Somewhat Simple.

So, while the husband is spending countless hours in the hardware store this weekend, instead of tapping your foot and asking "are we done yet", go pick out some fun paint chips and be inspired.  You'll be glad you did!

Tristin Signature

Another Pillow: Ruffles!

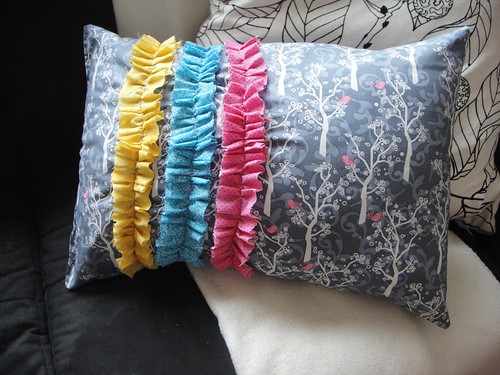
What is the deal with our new obsession for pillows? Tristin said it best in her post yesterday, many times we are on the same page with our projects. And I guess pillows are on our mind. So sorry readers, but I have another pillow to share. It's a ruffle pillow. Mmm ruffles.

Ruffle pillow

No, the ruffles are not completely straight... but you know me, I hate rulers. ;) I found this wonderful gray fabric with cute little pink birdies, and I wanted to do something fun with it. Nothing says fun better than ruffles. So I went to work making a pillow with the gray fabric. I cut out a front and a back for my pillow. I made a small, rectangle pillow because I already had a pillow form that was just begging to be used (and by "begging to be used", I mean sitting in my craft supply area for months.)

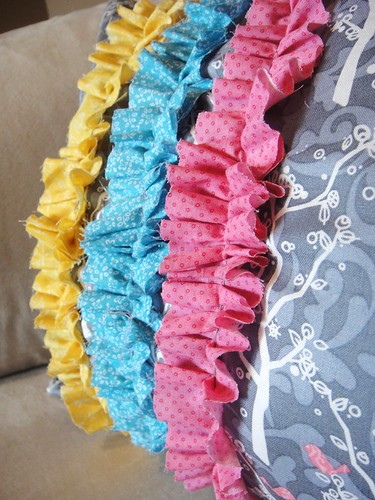
For the ruffles, I cut 1 1/2" strips of fabric about twice the length that I wanted the actual ruffle to be. To create the ruffle look, sew a simple basting stitch through the middle of each strip (you can also sew the stitch on one of the sides for a different kind of ruffle). The basting stitch resembles the running stitch and is one of the simplest hand stitches to do.

Basting stitch, how to make a ruffle

Once the basting stitch is sewn down the length of the entire strip, gently pull the thread at the working end so that the fabric bunches. Do not pull too hard or you will break your thread!

Ruffles on pillow

Now sew your newly made ruffles onto your fabric that is going to be the front of your pillow. Next, make your pillow! Place your two pillow fabrics squares (or rectangles) right sides together. Sew three sides leaving the bottom long side open. Sew the ends of that remaining side leaving the center open for stuffing your pillow. Don't forget to back stitch to reinforce the stitch around the opening.  If you have a pillow form or a fuller pillow, you may need to leave a larger opening. Hand stitch the opening closed. My pillow form was so difficult to get in, so I left one of the short sides open and hand stitched it closed after the form was in.

Mistakes/Things I would have done differently:
  • I actually got really excited and sewed the whole pillow case together (save the one short end for stuffing the pillow case in) before my ruffles were even on. I still managed to attach my ruffles, but with more difficulty. Scatterbrained? Yeah, maybe a little.
  • Looking back I probably should have only used one or two colors. I think three is a bit much. Or maybe the bright cheery colors I used is a little too bright for my taste. But I have gotten a few compliments on it, so I guess some people think it's ok. 

What do you think? This is only my second time doing ruffles, so go easy on me! ;)
Enjoy!
XO,


Crocheted Rose Pillow Tutorial

Crocheted Rosette Pillow 016

Sometimes Sharon and I are surprised by how much we're on the same page.  I'm not talking about how we're on the same webpage--that's a given.  But take for instance, this pillow:

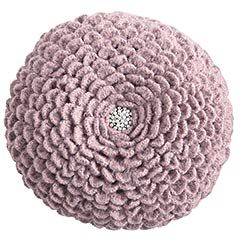
Lavender Rose Pillow Pier 1
Pier 1's Lavender Rose Pillow, $34.95
We each took pictures of it at our Local Pier 1 at separate times, each thinking "I could make that".  A few days ago, Sharon was over at my house (for the purpose of crafting, what else?!) and I showed her my work in progress and she immediately knew which pillow I was knocking-off because she had intended to do the same thing! 

Great minds truly do think alike.  Except for the fact that Sharon really loves that purple color, and I really don't.  I'm just not a purple-lover.  Wanna make something of it?  That's what I thought. 

Back to the pillow--want to make one?  Sure you do.  Here's what you'll need:

crochet hooks that correspond to the size of your yarn
2 balls of yarn (can be the same color)
scrap fabric for making the pillow
poly-fil
a good old-fashioned needle and thread
an embellishment for the center (maybe a pretty brooch or a big button)

Crocheted Rosette Pillow 002

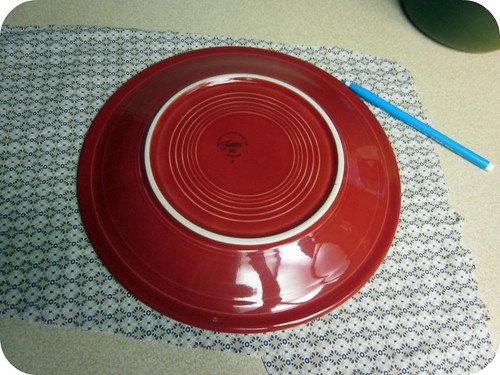
Before you start crocheting, you'll want to determine the size of your pillow.  I wanted a small accent pillow, so I traced a 10" dinner plate onto scrap fabric.  In hindsight, I wish I'd used plain fabric, but I was trying to be thrifty and use what I had on hand.   Be sure to cut two matching pieces of fabric--a front and back for your pillow.

Crocheted Rosette Pillow 003

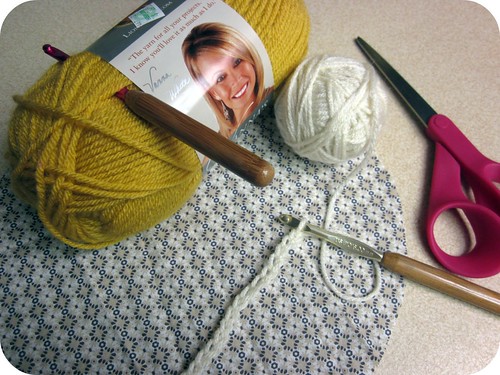
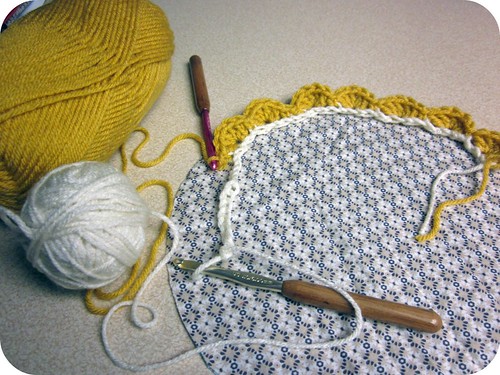
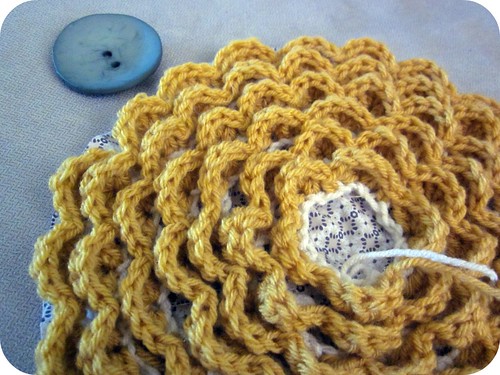
Now it's time to get crocheting.  I've been crocheting for about 6 months now, so I'm by no means qualified to make patterns or use the jargon--but here goes anyhow. Please note that I used two different colors of yarn to better show how I went about creating the pattern.  With the base color (white) I made a chain--I probably started with about 20 stitches.  Then I began to make a shell pattern using the yellow yarn, starting at the beginning of the chain.  Here's the shell pattern I used:

1 sc *skip 1 st, 5dc into next st, skip 1st, 1sc into next st; rep from * to end.

Once your shell pattern is approaching the open end of your chain, it's time to chain some more.  Then shell some more.  As I was making my shell strand, I was also tacking it down to my fabric using a needle and thread starting at the outside of the pillow. 

Crocheted Rosette Pillow 007

I know it sounds kind of complicated, because you are basically running three processes at once--the chaining, the shelling, and stitching it all down on to the fabric.  It's really not that complicated, though.  The reason I did this little by little is so that I only made enough crocheted shells for the pillow and so I didn't waste my time and resources making a string of shells 20 feet too long.  Make sense?  It worked out pretty well, though I wish I'd sewn the strands of shell closer to each other so that the petals would appear fuller like the original Pier 1 pillow. 

Live and learn, right?  With the lessons I learned, your pillows are bound to be better than mine!

Crocheted Rosette Pillow 011

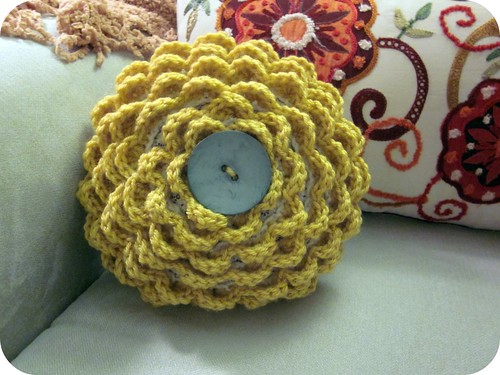
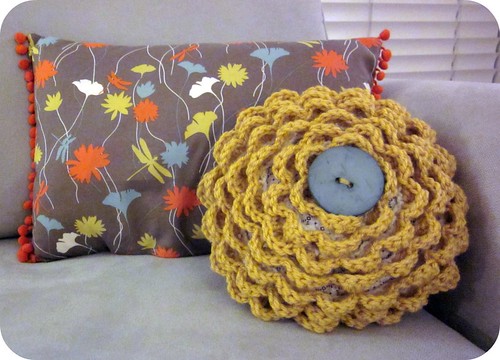
Anyway, follow the same process until you work your way into the middle of the pillow.  Now it's time to add your embellishment.  The Pier 1 pillow has a gorgeous rhinestone cluster in the center--this would be the perfect opportunity to use a brooch from a thrift store or from your own jewelry box.  I chose a big blue button I picked up at Hobby Lobby for $2.50.

Sew or pin your embellishment in place and then finish your pillow as you normally would (taking care not to sew the petals into your seams).

Voila!  A beautiful and unique accent pillow!

Crocheted Rosette Pillow 014

Yeah, Sharon and I are both a bit pillow-obsessed lately.  But there are worse things to be obsessed about, right?
Tristin Signature


P.S. Please send us a link or a picture if you create this pillow or any of our other crafts.  We love to see what you come up with and we'd like to share your successes with our readers!

Fabric Birdie Magnets

Adorable Fabric Birdie Magnets

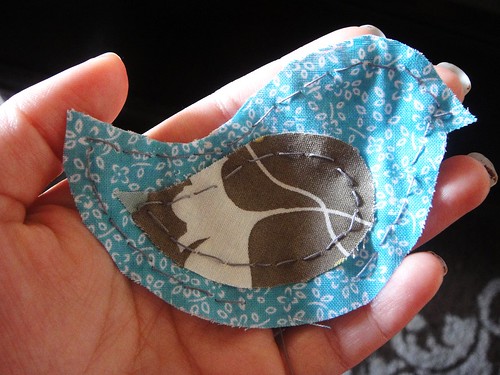
One chic new trend I'm falling for quickly (and have been for a while) is the adorable and simplistic bird shape that's been adapted into everything. Pillow appliques, precious baby room decor, wall art... you can seriously do anything with this cutie shape. So, I made magnets.

Bird shape tracing

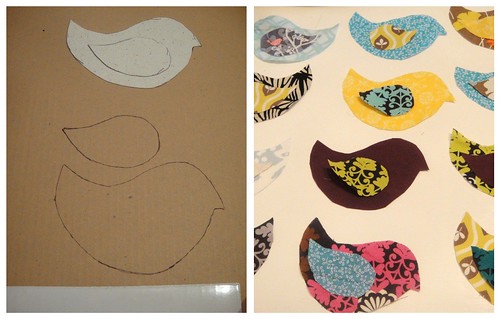
I used this bird shape as a template. I placed a thin piece of paper right on top of my laptop screen and traced it as is. Trace the wing as well. Don't forget to give yourself a seam allowance.

Bird template

Then, I just cut out a cardboard template and traced the shapes (both the bird's body and wing) onto different fabrics. This is another great way to use up any scrap fabric you may have in your stash.

Sew the fabric bird magnet together

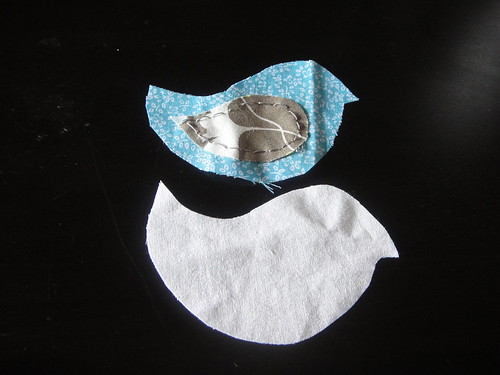
Trace and cut out a separate piece of fabric for the backing. Since you rarely see the back of magnets, I used a plain white fabric. Sew the wing on. (I hand stitched everything using a back stitch, but a sewing machine would have been nice..)

Sew back on

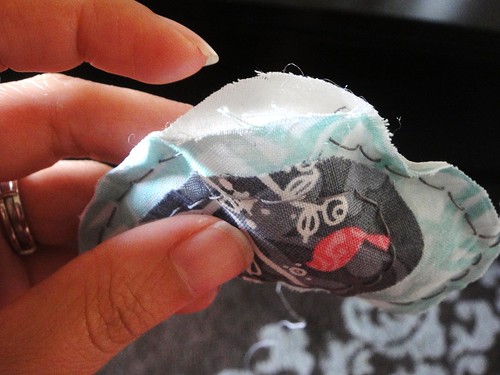
Now sew the backing on leaving a hole at the belly for a little bit of poly fill. You could definitely sew these birdies with the right sides together and then turn them inside out. I sewed the seams right on top because I like how it looks. It gives it a playful childhood feel. Or something. Let's not get too technical here - I just think it looks cooler.

Stuff that Fabric birdie

Next step: stuff that fabric birdie! And then sew him up. Don't stuff it too full, or your little birdie will lose its shape, and then people will just look at your fridge and wonder why you have a colorful, fat blob as a magnet. Looking back, I probably would have just cut out one or two layers of felt and sewed them in as stuffing. I think that probably would have proved sufficient. But we learn from our mistakes. (And I have a few colorful, fat blob magnets to prove it. Poor birdies.)
Magnets for the Fabric Birdies

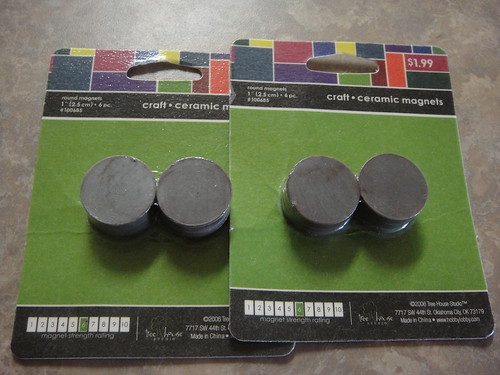
Finally, add magnets. I bought two packets of six magnets each (12 total) for around $4.00. It was the only purchase for the whole project. I hot glued one magnet directly to the back of each bird. But after having done so, my husband said "why didn't you just attached them to the fabric inside the birds so you can't see the magnet from the outside?" What a super craft genius. He's going to overtake me someday - you'll see. So, there are two ways of adding a magnet. (You'd better choose my way.) It's really up to you whichever option you choose. (But my way is better.)

Bird magnet collage

And you're done! Enjoy your birdie magnets!!
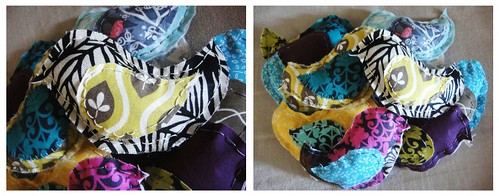
Yes, maybe I went a little overboard and made too many magnets.
I was powerless over all of the cuteness going on!

XO,

Related Posts Plugin for WordPress, Blogger...