Pages

Nesting. Two Ways.

Do you have a "Type A" or "Type B" personality?  I find it hard to categorize myself, but when it comes to crafting, I lean more toward "Type B".  Go with the flow, you know?  Every now and then, though, the perfection bug bites me and I have a fit and throw my crafts across the room.  What, you've never done that before? 

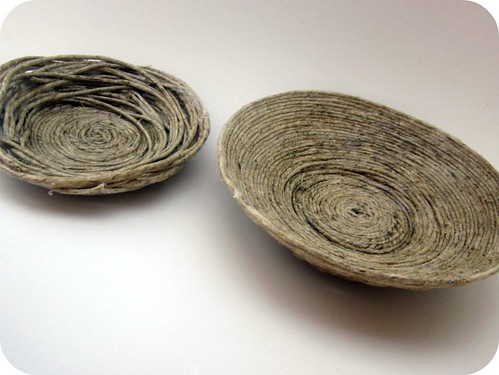
DIY Nest 032

Recently I picked up a ball of hemp at my favorite thrift shop for 30 cents--an AMAZING bargain.  Normally a ball of hemp of the size I purchased costs like $10.  You better believe I snatched that hemp right up!  Because it's spring time, it seems appropriate to celebrate my awesome hemp find by making a gorgeous and simple nest.  Want to make one, too? 

Whether you're "Type A" or "Type B", you'll appreciate this craft because you can have it your way, just like at Burger King. A Burger King ad slogan on a crafty blog?  I'm lovin' it.  (Did you catch that?)
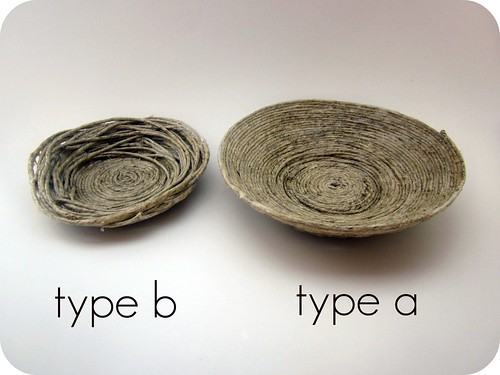
DIY Nest types

Regardless of the type of nest you choose to make, you'll need the same supplies.
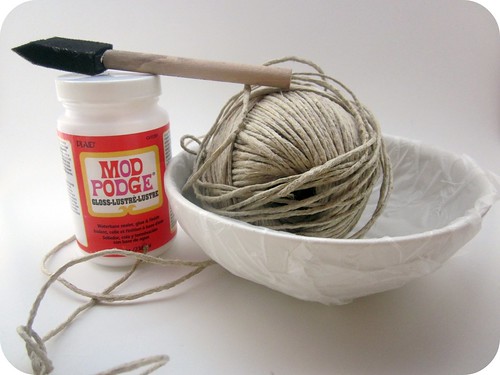

DIY Hemp/Jute/Twine/Raffia nest

Mod Podge and a brush
Hemp (or jute, twine, raffia... feel free to use whatever you have on hand)
A bowl that will provide a good nest shape
Plastic wrap (to cover said bowl)
Clear spray-on sealer (optional)

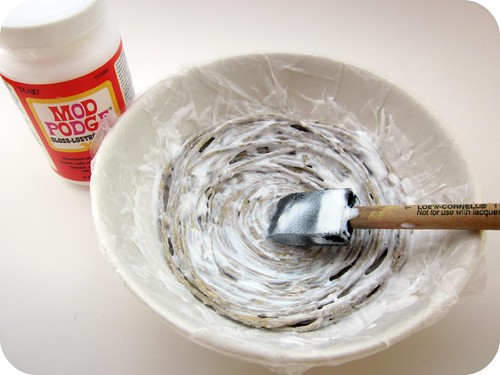
For the "Type B" nest, I used the inside of the bowl because it provided better support for the nest shape.
DIY Hemp Nest

Paint a thin layer of mod podge on the inside of your plastic-lined bowl.  Then coil your hemp/jute/twine/raffia starting in the center and work your way up the bowl slightly.  I dabbed mod podge over the top of the coils as I went to keep the hemp from uncoiling.  Then, just start circling the bowl with the hemp in a random circular motion.  Dab mod podge on as needed to help it keep the shape.  Let dry and remove it from the bowl and spray with sealer if desired.  There you have it! 
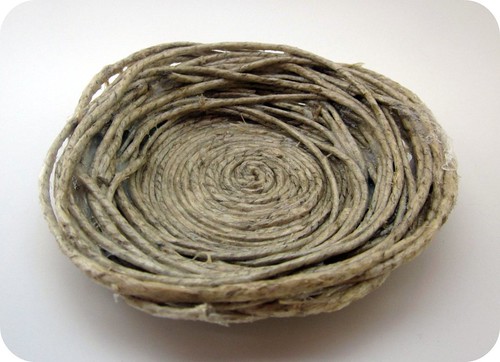
DIY Nest 028

Voila!

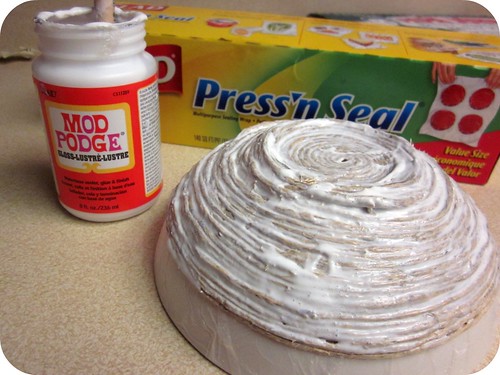
For the "Type A" nest, I inverted the bowl and covered it with plastic wrap.  I use Glad Press'n Seal plastic wrap because it sticks to objects.  It's a very handy thing to keep on hand for craft projects.  And leftovers, of course.
DIY Nest 001

Paint a thin layer of mod podge on the outside of your plastic-lined bowl.  Then coil your hemp/jute/twine/raffia starting in the center and work your down the bowl until your nest is the desired size.  Dab mod podge on as needed to help it keep the shape.  Let dry and remove it from the bowl and spray with sealer if you want to.  There you have it! 
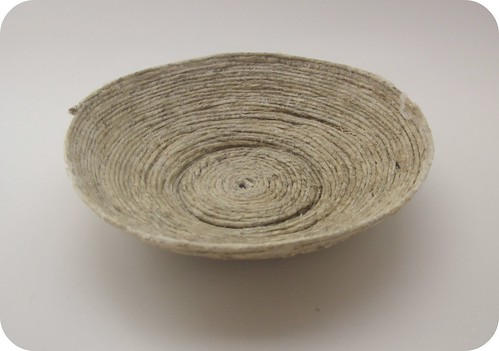
DIY Nest 022

And there you have it, DIY nests, two ways.

DIY Nest types

All of you "Type A" people are probably bothered that I have the A & B out of alphabetical order in the picture.  I did it just to mess with you.

Are you a "Type A" or a "Type B" crafter?  Which nest do you prefer?

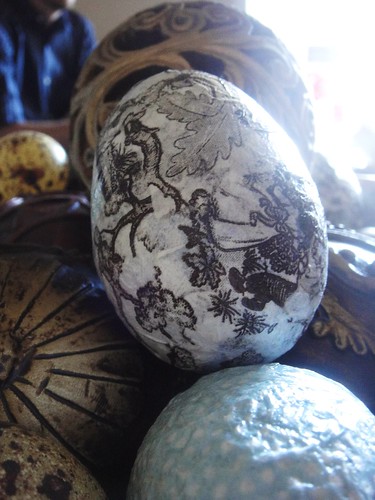
If you're feeling extra crafty, keep that Mod Podge out and make some Decoupage Eggs like Sharon did last week.  They'll look great in your nest!

Tristin Signature

Linky Love: DIY Dresses Edition

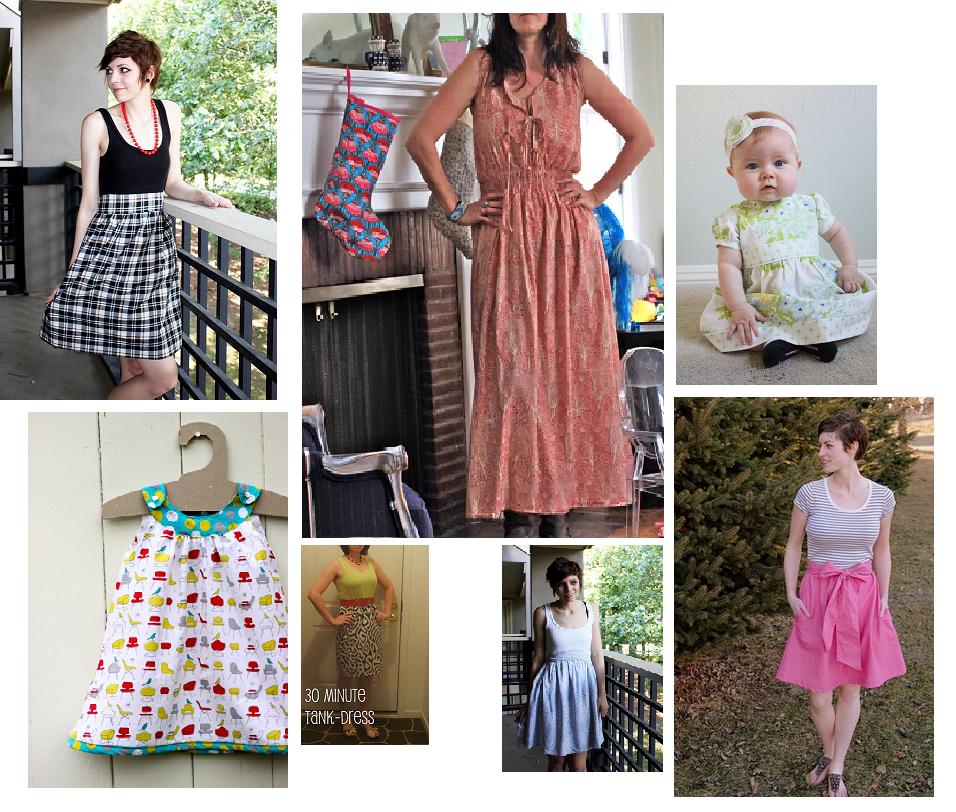
Here in Florida, spring is in full swing--so summer is only a few weeks away!  Yeah, I know what the calendar says, but let me just tell ya that we're a little different down here close to the equator!  My mind has already shifted to start thinking about my summer wardrobe--which always includes plenty of light and airy summer dresses.  The blogosphere offers a wide variety of *free* tutorials about making your own dresses and dresses for your little ones, so here are a few of my favorites!


These simple dresses made from a t-shirt and fabric are a favorite seamstresses of all skill levels.  Talk 2 the Trees has a very simple tutorial to follow.


Jessica of Sew Homegrown also  has a similar tutorial.  Her technique involves a bit more tailoring than the aforementioned tutorial and the results are worth the extra effort!  Didn't she choose an awesome t-shirt/fabric combo?


This knock-off dress from Maybe Matilda is a variation on the previous two dresses with a few extra details.  For instance, she leaves the gathers in the front and not on the sides so that those of us with hips (yeah, that's me!) don't look super hippy and puffed out like the Michelin man.  She even includes pockets in her dress.  Since I had sweet Junebug, I looove pockets in my dresses.  Seriously--it's something I get excited about!


Leave it to Prudent Baby to set the bar even higher--Jaime created this Modern Prairie dress by tracing an existing one that she liked.  Using her technique, you can recreate your favorites, too.  I won't lie, I'm still intimidated by the shirring technique. 


I have two dresses in the works for Junebug right now, too.  The first is the Charlotte dress from Craftiness is not Optional that I'm using for her Easter dress.  It's so classically beautiful and it'll be my first invisible zipper.  I'm not to that step yet, so wish me luck!


The next is the snappy toddler dress from Prudent Baby.  Not only does Jaime make awesome clothing for herself, but her daughter gets to rock some pretty awesome garments, too.  I hope the one I make for Junebug is this precious.


Even if you're snowed in somewhere up north, you can bring a little sunshine to your day by making one of these awesome summer dresses in preparation for the season.

Or you could move to Florida.  Just sayin'.

Tristin Signature

Decorative Jute Balls

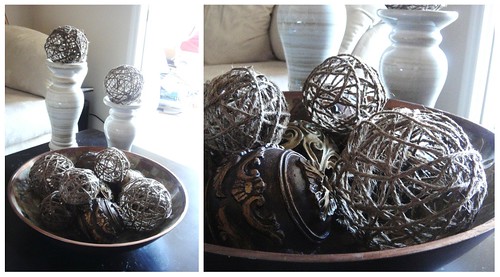
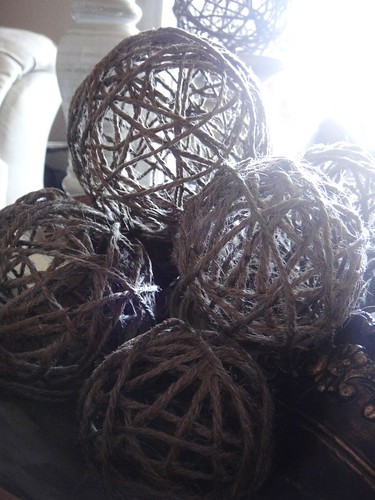
I've seen these decorative balls everywhere. In potpourri, on awesome blogs I read, like Thrifty Decor Chick, etc. I've even seen a tutorial on them, but I tried to find it again and couldn't. So, again, this is not a Two Girls Being Crafty original idea. But I hope that some of you will be inspired by it. I know I was. And I couldn't resist making some for myself.  :)

jute ball collage

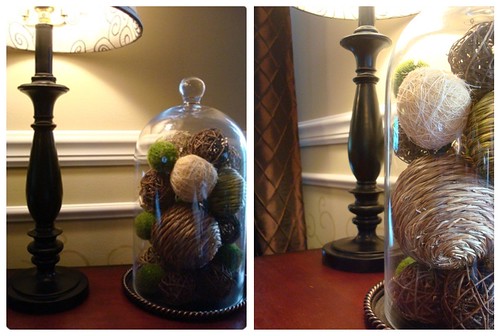
These would look great in a glass apothecary jar, cloche, or any bowl you may have. Below is a picture of my inspiration found on one of my favorite blogs, Thrifty Decor Chick. Want to learn how to make them? Let's get started!

Thrifty Chick's cloche.jute balls

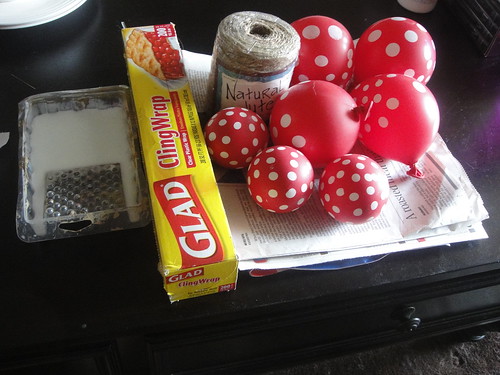
Here's what you'll need:

 DSC05841 

Balloons
Jute (hemp would work too)
Newspaper
Saran Wrap
Fabric Stiffener or Glue

Here's What You Do:

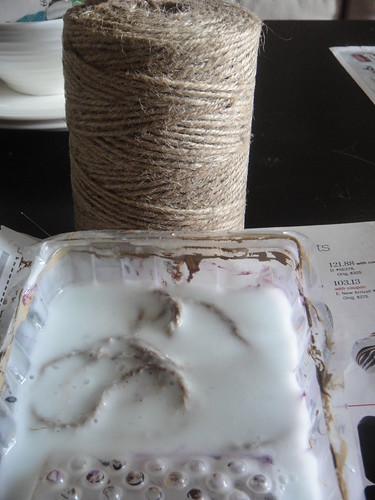
Blow your balloons up to the size you want your balls to be. I did some small ones and some larger ones. Mix your glue with equal parts water. (Of course, if you're using fabric stiffener, you don't have to do this part. Just pour it into a container.) Lay your newspaper down covering your workspace - it's gonna get messy, people!


Cut a fairly long piece of Jute and soak it in the glue or fabric stiffener. Let it sit in there for a couple of seconds, and then pull it out squeezing the excess glue/stiffener with your fingertips. Wrap it around your balloon in alternating patterns. Repeat this until your balloon is well covered but make sure there are still plenty of holes. 

DSC05846

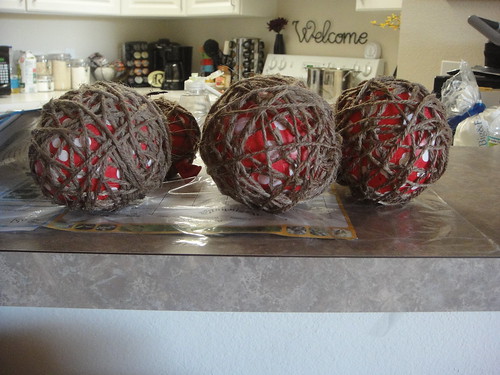
Let them dry on the saran wrap for a couple of hours. When the tops feel dry and stiff to the touch, turn them so that the bottoms are able to dry too. I left mine to dry overnight. Finally, pop the balloon and remove it through one of the holes.

DSC05851

And you're done! This project is so simple and satisfying.You should definitely try it! You could do it with different colored yarn (maybe some bright Spring colors) or spray paint them to match your decor. What do you think? What kind of decorative ball would you make?


Intersecting Circles Wall Art Tutorial

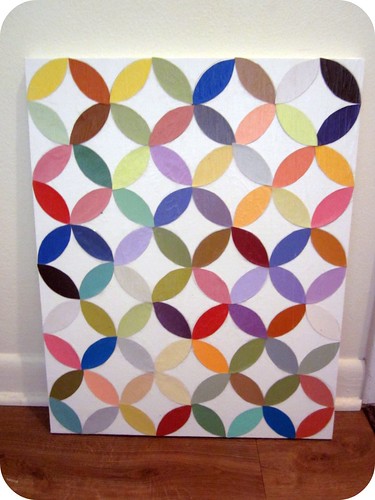
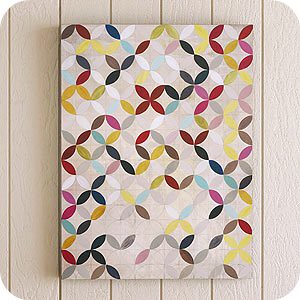
Remember how I promised a fun paint chip project a few weeks ago?  Well, here it is (finally)!  It's more DIY art for us "non-artists", so I hope you have some bare space on your walls 'cause you're sure to want to make this.

Circle Paint Chip Wall Art 014

Just like my last DIY art for non-artists, this masterpiece is a knock-off of a pretty canvas from World Market. 

Jodi Fuch's Collective artwork

Yeah, it costs $129 at World Market.  My version cost about $3.  Total.  No joke.

If you want to make one, here's what you'll need:

one canvas in a size of your liking
TONS of paint chips
Mod Podge and a foam brush
Lots of patience
Saran wrap
A book (I used the Complete Works of Shakespeare Volume 1, but you can use any book you like--lol)
A template (Directions on making one follow)

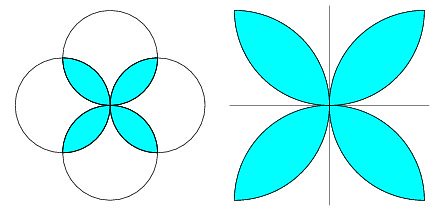
Ok, first let's talk technical stuff.  You're going to need to think about math for a few minutes, so brace yourself and don't be scared.  Your canvas needs to have sides in a size where you can find a common denominator.  For instance, if your canvas is 15"x30", your common denominator would be 3" or 5", so you'd want to choose either 3" or 5" circles (I'd recommend 3").  If your canvas is 12"x18", you'll want to choose 3".  I used a 16"x20" canvas, so I used 4" circles.  Whatever you do, just make sure you have a common denominator when you choose your canvas, preferably 3" or 4". 

If you're mathematically inclined, a picture like this may help you envision what we're trying to accomplish.
Circle4Intersection_700

Or, here's a simple way I came up with to make my own template--it's easier than it looks so please don't get scared now!


1. Start with a circle in the size you need.  (Remember to use a canvas where the sides share the same multiples or else you will not get an exact match up and you'll be disappointed.)
2.  Fold it into quarters
3.  Cut out your quarters. You'll need two.
4.  Overlap the quarters by lining up the corners (the curved sides should overlap one another).
5. Trace along the exposed curved side.
6. Cut along the line you just traced--and badda bing--you have your template!

Use your template and trace a it a bajillion times on a bajillion paint chips and cut those shapes out.  (Really, you need 4 chips per circle. Think of it this way, I used a 16"x20" canvas and 4" circles, so there are 20 circle shapes on the canvas. I needed 80 "leaf shaped" pieces cut out.)

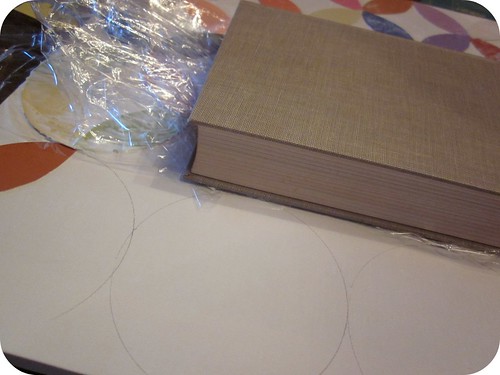
Circle Paint Chip Wall Art 002

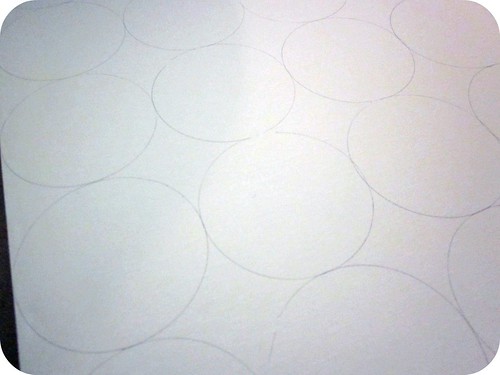
To make placement of my pieces easier, I lightly traced a 4" circle in rows over the canvas.

Circle Paint Chip Wall Art 004

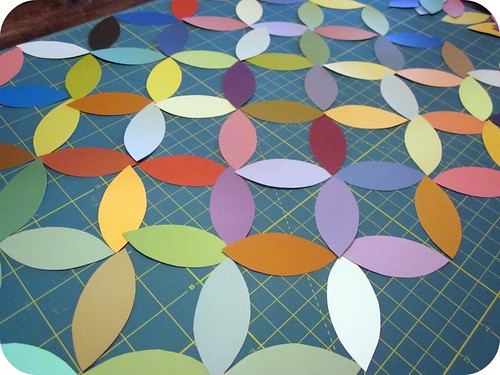
I also laid out my paint chips in the intersecting pattern prior to placing them permanently onto the canvas to ensure I was happy with the color distribution.

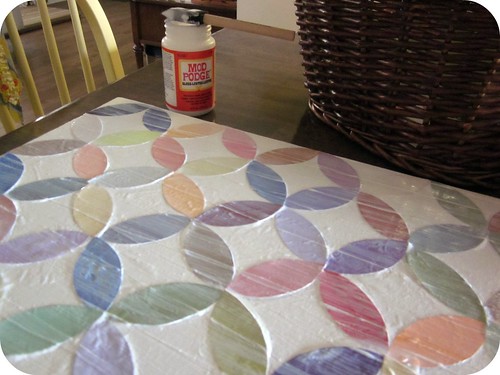
Circle Paint Chip Wall Art 005

Finally, you're ready to place the leaf-shaped pieces onto your circles.  It's not rocket science--look at the finished project and you'll be able to see how to lay them out.  To adhere them to the canvas, I used a thin layer of Mod Podge.   The paint chip cut-outs will begin to warp and fold up--don't worry!  Just brush a layer of Mod Podge over the top of the paint chips, cover with a piece of saran wrap and then lay a book over it for about 15 minutes.  This should prevent the edges from curling up.  Be sure to remove the book and saran wrap before the Mod-Podge dries!  I worked in sections over the course of a few hours to accomplish this.  (It's worth the effort, pinky promise!)

Circle Paint Chip Wall Art 011

Once you have all of your pieces firmly secured, cover the whole canvas with a thin layer of Mod Podge.  Once the first layer dries completely, go ahead an do one more layer just for luck.  You're done!  Now find a purdy spot to hang your masterpiece!

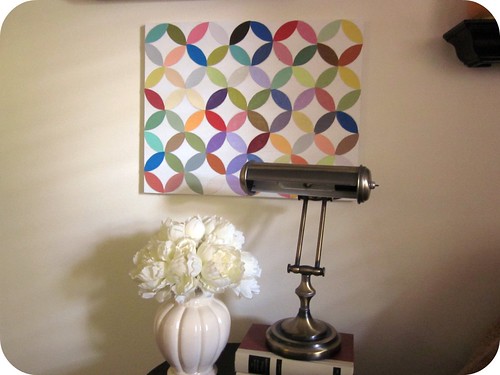
Circle Paint Chip Wall Art 019

I put it in my living room for taking pictures...

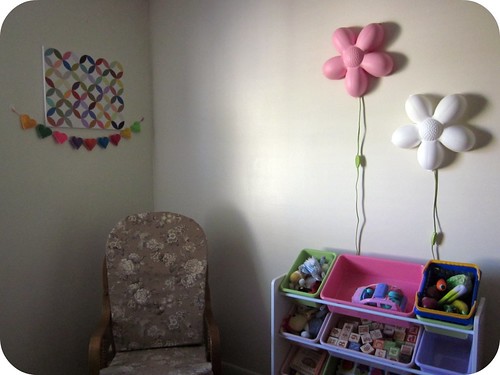
Circle Paint Chip Wall Art 025

But it found a permanent home in Junebug's bedroom with the Felt Heart Garland from Valentine's Day.  She loves the bright colors!

Circle Paint Chip Wall Art 014


Tristin Signature

DIY Decoupage Napkin Eggs

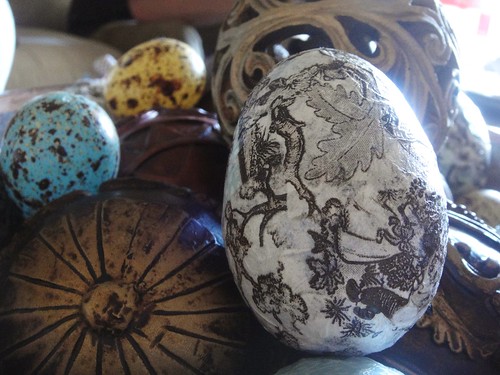
DIY Decoupage mod podge napkin egg

I know what you're thinking... another decoupage egg tutorial?? And sorry to disappoint, but yes. This concept has already been done numerous times this season, so I'm not sure who to give credit to. Just know that this is not my original idea. If you haven't heard of these yet, great! If you have, I hope you find some of my tips helpful in creating your own way of doing this craft. Enough talk. Let's get down to business.

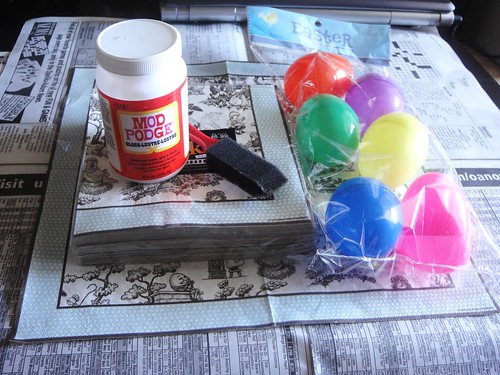
supplies for decoupage napkin eggs

Supplies:

Pretty napkins
Plastic eggs ($0.35 - half off at Hobby Lobby)
Mod Podge and felt brush
Newspaper
Saran wrap (not pictured)

Once again - the supplies for this project are almost completely free! Booyah! Cause that's how we roll. That was lame. Sorry, continuing on...

What To Do:

First, before you do anything - take your eggs out to a well ventilated area and spray paint them white. This is so you can't see the extreme(ly nauseating) neon colors through the napkin. Like a dummy, I didn't take a picture of this step. Some people choose to glue the two halves of the eggs together, but I didn't feel this step was necessary, and mine turned out fine. If you plan on reusing these for years to come, I would probably glue them.

Decoupage Napkin Eggs

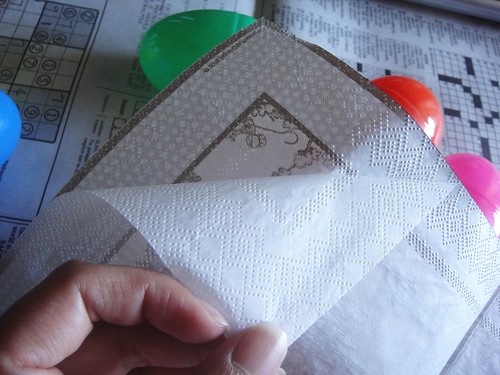
Next, remove the back layer of your napkin. You only need the thin top layer.

DSC05799

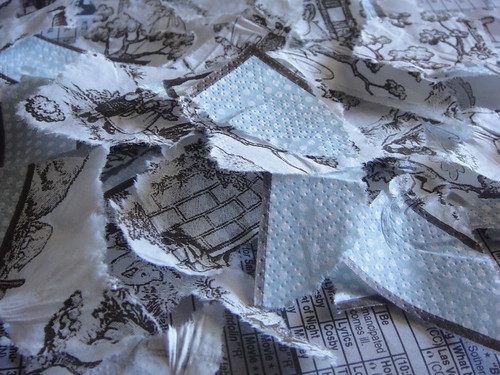
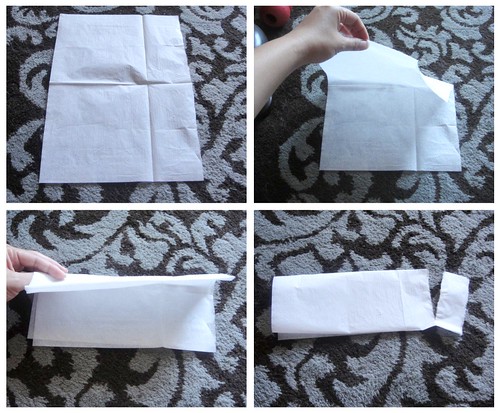
There are two ways of approaching this. You can tear your napkin into pieces...

Napkin eggs

Or tear long strips. Or both! (Which is what I did.) If you try to put the whole napkin on at once, it won't adhere smoothly. Above are the simple steps to creating long strips.

DIY Decoupage Napkin Eggs

Mod Podge your pieces or strips onto your eggs, and place them on a piece of saran wrap to dry. Once they have almost nearly dried, apply another layer of mod podge for more of a glossy effect (my mod podge is glossy vs. matte).Warning: This gets extremely messy! If you were one of those kids who put Elmers glue on your hand so you could peel it off once it dried - you're going to love this project!

You can certainly do this with scrapbook paper or even fabric. But to achieve the best results it is better for your material to be as thin as possible. Which is why I chose napkins! Looking back now, I would have chosen a more colorful floral print because I think that would have looked better decoupaged.

What kind of egg projects have you done this year?


Spring Is Heeere!

Well folks, Spring is finally here. (It's April already. What? Where has this year gone??) For some of us it doesn't feel like it at all. Some people are still getting frigid, Winter weather. And some of us are fighting heat strokes when we walk out the door. (All my Floridians say "yeah-yuh"!)

But no matter what the weather is like where you are - it's Spring. My favorite season. I find it very difficult to muster up motivation to decorate for a holiday that will come suddenly and then abruptly pass us by. (Tristin says I'm a holiday Grinch.) But I can decorate for Spring. It's a whole season! And maybe I'll nestle in some little Easter decor in there somewhere. :)

Here's some inspiration for your Spring/Easter decorating.


Check out this gorgey mantle from Dwellings By DeVore. She says most of these items are from Goodwill. You know I love me some smart and beautiful Goodwill purchases! I just love how all of the elements are simple, but together they create a bold statement that screams "Spring"!


Learn how to make a DIY Hydrangea Egg with Trisha from The Sweet Survival. They are so lovely!! I am a BIG fan of topiary-type decorations and a HUGE fan of hydrangeas. Ok, any flower, really. Flowers are an easy way to bring Spring into your home. Plus, they always make a space look beautiful.


Thrifty Decor Chick created this beautiful, Spring-y Vignette. Love it! 
Learn how to make her mossy letter here.


 Some of you who know me know that I am obsessed with eggs, nests, and birds. Yes, I know it's a popular fad going on right now, but I liked them way before you guys got here! ;) Vivienne from The V Spot has a great way to create perfectly beautiful robins eggs from those well known (and icky) plastic eggs. Get her tutorial here. I love these! I just might have to make some.


The Inspired Room pieced together this refreshing mantel. 
It's bright, and it's beautiful. And baby, that's what Spring is! :)


So have you started decorating your home for Springtime? What are you doing to decorate?
Happy Weekend! :)

{Thrift Store Makeover} Bird Branch Jewelry Stand


Don't you love a good thrift store find?  I sure do.  Like really.   I really love a good thrift store find.  I brag about them for months--just ask my friends.

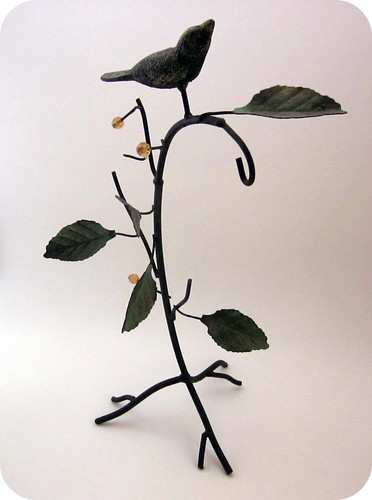
I recently had the pleasure of walking into my favorite thrift shop and finding this little diamond-in-the-rough.  Nice shape, huh?  I paid 2 bucks for it--boo yah!

Thrifty Branch Redo 005

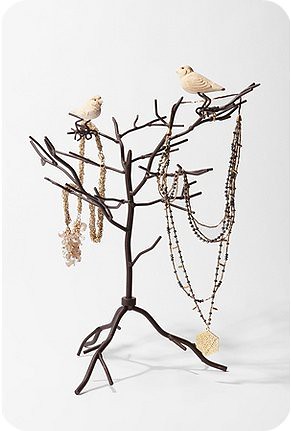
It reminded me a lot of the Anthropologie/Urban Outfitters jewelry stands that are popular right now.  Urban Outfitters currently has this Love Birds Jewelry Stand online for $39.   

UO Jewelry stand

I liked the shape of the one I picked up at the thrift shop, but I wasn't loving the wrought iron look.  So I washed it down (it was SO dusty) and spray painted it with a couple of coats of ivory spray paint.

Thrifty Branch Redo 010

Pretty awesome for $2 and a little elbow grease, huh?  What have been your latest and greatest thrift store finds?

Tristin Signature
Related Posts Plugin for WordPress, Blogger...