Pages

Linky Love: Top 10 Handmade Baby Gifts

Shopping for babies is so much fun--way more fun than shopping with babies.  And if you have the time, making gifts for babies can be a lot of fun, too.  I like to make baby gifts and, of course, things for my own little one.  Right now, I think I have at least half-a-dozen friends and family members who are expecting, so I'm thinking a lot about baby gifts.  It's so special to give (and receive) handmade gifts, so here's some linky love to share my FAV handmade baby (and baby-momma) gifts! 


(Boy, I sure do love parenthesis!)

1. Nursing Cover from Sew Much Ado - These are a must-have for all nursing mothers.  They're $30 at many stores, but you can make one for a fraction using fabric of your preference!  Nursing was very important to me, and doing it modestly (and somewhat fashionably) is a must!

Sew Much Ado Nursing Cover

2. Diaper Cake from Homemade by Jill- Perfect as a gorgeous (and useful!) gift or as a unique centerpiece at a baby shower.

Homemade by Jill Diaper Cake

3. Burp Cloths from Homemade by Jill.  This is a great sewing project for beginners and the results are professional and oh-sew-satisfying!  (Forgive my pun...) 

Homemade by Jill Burp Cloth

4. Appliqued Tie Onesies from Crap I've Made are such a fun craft to make for little boys.  If you don't have a sewing maching, you can try my no-sew version (a tute is offered on my previous personal blog, Spartan Living).

Crap Ive Made Tie Onesie

5. Itty Bitty Baby Dress by Made by Rae- A sewing project suitable even for beginners!  I made a black and white one for my sweet little Elliott.  She wore it once.  Go figure.  I didn't get any pictures of her in it, either.  Lame!  Anyhow, this was the first dress I ever made and Rae's tutorial is practically foolproof. 

Made by Rae Itty Bitty Dress
photo by Rae Hoekstra, used with permission

Black and White Itty bitty Dress
The Itty Bitty Dress I made for Junebug
6. Stardust Shoes - Such a cute little accessory for either gender!  Use coordinating fabric from your tie applique onesies or Itty Bitty Baby dress to make the perfect gift set for a little boy or girl.  They're trickier to make than they look, but the results are pretty fabulous!  (Silly me never took a picture of the ones I made!)

Stardust Shoes

7. Crocheted Hat from Girl in Air.  It's super simple, even for a new crocheter like me!  Below is the hat I made for Junebug using Girl in Air's pattern, and I embellished it with a crocheted butterfly from Little Birdie Secrets.

Elliott's butterfly hat I made

8.  Pacifier Clips from Prudent Baby.  I received some of these at Junebug's baby shower and man, were they handy! 
Prudent Baby Pacifier Clips

{You may be interested to know that before I had a baby I said that I wouldn't use pacifiers.  Then, I had the baby and changed my mind...quickly!}

9. Lullaby CD by Prudent Baby.  You don't have to be crafty to pull this off, but it is such a thoughful and personal gift.  I received a soothing lullaby CD in a gift basket when we returned home from the hospital with Junebug, and lemme tell ya, that simple CD meant a whole lot to me.  Soothing music really takes the edge off of the frustration and exhaustion that comes with a newborn (I mean, babies are precious, but they're not always easy, ya know?)

Prudent Baby Lullaby CD

10.  If you're not crafty, why not make dinner for the baby's family?  A meal that can be frozen would be especially appreciated by dazed and confused, sleep-deprived new mommies and daddies!

Happy crafting!
Tristin Signature

So easy a caveman can do it

Don't you love it when you get the, "what?! You made that??" response to one of your crafts? I do. Stay tuned, and I'll show you how to make a beautiful stencil painted canvas that will awe your guests and leave them speechless. Ok, maybe that's a bit too far. But they'll love it.

Painted stencil canvas

I have been focusing on covering up my bare walls lately. They're bare because we just moved in... seven months ago. What? I've been busy, people! Anyways, we needed something for our entryway area, so I headed to good ole' Hobs Lobs. While browsing the aisles, inspiration struck (as it usually does in that glorious store). I decided to paint a canvas and then go over it with stenciling in a different color.

Stencil, paint, canvas supplies

Here's what you need:
  • A canvas board measuring to whatever size you need
  • Some acrylic paints (two colors... or more if you so choose)
  • A stencil in a neat design (purchase it or make your own using Tristin's freezer paper stencil idea)
  • Paint pens (optional)
  • Paint brush or mini roller (not pictured)
These items are pretty inexpensive, and there are only 4 or 5 of them! Depending on what you decide to do with it. I already had a mini roller, so not including the paint pen, my project was under $5! (Make sure you buy the canvas with a coupon.)

painted canvas - background

The first thing you do is paint the whole canvas your background color. Let it dry - about an hour or so (whatever it says on the bottle), and go do some chores!

painted stencil canvas

Next, you position the stencil however you want and paint your accent color using it. Let it dry before you hang it up. It's as simple as that!

Now, the paint pens are for if you want to go further and personalize your newly painted canvas. My original intentions were to write "The Ramseys Est. 2010" with a funky border design, but I was not happy with my end result, so I didn't post it. (That's why there's not a picture of the end result hanging up.) The problem was the background was too soft and light, and my paint pen was way too dark. But you bet I'm going to try it again! Even though it's painted beautifully, it's still a "blank canvas", so feel free add your own custom design. Or leave it how it is. It's your canvas, and you can do what you want!

This project is so easy (a caveman can do it)! And with only a few supplies needed... what are you waiting for?

Guest Post: Confessions of a Fabric Hoarder

Hello fellow crafty girls!  Sharon and I are excited to share with you a first--a guest blogger!  (If you recall, last week we celebrated our first guest post on someone else's blog--Sew Homegrown to be precise--but this week, we have a guest on our very own blog!)  Our fabric-hoarding friend Laura created some super fabulous wall art very inexpensively and as soon as Sharon and I saw it we knew it needed to be shared!  Take it away, Laura!

 
Den


A big thanks and a big hug to my two crafty friends, Tristin and Sharon, for letting me share one of my ideas with you! Aren't these gals great? I feel more crafty just sitting by them in church! Over the weekend my husband and I hosted a little gathering with our dear friends for dinner and fun around the fire pit. Among the taco shells and s'more-building, the girls noticed my freshly created wall art. That was the first time anybody besides my husband had seen it, so I'm glad it was a hit!

 
I LOVE PRETTY FABRICS. Love, love, love them. I could spend most of my day looking at rows and rows of fabrics in the craft store. Sometimes I do when preparing for my next project, just waiting for a color or theme to jump out at me. I believe my love of fabrics is matched only by Sharon and Tristin's love for scrapbook paper! If you looked in my closet, you would find bins full of neatly folded fabrics that I bought on a whim because I thought they were so pretty, and figured I would get around to creating something later.

My name is Laura, and I am a fabric hoarder.

Fabric_Hoard


The thing is, I can only make so many quilts, throws and table toppers before my patience and my eyesight from quilting has long gone. The solution: wall art! It's a simple and inexpensive way to personalize a corner of your home, while utilizing those gorgeous patterns and prints.

 
Here's what you will need:

Supplies
  • Art canvas (there are a ton of sizes and dimensions, so just choose what works for your space)
  • Pretty fabric (enough to cover the art canvas and wrap around the back)
  • Hot glue gun or staple gun
  • Scissors
  • Tape
Step_1


1. First, lay your fabric print side down and lay your art canvas facing down on top of the fabric. If the pattern is one with lines that need to be straight, or there is a certain portion of the print you want to display, be sure to line that up now before cutting.

 
Step_2


2. Once you have the canvas placed and measured, cut off any excess fabric.

 
Step_3


3. Fold the fabric up and around to the back of the canvas and tape it in place (this step just makes it easier on you when you begin gluing).

 
Step_4


4. Next, take your glue gun (or staple gun- I didn't have one, so I improvised!), remove the tape from one side and make a line down the edge of the canvas, then quickly fold the fabric over the glue to secure. I mention doing this quickly because if you wait over just a few seconds, the glue dries and hardens, and you're left with a lumpy mess that you just have to either scrape off or glue over, and nobody needs that kind of stress in their lives!

 
Step_5


5. If you're good at wrapping gifts, then the rest is a piece of cake. If you're not, no worries, glue can mask a world of imperfections! Just fold the corners like you would a package with gift wrap, and glue it down. Simple, huh? Now go find a nail and a bare wall and display your cool new wall art!

Finished


Let your imagination and creativity roam with this fun project.  The one I just assembled for you is 8"x 8".

 
Den


I had a corner of my den that just needed some love, so I used several 16"x 20" canvas to create this masterpiece. You could easily mix up the sizes, and arrange them however you want. I mentioned that this was an inexpensive project, so lemme break it down for ya...and don't forget to take advantage of those craft store coupons!

 
For one 16"x20" fabric-covered canvas you'll pay:

  $2.40 16"x20" Art canvas                   
+$2.66 1/3 yard pretty fabric                                                                                            
  $5.06

 
Just over $5!! Now that's a deal. So, if you're a self-proclaimed fabric hoarder like me, grab some art canvas and create something unique. Let the fabric's inspiration be your guide!

Hangin' Tough!


Oh, oh, oh, oh, oh. Oh, oh, oh, oh, oh.
Listen up everybody if you wanna take a chance.
Just get on the floor and do the New Kids' dance.
Don't worry 'bout nothing 'cause it won't take long.
We're gonna put you in a trance with a funky song, 'cause you gotta be
Hangin' tough, hangin' tough, hangin' tough.

Seriously, though, this post is not about the New Kids on the Block (or as I call them now, the Old Men on the Block.   Did you see their New Year's Eve performance?  Wow.  Weird to see them dancing around now, huh?)  Man, I used to LOVE NKOTB!  Who is your favorite?  Mine was always Jordan, go figure.  He still is, too.  ; )

My friend Suzanne recently asked me to share my entryway solution, and I thought I'd oblige her... and Sharon provided the perfect segue with the frame wall she shared yesterday!  (Gorgeous, by the way Sharon!  She has done amazing things in her apartment.)


While I have grown to love my home, an area of concern for me has always been my entryway (or lack thereof).  When my guests come over, there is very little area for reception and welcoming, so they quickly make a dash for the living room and typically purses, coats, and keys follow them to that area.  I knew something needed to be done in order to accommodate my guests' personal effects. 

So I put some decorative metal hooks on the wall with frames around 'em.

Here's what it looks like with things on it:

My MIL gave me "Green Bags" embellished with photos of my dog on them a few years ago.  Precious, right?
Yep.  It's just some hooks I bought for a few bucks and frames with the glass and backing removed and discarded.  The project total was $18.  The frames prevent the keys from scratching the walls, so they actually serve a purpose while looking glamorous.  I used an anchor that could support 50 lbs. for the each of the hooks in order to accommodate the heavy bags that most of the women I know seem to carry.

The framed hooks also provide a great decorative place to hang my crafts to display for the blog (if you haven't noticed!)

See, the framed hooks really do come in handy.  And when I'm not taking bloggy pictures, those hooks house a whole host of, umm, junk.
Tristin Signature

Frame wall

Do you like my super creative title for this post?

Empty frame wall 3

Today I'm going to share with you my wall of empty frames. I stole this idea from The Nester who made a similar one on the wall to the side of their stairs. Craftiness meets home decor!

Our living room wall was very bare. Like just-color-a-dang-picture-and-put-it-up-here bare. Since we are renting, we don't want to spend the extra time and money painting and then soon after, repainting. I also didn't want to buy a humongous piece of art and just slap it up there. Don't get me wrong - I love wall art, but I wanted to incorporate something a little more unique and interesting. (Even though frame walls are definitely not a new concept.)

Empty wall before frames

Here is our unbelievably bare wall [before]

Empty frame wall

And here is our awesome frame wall [after]
Ah! Much better.

The concept is simple -
1. Collect interesting frames of all sizes
2. Remove the art and/or glass panel from inside the frames
3. Play around until you find a beautifully well-balanced arrangement that you love
4. Spray paint your frames
5. And finally, hang them up

Some notable tips - 
  • You can also incorporate oval frames to give your wall a different dimension and look. 
  • Be careful when removing glass paneling or artwork from inside the frames! I had to use my husband's tools for some of the demolition (removing staples, etc.) and I even had to carefully smash one of the glass panels in order to remove it. If you do not want to go through this much trouble, then when you are buying the frames, keep in mind that you will have to remove whatever is inside of them. 
  • Find free frames on craigslist or buy them cheap from thrift stores.
  •  If you want the spray paint to adhere better, sand the frames down beforehand. Always spray paint in a well ventilated area, preferably outside.
  • Some people who have also done frame walls say to lay the frames down on a large piece of butcher paper and trace the frames where they are positioned. Then adhere the paper to the wall the frames are to go on, and nail the frames on top of the paper and onto the wall. Carefully remove the paper. I decided to fore go that method. I just had my frames in the arrangement I wanted and then eyeballed their position on the wall. Below is a picture of my frame arrangement before the spray paint.
Empty frames
    If you have a sad, bare wall, then vamp it up with this fun and interesting display of 
    empty frames!


    Linky Love: December showers bring January flowers

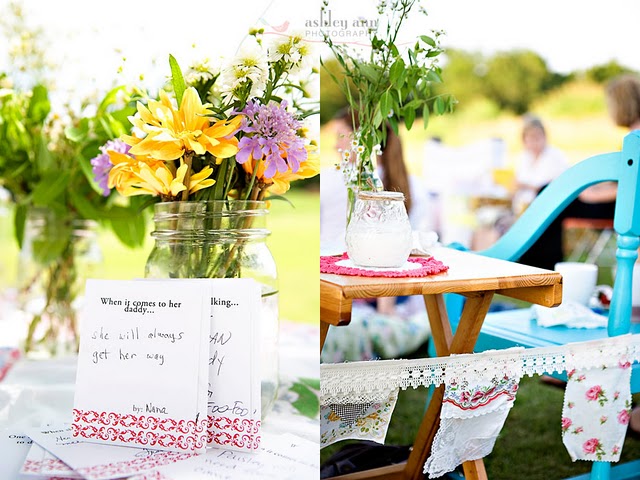
    This week's posts have revolved around the shower we helped host for our dear friend and bride-to-be. Today's linky love will serve as inspiration for bridal showers, baby showers, or birthday parties you may host in the future. It's almost that time again - shower season! I already know I'm hosting one in April. Start now and get some inspiration flowing. And because a picture is worth a thousand words ideas...

    Hope this inspires you in some way!
    Inspiration page by Style Me Pretty


    These towel cakes are just adorable! You could use the cupcake idea as favors for guests or the larger two tiered cake as a decorative centerpiece. This idea is creative and will have your guests impressed with minimal work required! Credit to Etsy seller: luly612.


    Indulge in this exquisite dessert table designed by Wedding Bells Magazine. At our shower, we chose to supply light finger-foods, but if you chose to do an even lighter morning shower, a dessert table would be perfect. 


    You probably know by now that I have an unhealthy obsession for scrapbook paper. I'm just dying for the next opportunity to make these precious cupcake wrappers. Get the full tutorial here.


    Martha Stewart is a great source of inspiration. Especially when it comes to weddings. Here is one of her ideas to incorporate vases of different sizes and colors, and transform them into a glorious matching centerpiece. She uses ribbon to bring uniformity to these three once very different containers. These could be used in a very formal shower setting or the idea could also translate into every day house decor.


    Another Martha Stewart idea is the infamous paper tissue pom-pom. I found these a year ago when I was brainstorming about different DIY wedding decor ideas. I wish I had actually gone through with making these. This simple pom-pom could turn a great party into a grand one! Look at how they make the room seem magical and soft! She even made smaller ones for the napkin holders.Tired of the usual balloons and streamers? Try this easy DIY decor project for your next party. Get the full tutorial here.

      
    I am obsessed with this vintage baby shower designed by Katie Grace Designs. These next three projects (all from her shower) are easy to mimic and will be trendy decor for any kind of shindig. The top photo is a personalized name banner. You can do so many creative things with this idea; including spelling out "Happy Birthday", a bride-to-be's new last name, a child's name... the ideas are endless! Dress the letters up with a great border and some fun scrapbook paper for the backing. 


    The second idea that I loved about this shower was the wooden cut-out letter "P" in the awesome vintage frame. The floating effect that the "P" gives and the tilted, off-centered frame add to the wonder and creativeness of this easy project. So go pick up a wooden cut-out letter from your local craft store (these are fairly inexpensive) and a neat vintage frame from your favorite thrift store (also very inexpensive), and you have easy and inexpensive decoration that you can use almost anywhere. How great is that?

    The cut-out letter "P" makes its second appearance in this simple, beautiful, why-didn't-I-think-of-that project. I have actually done this before for my dorm room in college. (Except it was an "S", duh.) All you need is a cut-out letter, scrapbooking glue, and some fun scrapbook paper (shopping for scrapbook paper is the best) from your local craft store (Jo-Ann, Michaels, Hobby Lobby - which my hubby calls "Hobs Lobs".) It's extremely versatile - use it as decoration at a party, keep the letters plain or paint them and hang by a gorgeous silk ribbon for a bridal shower, or simply use it to spruce up those bare walls (your baby's name above the crib would be just darling).


    SO MANY IDEAS.
    I hope you have already stopped reading because you're running as fast as you can to Hobs Lobs to pick up supplies for a new thought of project. :) Not really, I hope you waited until the end of this short blog post (come on people, it's not a novel or anything!) and are running NOW to get supplies.
    On your mark,
    get set,
    CRAFT!
    Related Posts Plugin for WordPress, Blogger...